
Integrating Planfix with Google Maps opens up a new realm of possibilities for managing tasks, contacts, and projects, making these processes even more convenient.
You can do more than just view tasks on a map. You can make quick decisions to optimize routes, manage logistics, and enhance team productivity.
Maps in Planfix improve the quality of administration and contribute to your company’s successful growth.
Linking tasks to maps is an intriguing option that opens up many potential use cases. Let’s take a look at the google maps integration setup.
Benefits of Using Maps Integration on Planfix
Having maps in Planfix is not just an extension of features; it’s a set of advantages that can significantly improve your business processes.
Visualize tasks
Maps allow you to arrange and distribute tasks visually, making organizing tasks by importance natural and straightforward while helping you prioritize efficiently.
Routes and Logistics
Integration with Google Maps enables you to automatically pinpoint the most efficient routes, making moving between points more efficient and saving time and company resources.
Task Grouping
The feature for grouping tasks on the map makes organizing work and distributing tasks among team members easy. It improves coordination and simplifies work for employees.
Color Coding
Color coding on the map helps highlight different types of tasks and their priorities. This makes data visualization even more informative and helps you make decisions faster.
Integrating maps in Planfix offers users a variety of tools for improving task management, making work in Planfix more productive and organized.
New Type of Field “Location”
In tasks (as well as contacts, projects, directories, etc.), you can now add fields of a new type called “Location.” The purpose of this field is for you to enter an address, and in return, you get a point on the map. It looks something like this:
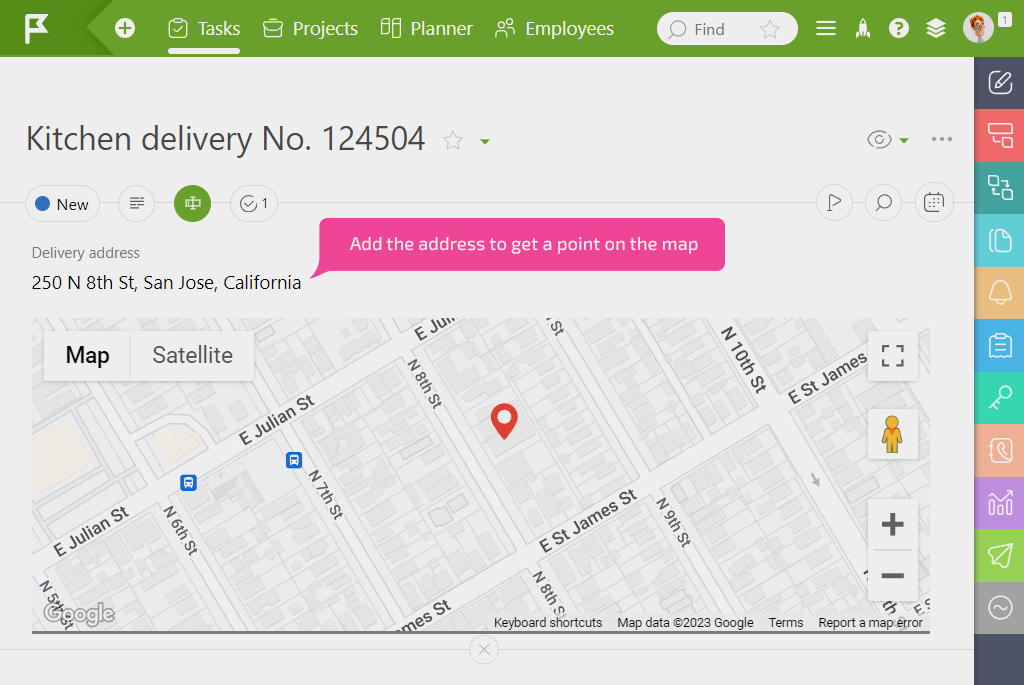
The task description
Note that this is a distinct, new field type. Existing addresses you have previously saved in text format (for example, in the default “Address” field on the contact card) will not automatically be displayed on the map. To visualize an object on the map, you must intentionally add a “Location” type field and enter an address that Google can recognize. Tip: You can do this as a bulk action by selecting the “Set field value from another field/task” option.
Set Your Tasks on Maps
We’ve introduced a new display method for task lists that shares its name with the new field type— “Location”. Now, any task list can be displayed on the map:
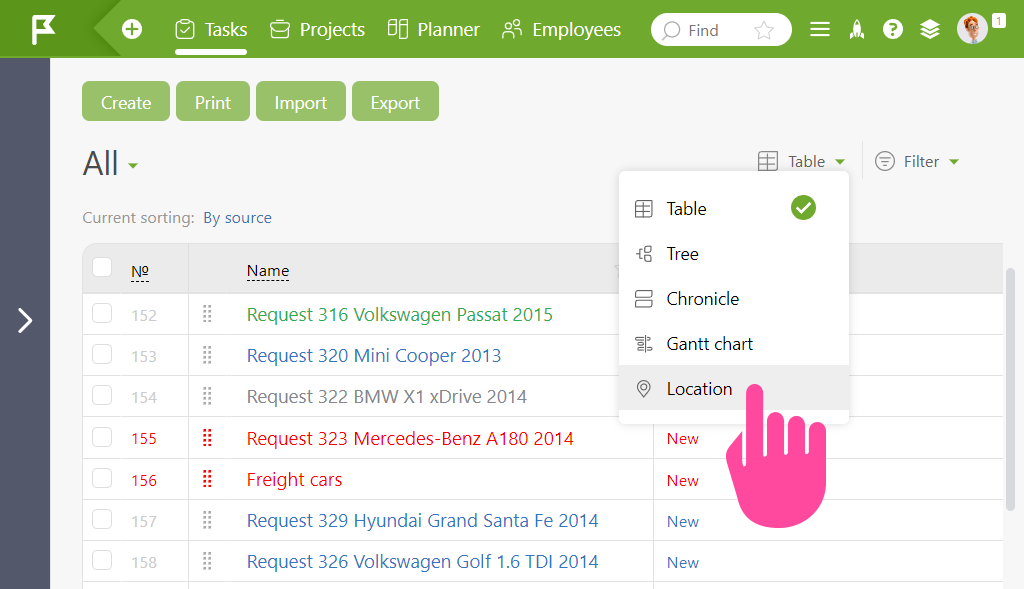
View of Displaying – “Location”
Of course, for tasks to appear on the map, there must be a “Location” type field within them. Tasks in the list will acquire a special marker and will be linked to the address entered in this field:
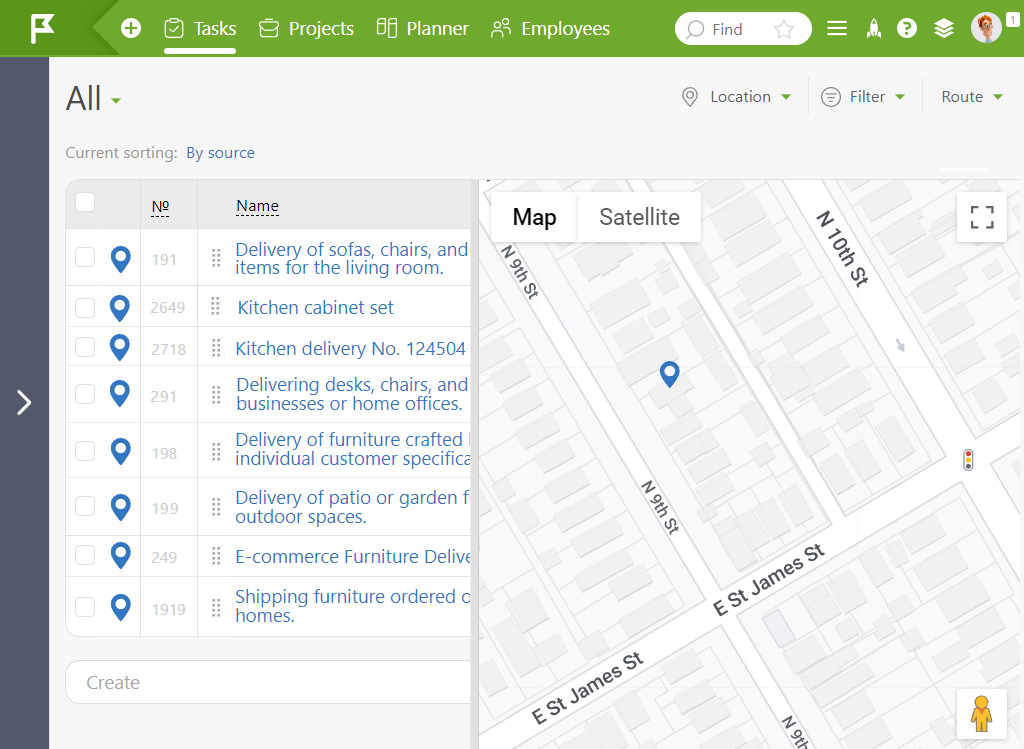
Displaying on the map tasks with a ‘Location’ tag
If you click on the geomarker on the map, the task name appears. In my case, the name is composed of the air conditioner’s model and the installation address. The task list itself is also centered on this task:
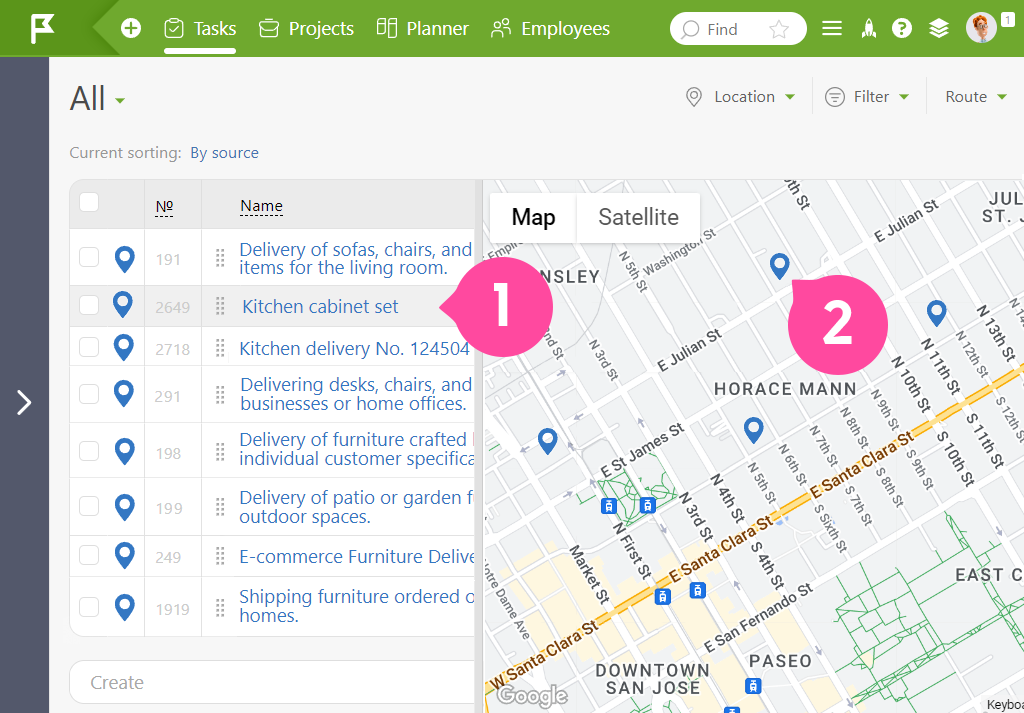
The geo-marker on the map
The color of the task status determines the color of the marker. This way, you can easily track the progress of the air conditioner installations:
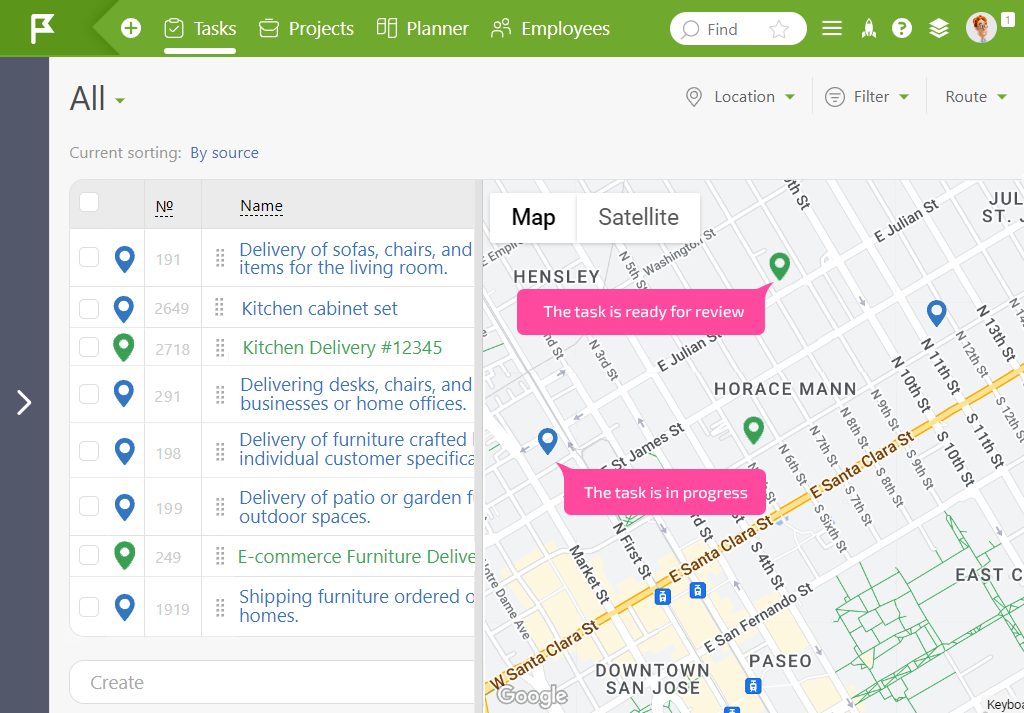
The marker is determined by the color of the task status
Set Routes on Maps
Planfix can do more than just display tasks on a map; it can also create routes between them, indicating the total distance and estimated travel time:
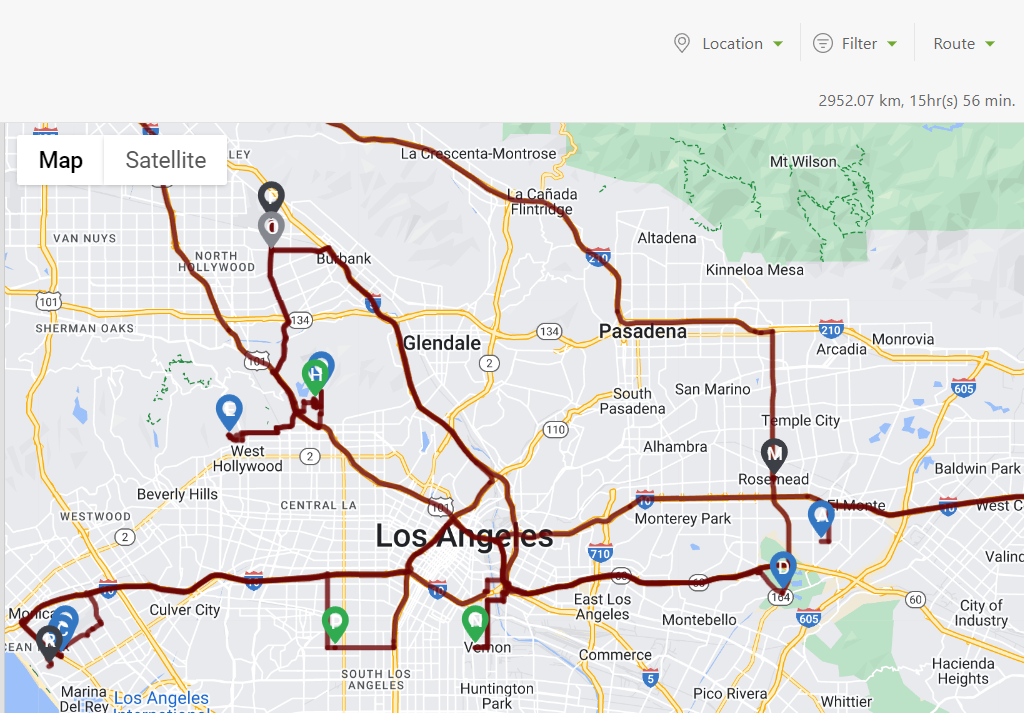
Building a route between tasks on the map
The order of the points on the route is determined by the order of tasks in the list—point A on the route corresponds to the first task in the list. Thus, you can adjust the route by dragging the tasks to the desired location or sorting them by a relevant criterion.
We organize tasks within a task group to make working with routes more convenient. This allows you to customize routes according to your needs. For example, I’ve added a “City” field to the task template for ordering delivery and grouped the orders by city:
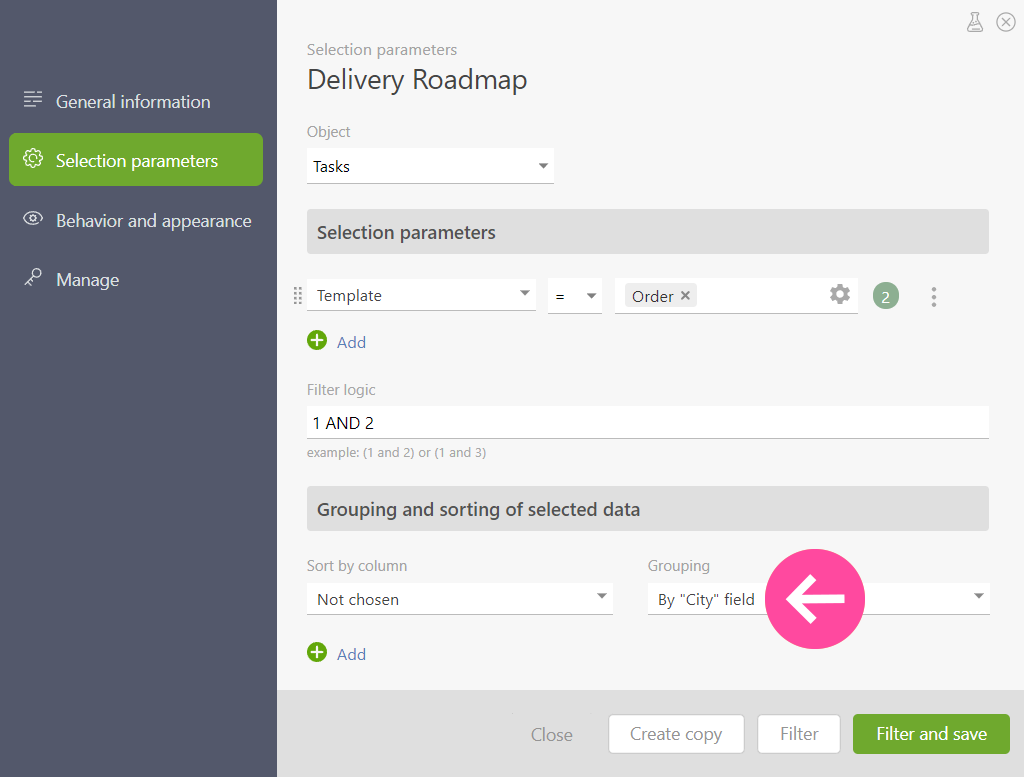
Grouping in task filter selection options
This also helps in assigning delivery orders within a city:
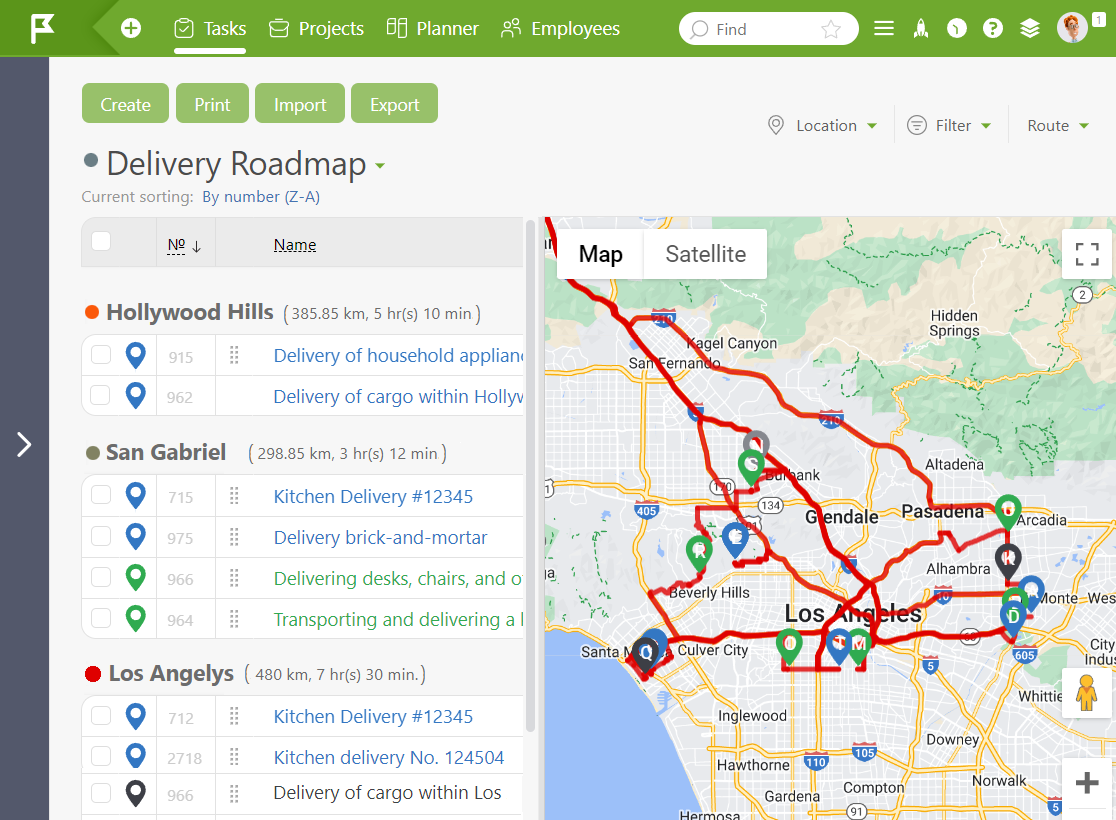
Distribution of orders within the city
However, there are several ways to go about this. For example, you can group the tasks by the assignee to assign a convenient route. I think the general approach is pretty clear by now.
The route for each group is color-coded—notice the circle next to the group name:
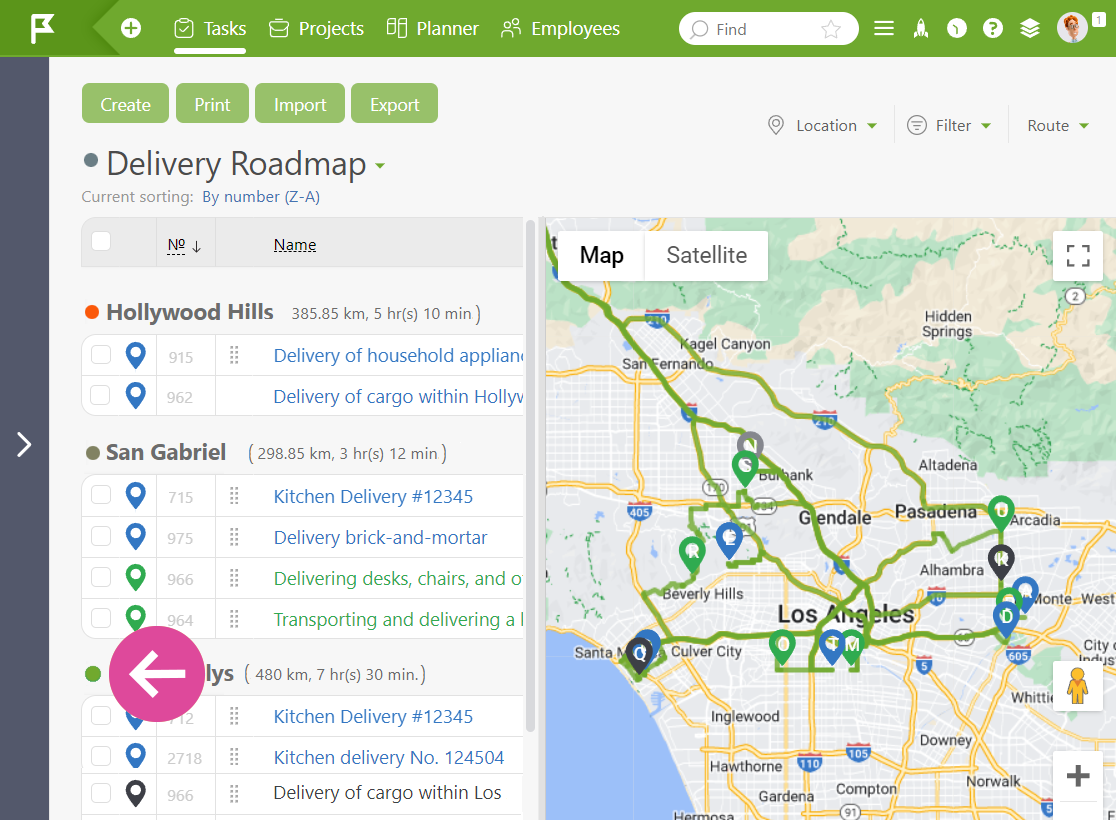
Color coding for each group
If too many routes are displayed on the map, and it becomes confusing, you can disable the unnecessary ones by clicking on this icon. Another click will reactivate the display of that group’s route on the map. When groups generate routes, the distance and travel time for each group are displayed:
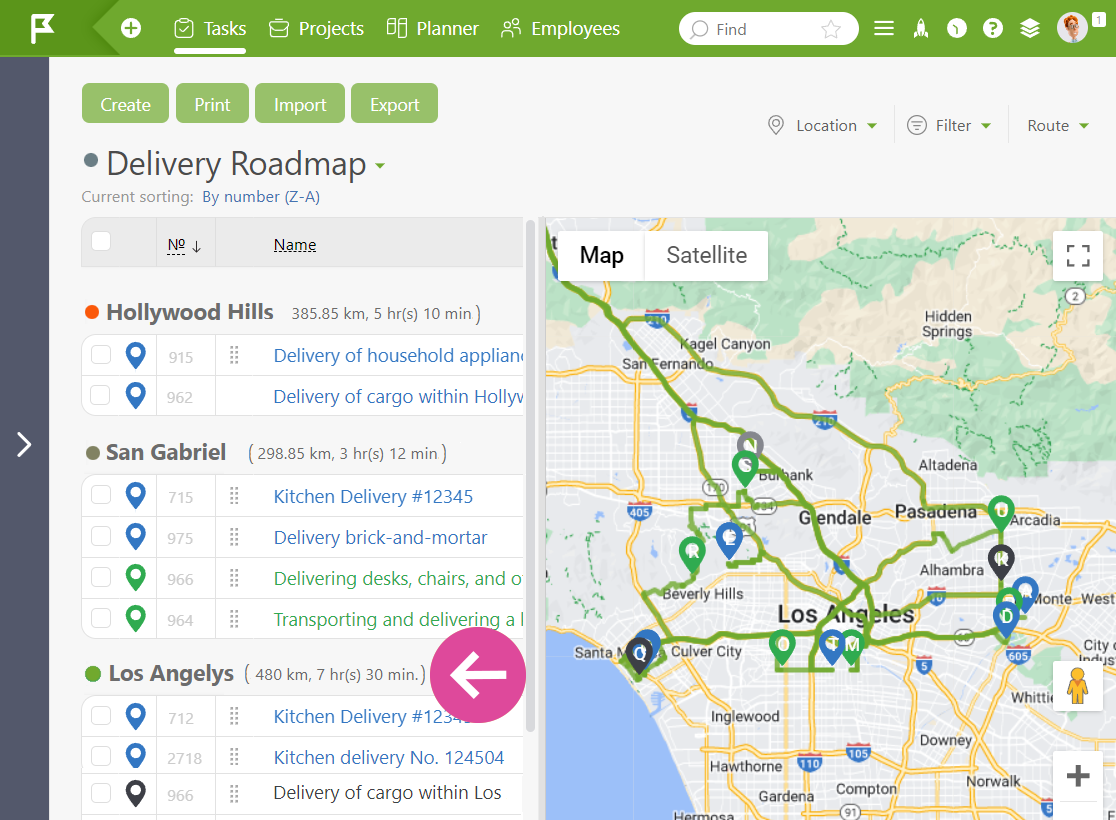
Displaying distance and travel time for each route group
Clicking on any section of the route reveals information specific to that segment of the road:
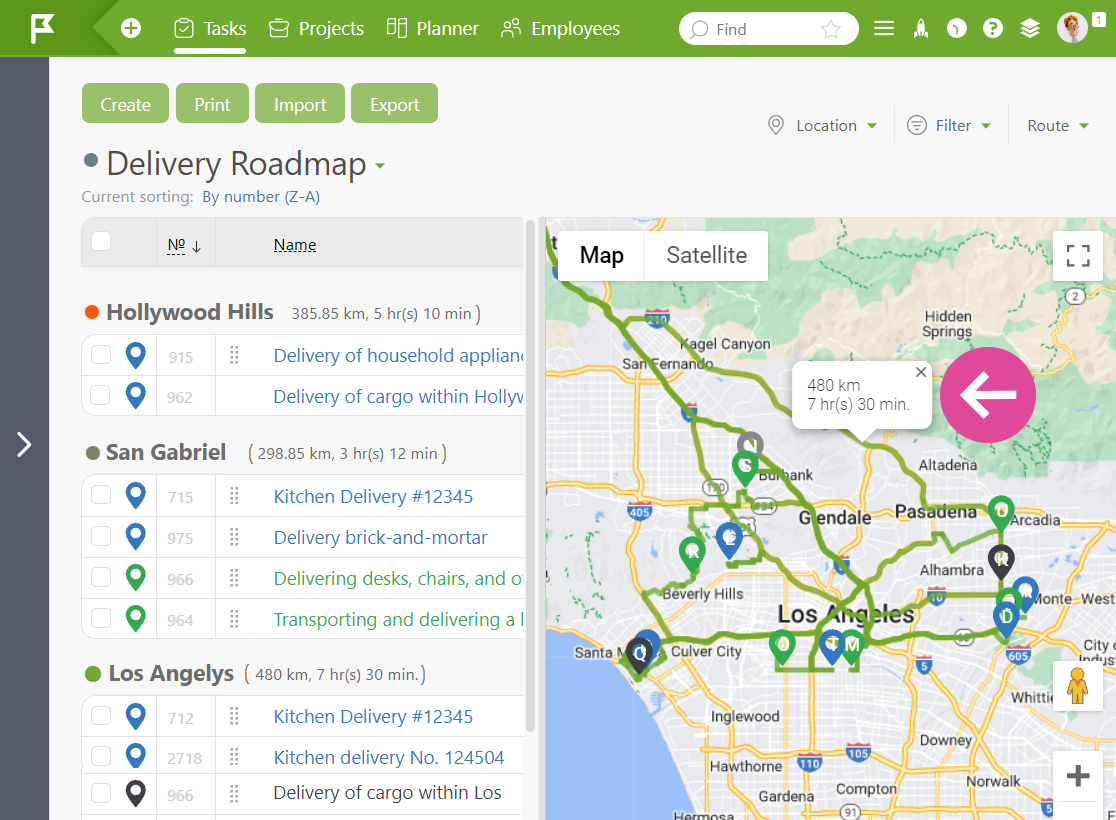
The information regarding the time and distance of the route
Tips for Google Maps Management in Planfix
- To make this work, you’ll need to set up the “Integration with cartographic services,” as described in the help section.
- Currently, we support displaying objects and routes on both Google Maps and OpenStreetMap.
- Regardless of which map service you choose, you’ll need to connect to Google’s geocoding services, also described in the help section. These services convert text addresses into geographic coordinates and help create routes. Following the instructions correctly, you can access all the free features for a year. This extended trial period lets you accurately assess costs—Google provides detailed statistics on API usage, including monthly financial calculations. Importantly, there is no automatic billing after the trial period; you’ll only switch to the paid API version if it benefits your business.
- As for Planfix’s policies, integration with map services is available for all paid, premium, and trial accounts without additional restrictions. For more details on the plans, visit https://planfix.com/prices/.
Payment for External Services
Integrating external mapping services into Planfix opens up new possibilities for improving workflows. Google Maps is a service known for its popularity and extensive features, but it comes at a price.
To fully integrate Google Maps into Planfix and take advantage of its features, a connection to the Google Maps API via a Google payment account is required. These features improve navigation and localization of objects and provide access to detailed maps and various geographic services, increasing work efficiency.
It’s essential to recognize that investing in mapping services can significantly improve work processes and provide your business with new opportunities to grow with Planfix.
FAQ
What is CRM mapping?
CRM mapping, also known as customer relationship mapping, is the process of visually representing and analyzing the relationships between a business and its customers.
It involves mapping out various touchpoints and interactions that occur throughout the customer journey, such as sales interactions, marketing campaigns, customer support interactions, and feedback loops. CRM mapping helps businesses gain insights into their customer relationships, identify areas for improvement, and develop strategies to enhance customer satisfaction and loyalty.
Can Google Maps be integrated with Google Calendar in Planfix?
Planfix doesn’t offer a direct feature to connect Google Maps and Google Calendar. Add some description that will expand
However, you can use Zapier for integration or the Planfix API to synchronize data between these services.
Can the “Location” field type be used in Directories?
Yes, with the “Location” field type in Planfix directories, you can add the addresses of stores, warehouses, or other locations and use this information to create optimal routes.
For example, if your company has a network of stores or warehouses, you can add their addresses to the “Locations” directory in Planfix. With map integration, you can then visualize these points on a map and easily optimize routes for product delivery or customer service.

