
This guide outlines the steps to develop a content plan and automate workflows in Planfix. At our company, Planfix integrates all of our business processes, including customer support requests, ideas, and the transformation of ideas into tasks, which then undergo a defined development cycle before implementation. Upon completion of each task, we evaluate its potential as newsworthy content that can be effectively communicated to a wide audience.
To achieve this goal, we’ll develop a business process for regular block publishing. We’ll also set up a process for selecting news items for various channels, including our company’s internal blog and social media content. Our company regularly posts important news and case studies on the blog, while shorter updates are shared on social media. As the product evolves and grows, there is an increasing need to gather, categorize, and distribute information and news through various channels.
Here are the steps to create a content plan and set up automatic scenarios in Planfix:
Step 1: Add the “Publication” Field to the Task Template
Use the “List” field type described in the Help Center. You can create a template specifically for a team (e.g., Marketing) or add a new field to the default template. Learn more about working with templates in the Help Center. In our case, we created the following fields for our business processes.
Step 2: Create a Planner
We named ours “Working with the news.” You can choose a convenient and easy name that your employees will understand.
Our company has several options for a news publication, including:
Option 1: Post News
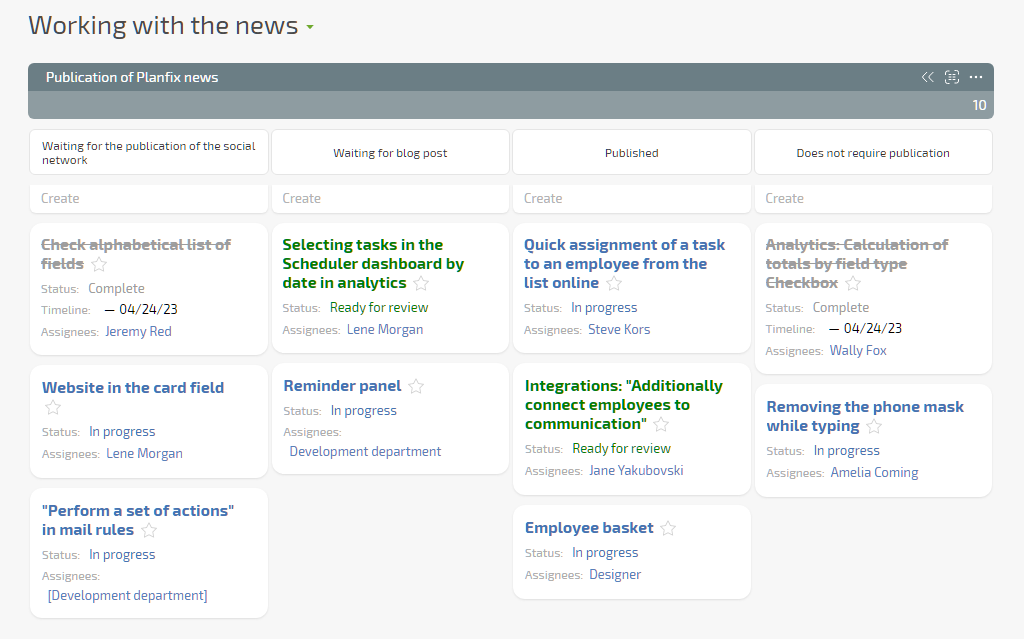
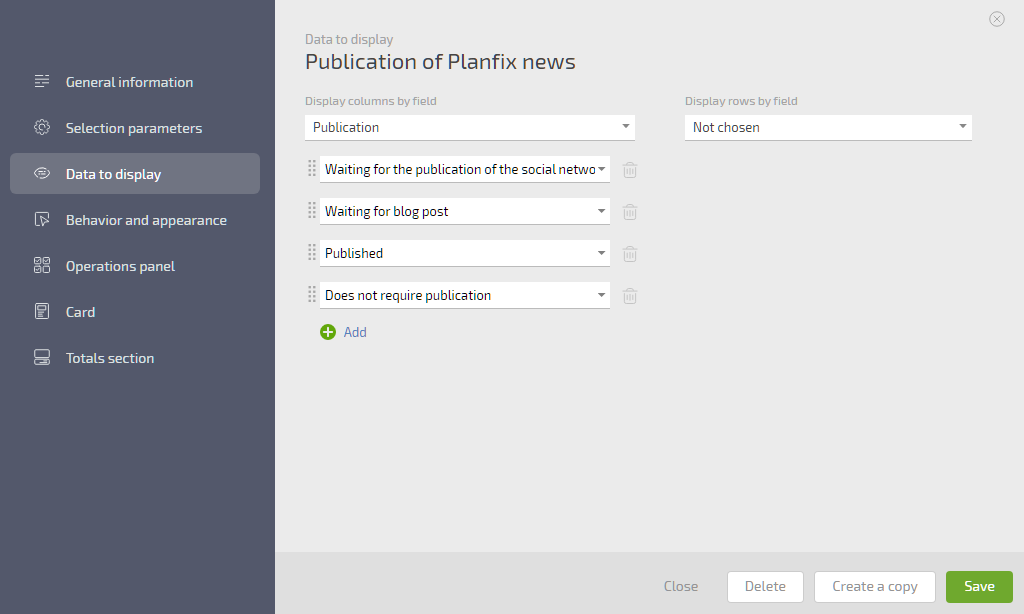
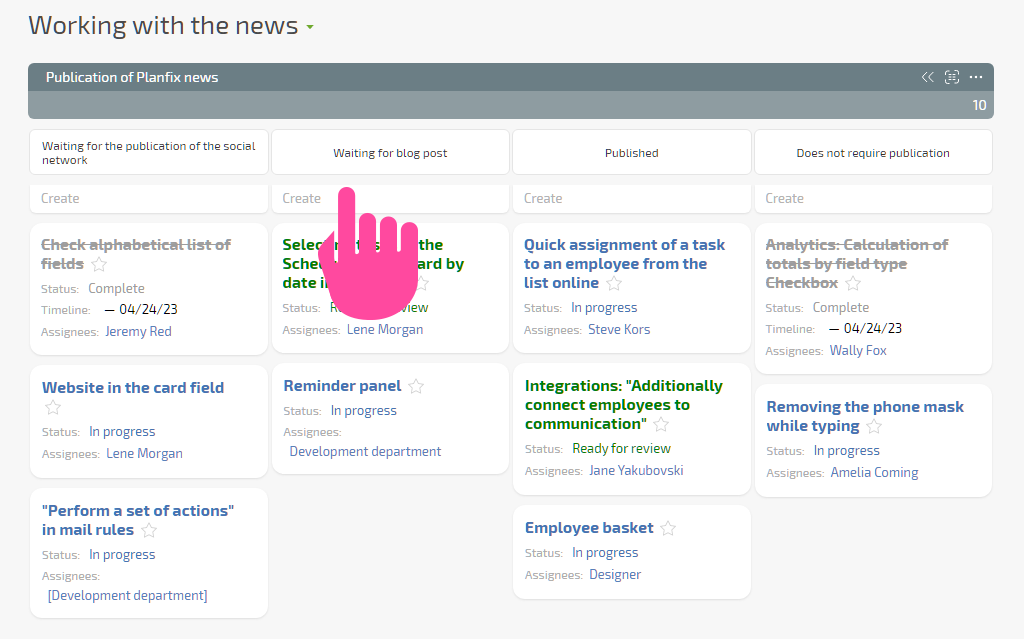
The key feature of this Planner is the “Post Planfix News” list. We have set it up with a “table” type list. It displays four columns, one for each of the values of the “Publish” list we need. The table is structured as follows:
This table is similar to a classic Kanban, where the first two columns contain the queue of news for publishing to social networks and the blog. The remaining two columns are for service purposes. It’s easy to work with this Planner by dragging news tasks from one column to another.
Option 2: Candidates for Publication
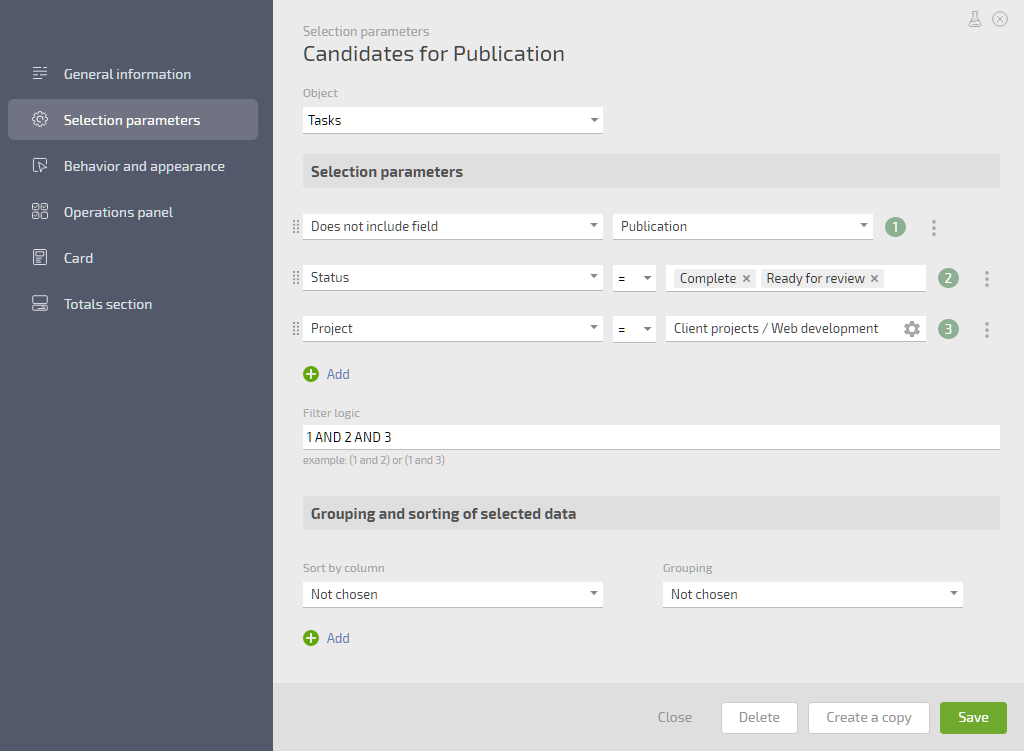
In addition to the first option, we have another list, a backlog called “Candidates for Publication.”
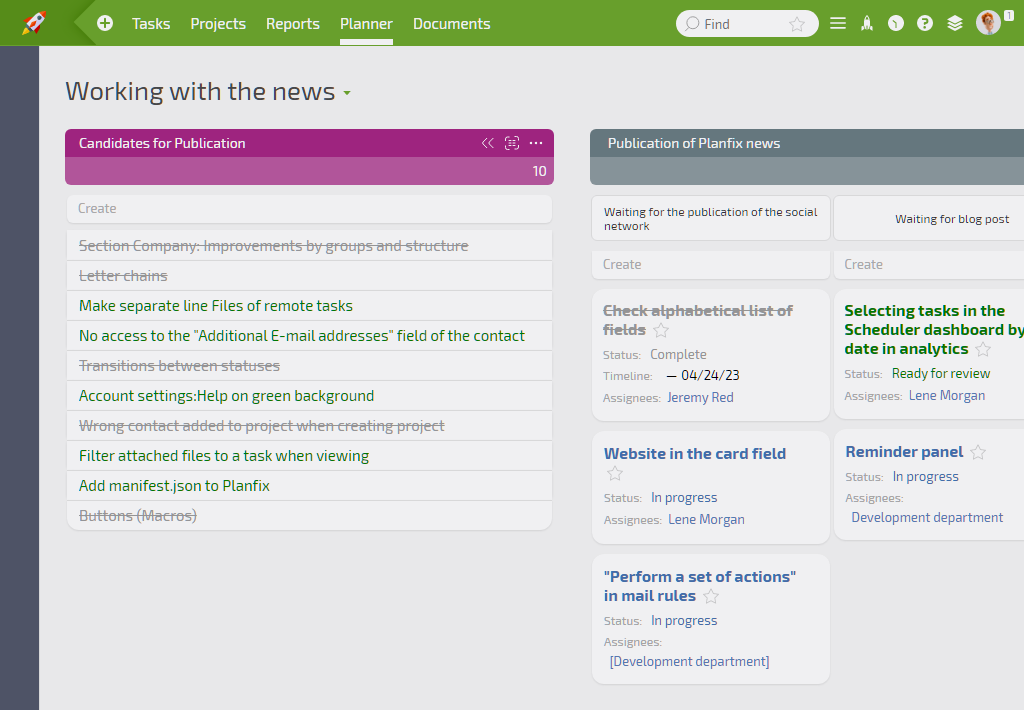
It contains tasks that have recently been completed or are in progress but for which the value of the “Publication” field hasn’t yet been selected.
With this list, we can capture tasks that might interest users but weren’t considered during the completion of the work. In this case, we can drag the tasks to the desired list of publications (blogs or social networks).
Option 3: Ideas
If we have an idea about something, even if there is no associated task, we can add the idea directly to the task field in the desired column. This idea will become a task and immediately appear in the right column.
News Publishing Workflow:
How Does it Work?
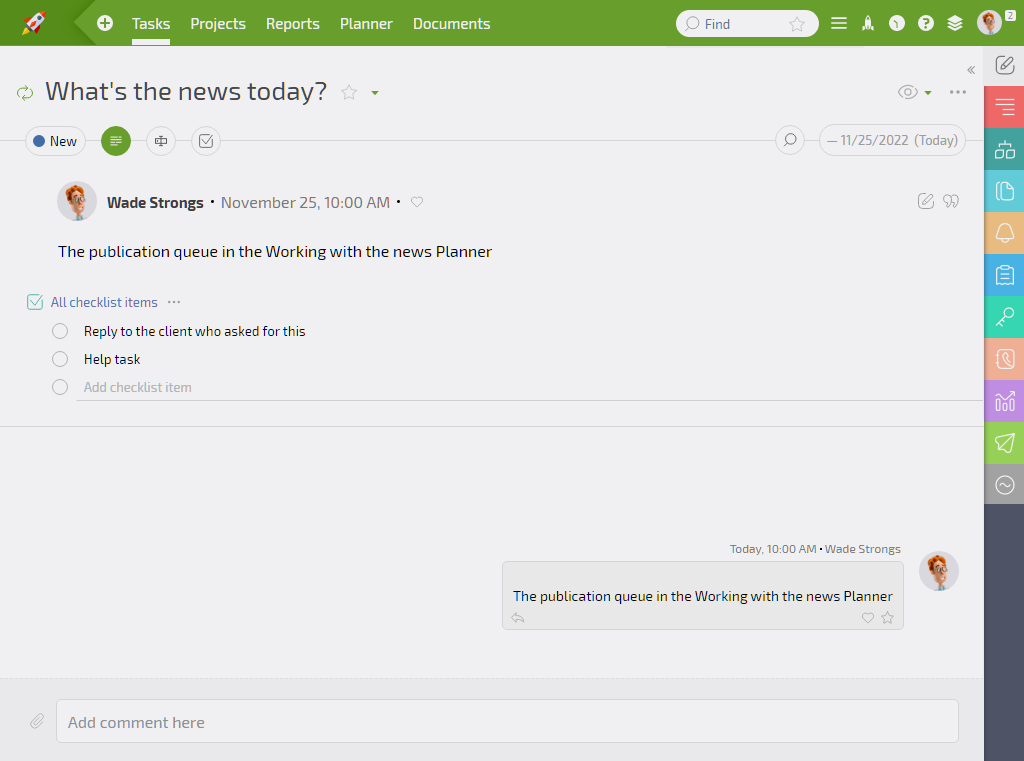
Every day at 10 a.m., the content manager receives a regular task reminder in Chronicle to take care of the news.
Learn more about Chronicle and how to set up recurring tasks in the Help Center.
The task includes:
- A link in the News Planner that takes the content manager to the “Work with news” task planner.
- Checklist items represent additional actions in the business process.
Knowing who needs to be informed once the news is ready is essential. Reach out personally to the client to let them know about adding a new feature to Planfix or sharing the latest newsletter.
Upon receipt of this task, the content manager goes to Planner, selects the news items to publish, and writes and publishes the news items to the selected channel.
After completion, the content manager receives assignments to notify the client and returns to this task.
Our Process is Set Up as Follows:
- Once the news has been written and published, the content manager proceeds to the following steps. Firstly, they must notify the customer.
- They also monitor customer requests, and if someone is waiting for a new feature or enhancement to be released, they forward that information to the customer service team, who then communicates with the customer.
- The next step is to update the Help Center with all relevant information. Finally, after completing these tasks, the content manager marks the task as completed, and the process repeats.
This is how we create and implement content plans in Planfix. It is important to note that this is only one of the many methods for working with content plans in Planfix.