
We’ve completely revamped the project task creation form, and after a significant effort, we’re excited to present our results to you. Please join us as we explore the features of this new form.
The New form in Planfix
Without further delay, let’s take a look at the new form:
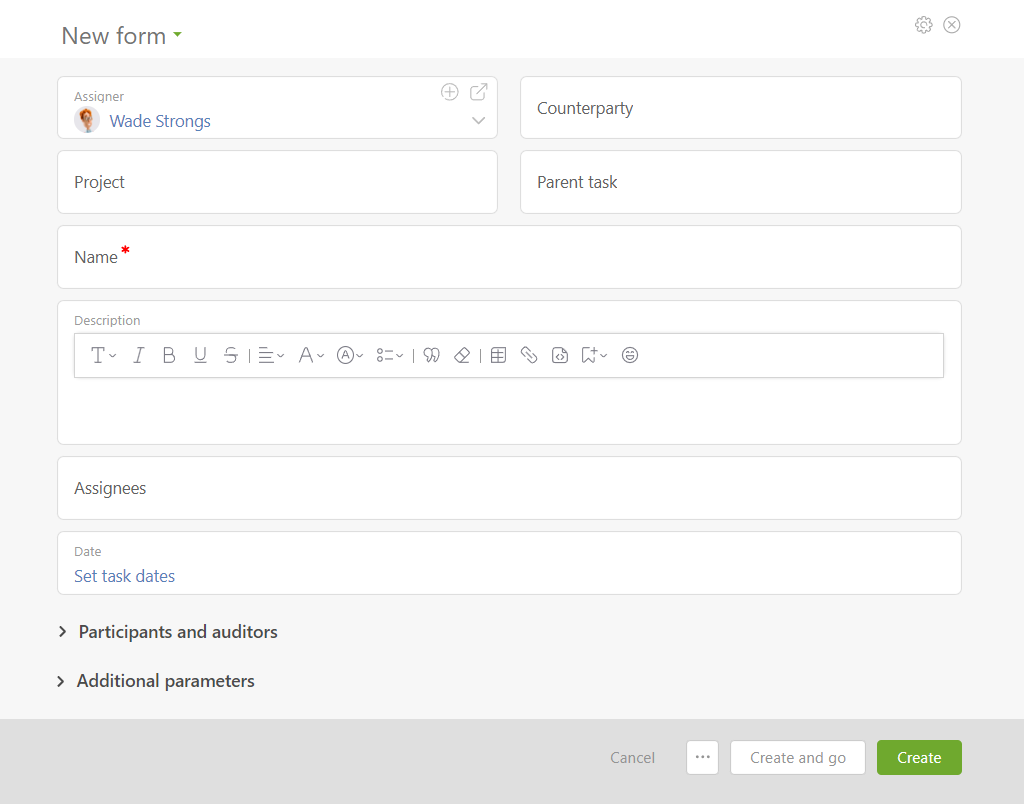
The “Object” field immediately stands out. This represents a new entity in Planfix, and I’ll delve deeper into its significance in the subsequent article. To prevent this from becoming an overly lengthy explanation, I’ll keep it concise for now. Overall, the form is intuitive, but there are a few exceptions which I’ll detail further below.
To transition to the new form, click on the “New Task Template” button in the “Tasks” section under “Templates” and switch to the new view
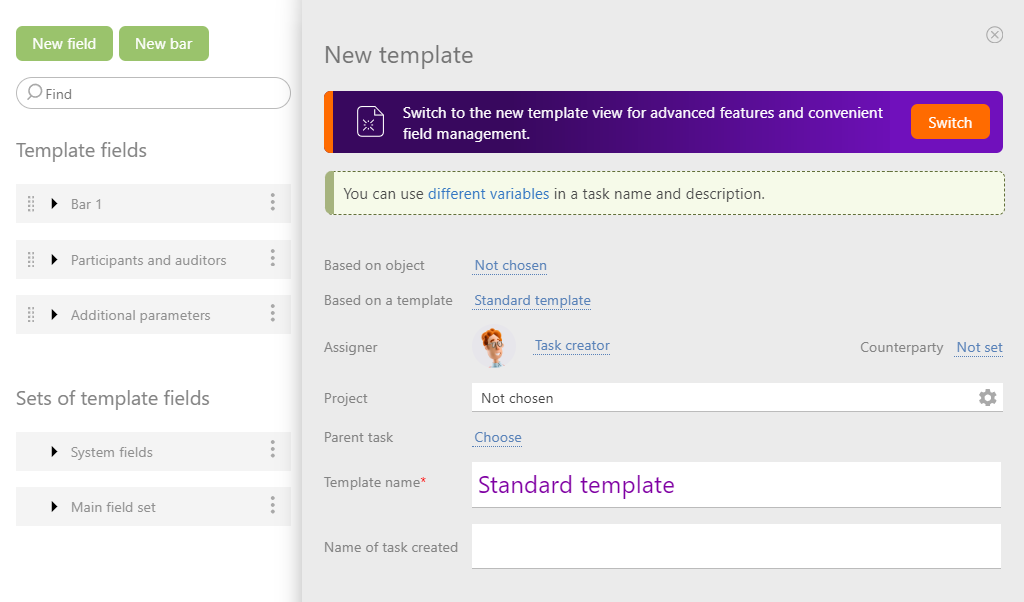
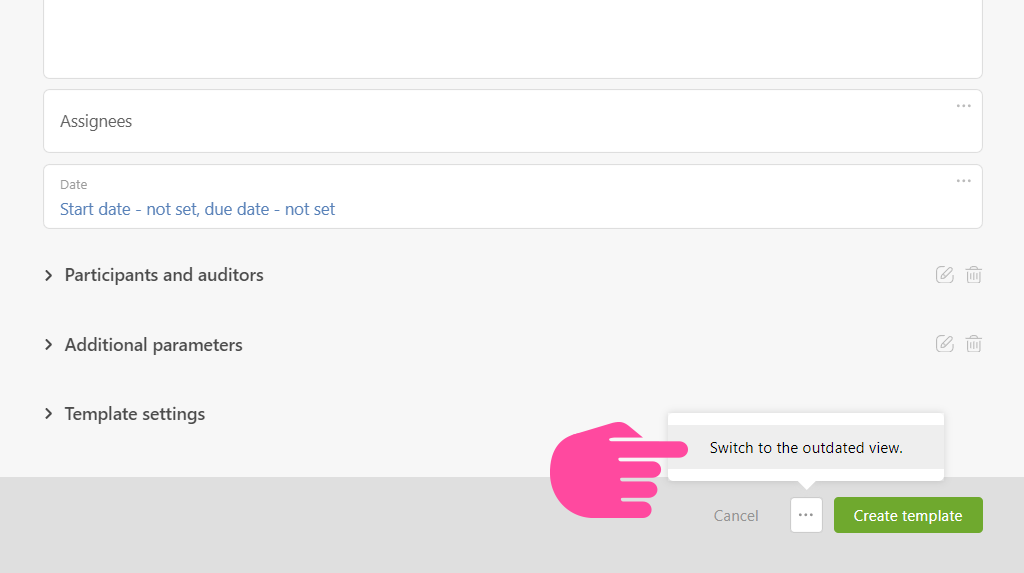
You have the option to revert to the old form using a specific button, but we think you’ll prefer the new one.
Configuring the Task Creation form
The layout of the new form consists of fields, rows, and panels, creating a “grid” structure in which the form fields are organized. The images below provide a clearer picture.
Adding Fields and Panels
To add a field to the form, begin by adding a new row. This row will display four cells—spaces are reserved for fields.
You can add a new row as follows.
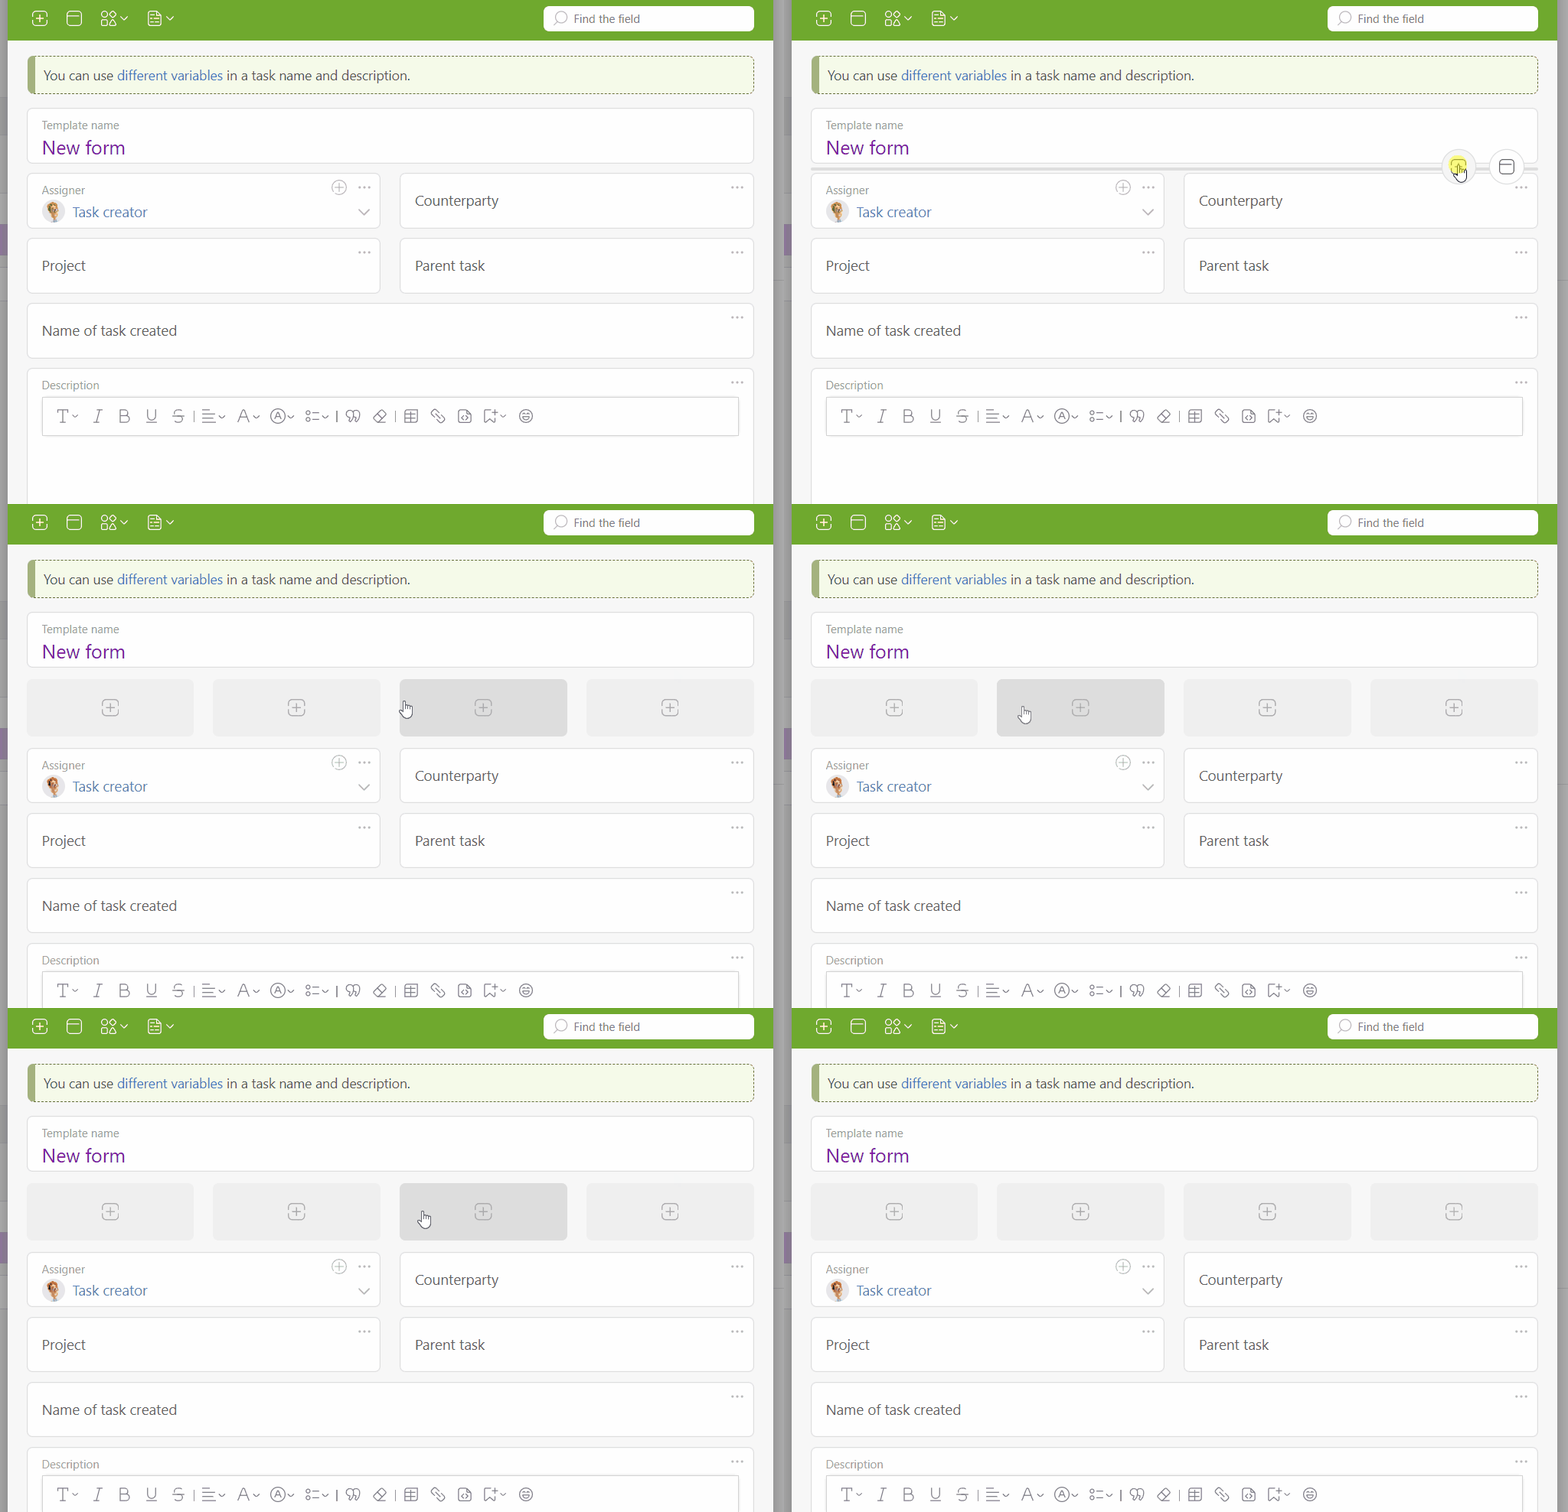
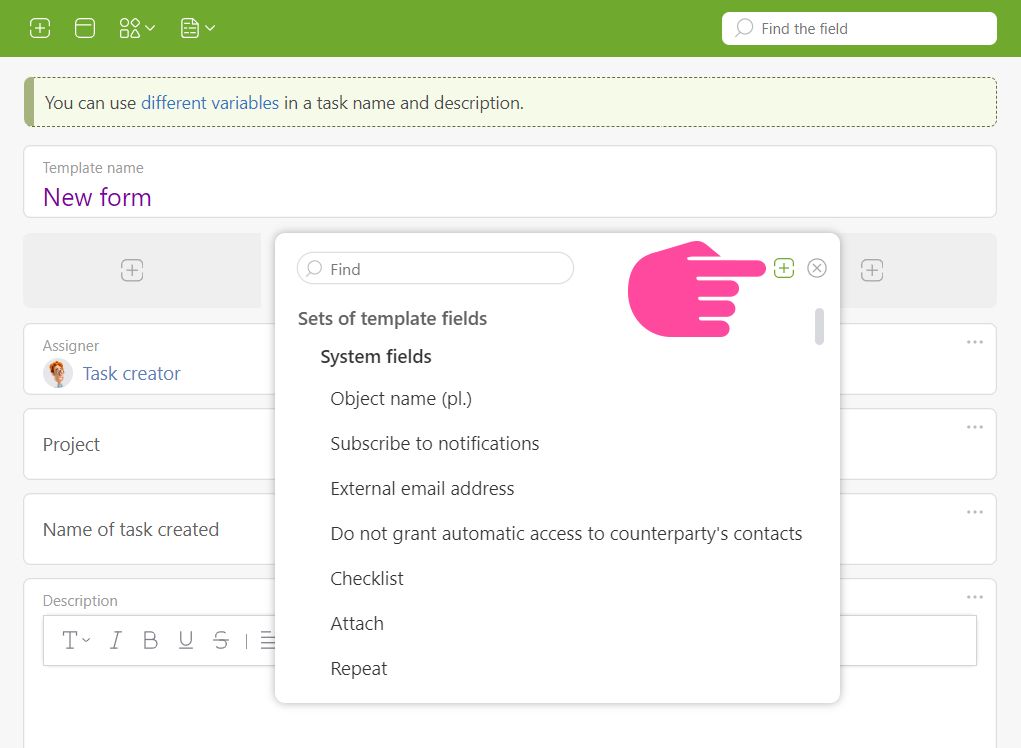
Next, you can populate one of the cells with either a system or custom field. If the desired field isn’t available, you can add it using the “Plus” icon.
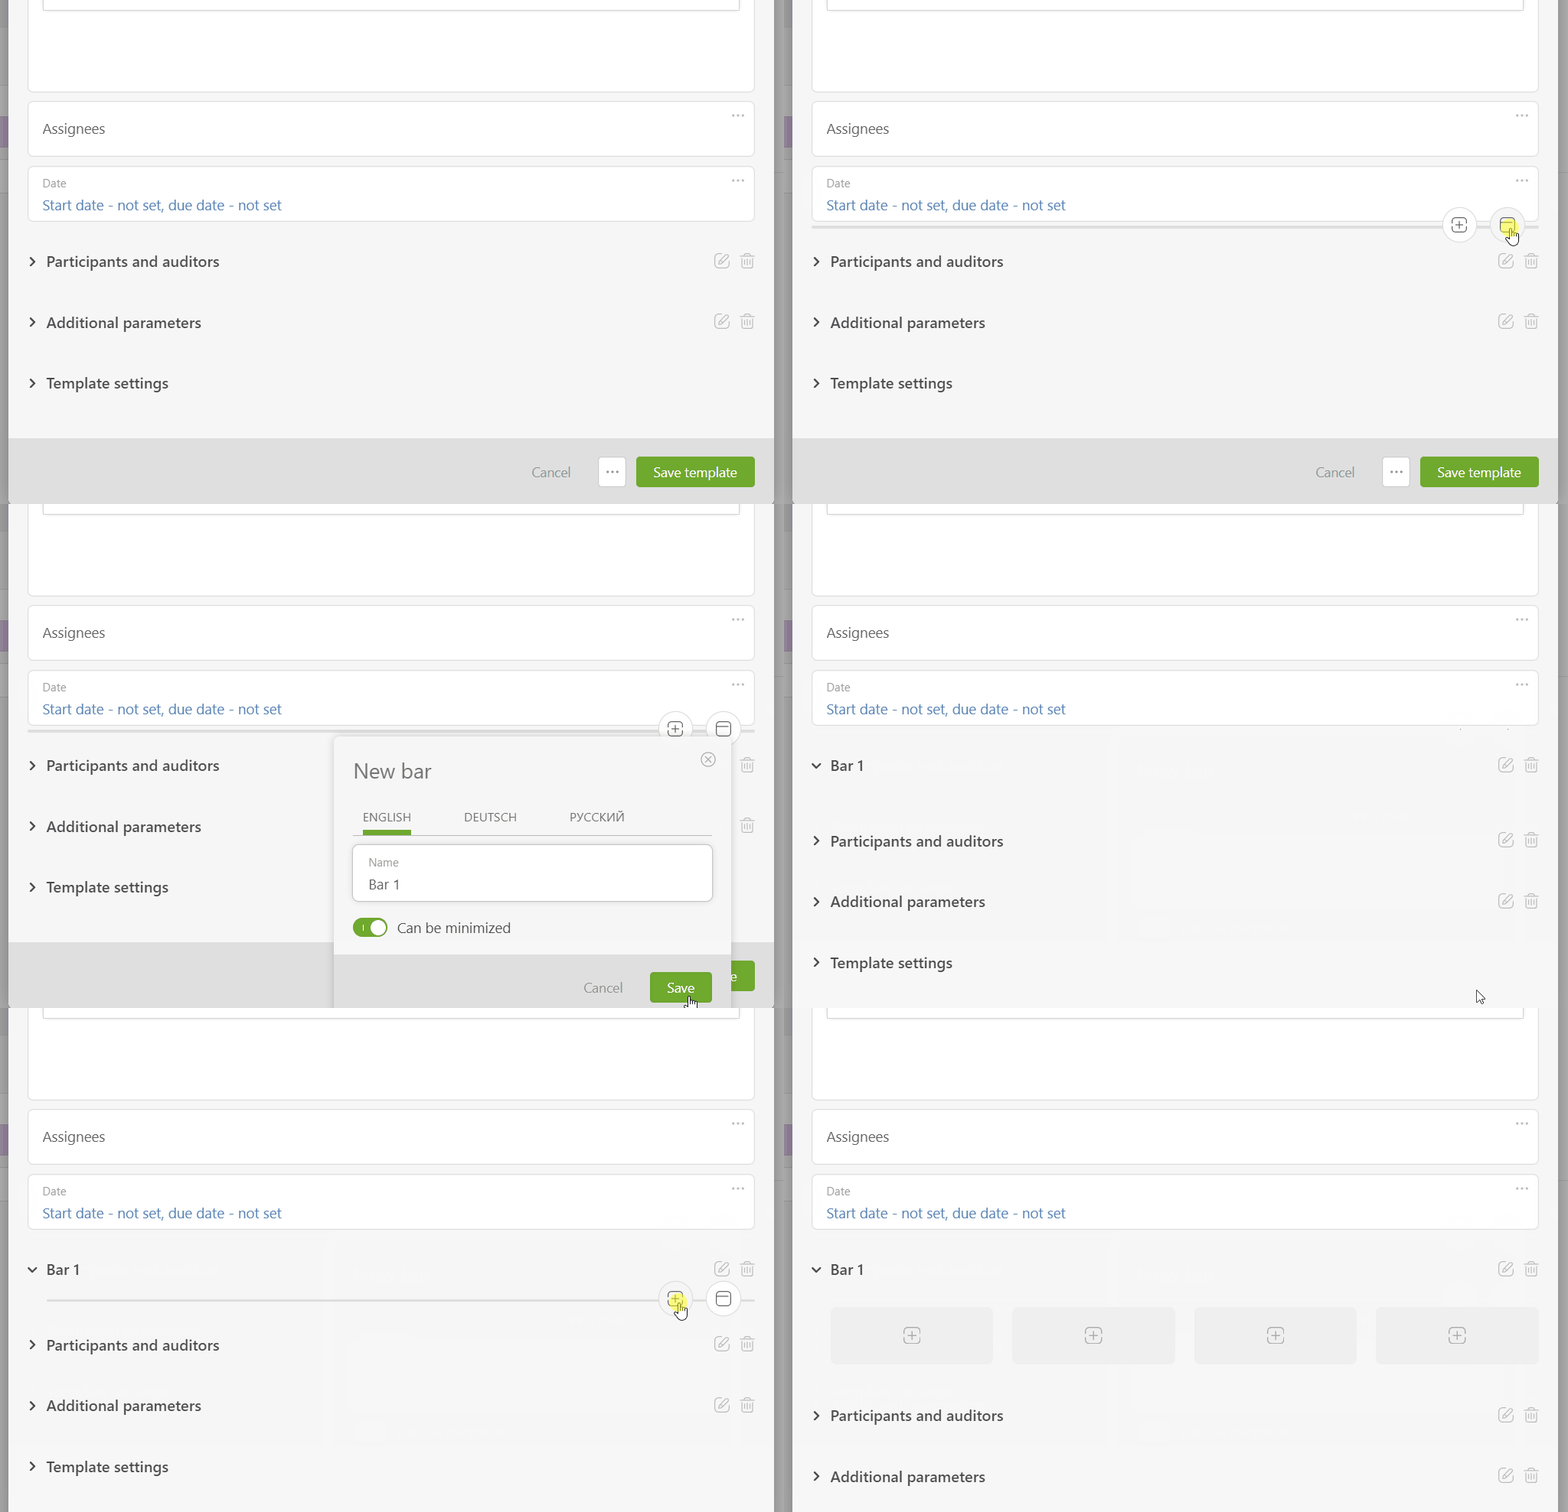
This is how you can add a panel to the form.
Dragging and Resizing Fields
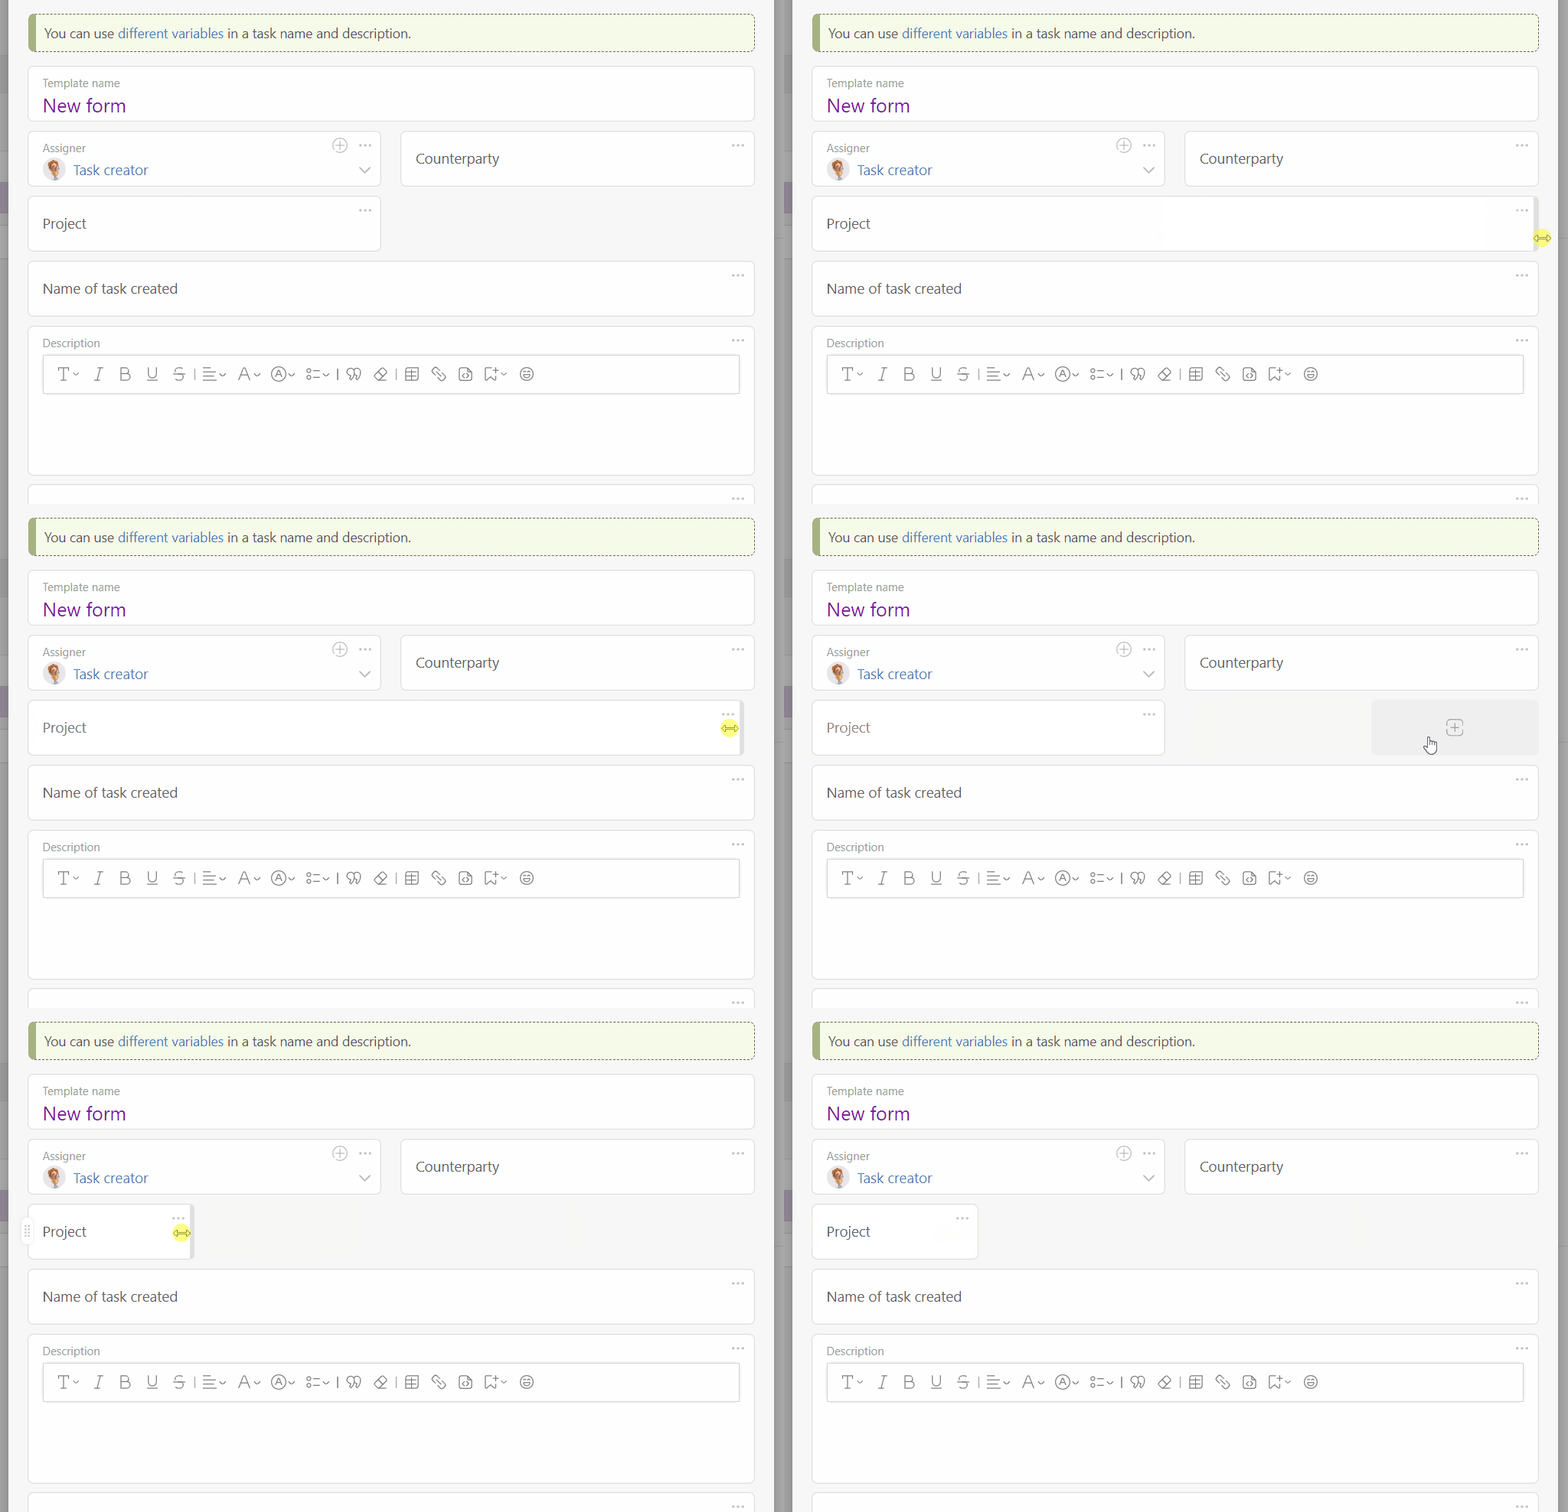
Using the “grid” mentioned above, you can easily resize fields and reposition them in the form.
Fields can span across all four cells or simply occupy a single cell.
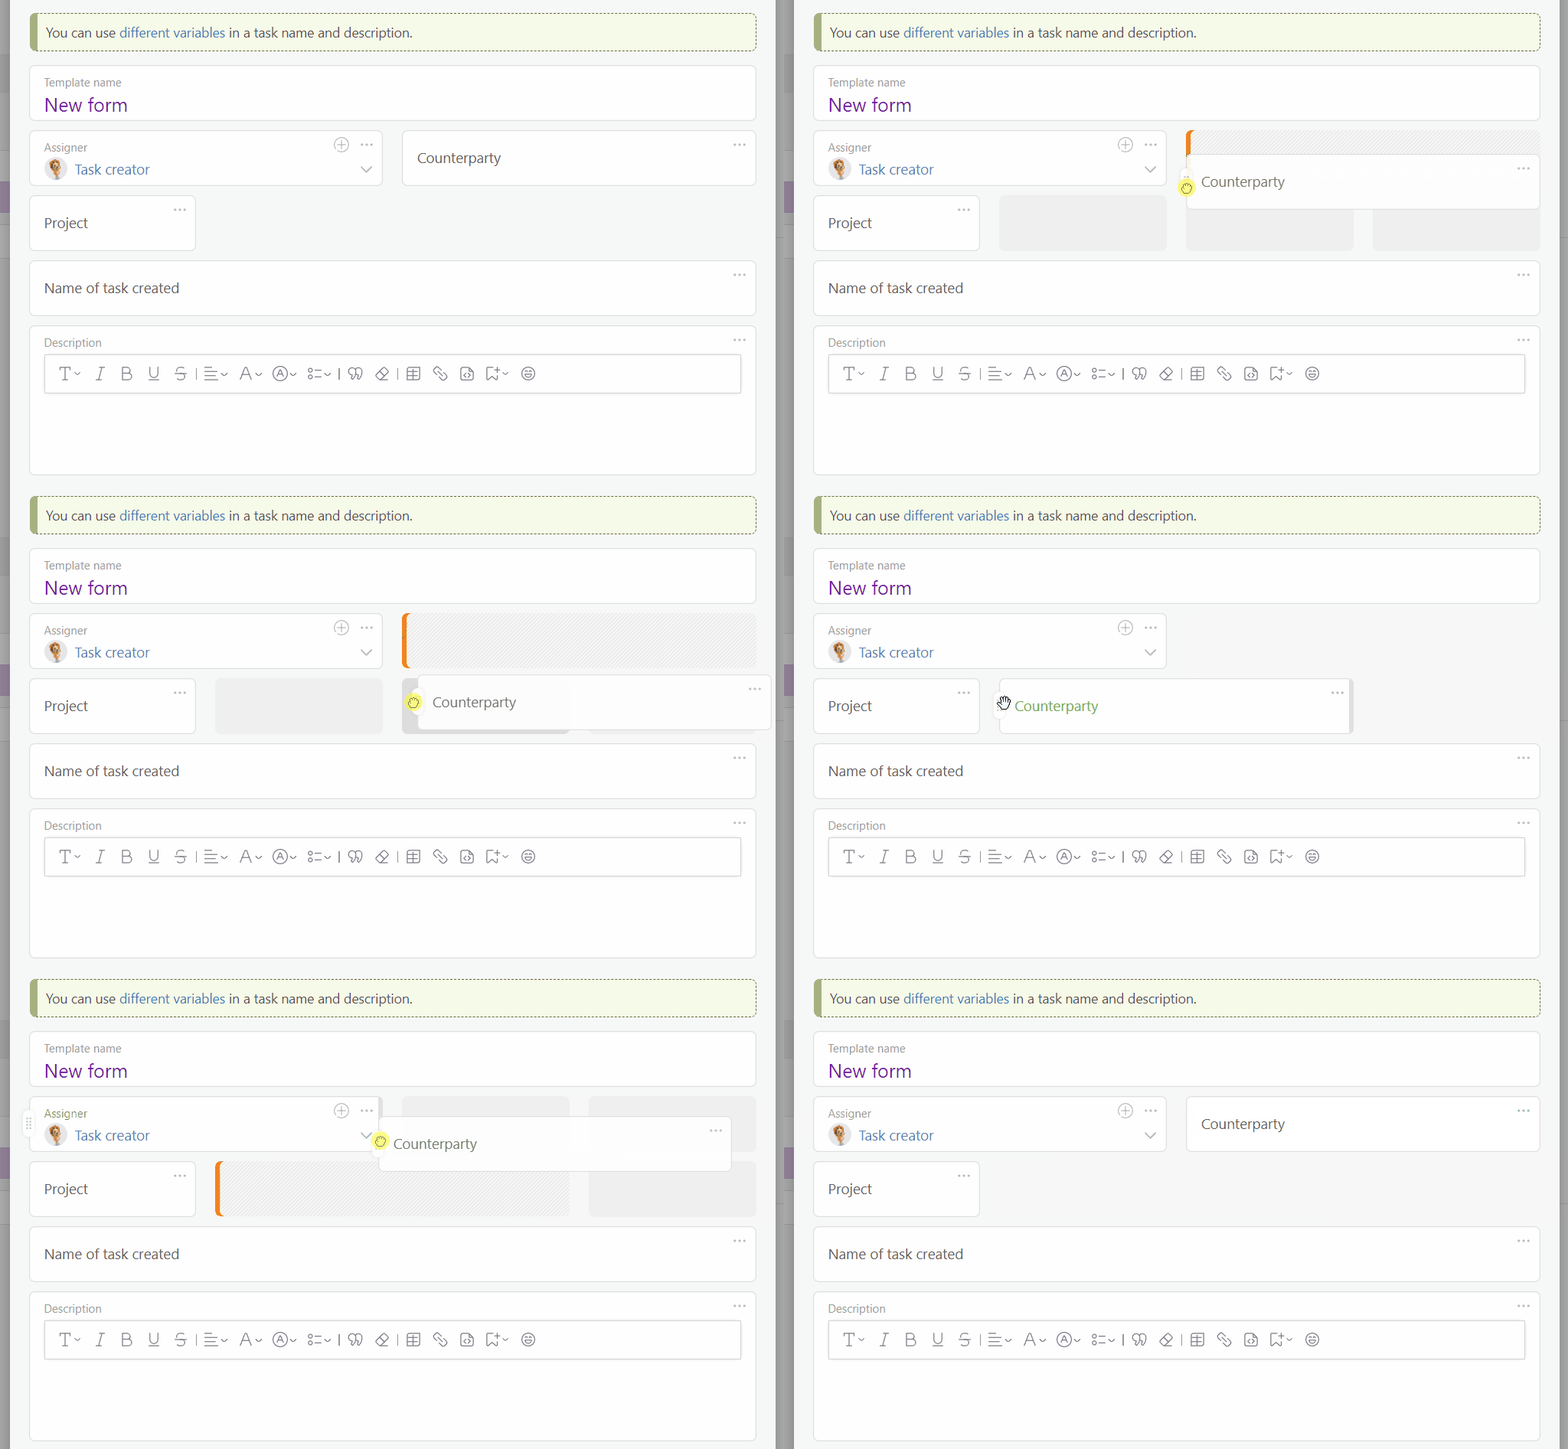
Additionally, fields can be dragged from one cell to another. Simply hover your mouse over the field and “grab” the drag icon.
Customizing the Field
The field settings are accessible through the three dots located in the upper right corner.
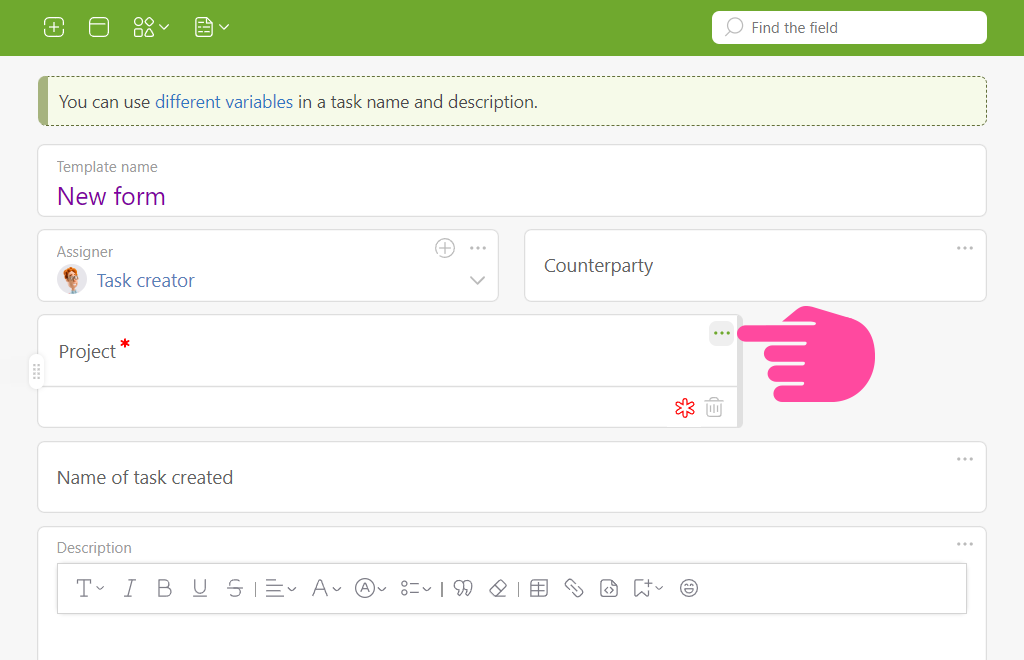
Depending on the field type, various additional settings will be available:
- Trashcan — to delete the field.
- Pencil — to open the field settings.
- Star (active/inactive) — to specify whether a field is mandatory.
- T+ (active/inactive) — to increase the text size in the field.
- Fx — to add a variable to the field. This becomes active after you activate the text edit mode by clicking on the field.
Attachments to the Task
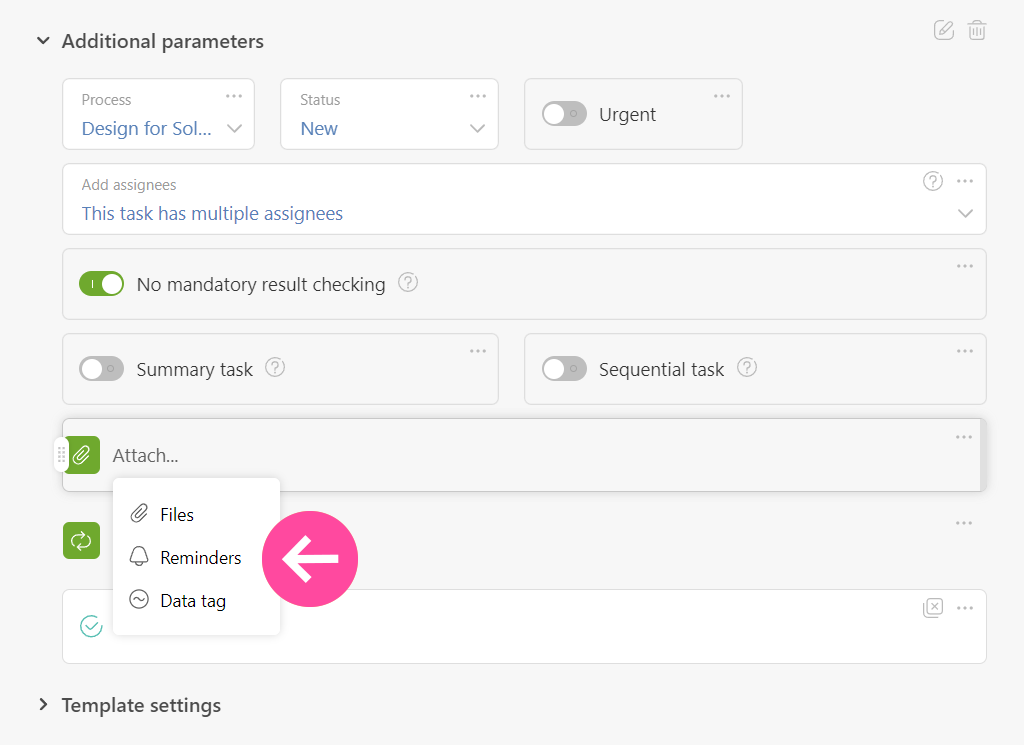
To add more objects to the task template – e.g., files, checklists, data tags, and reminders – or to set the task as recurring, select the appropriate icon.
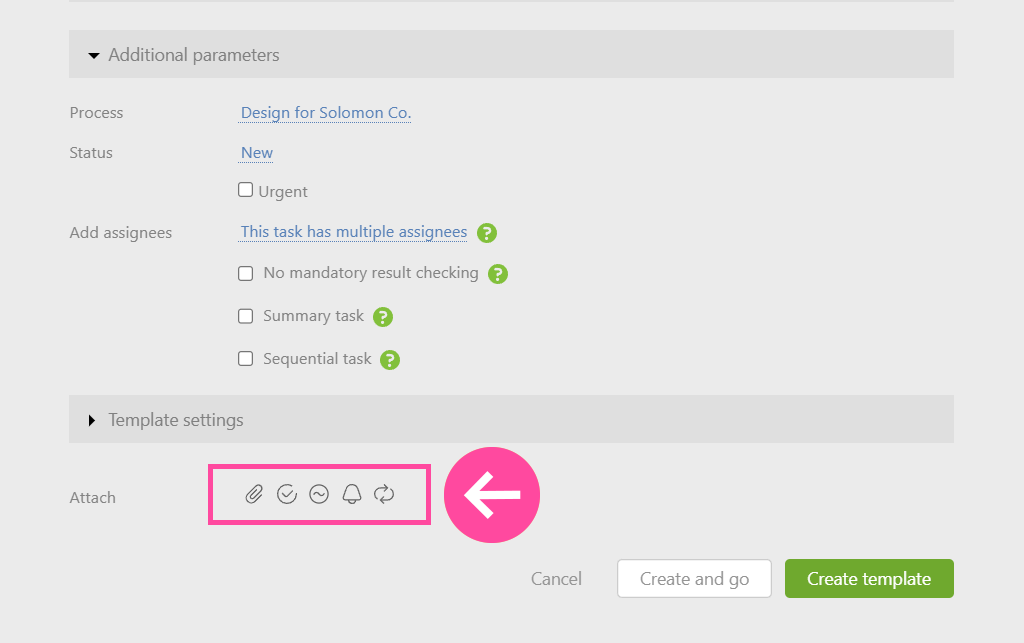
We’ve consolidated these options into a compact block, enabling you to position it as desired within the task template and adjust settings to your preference.
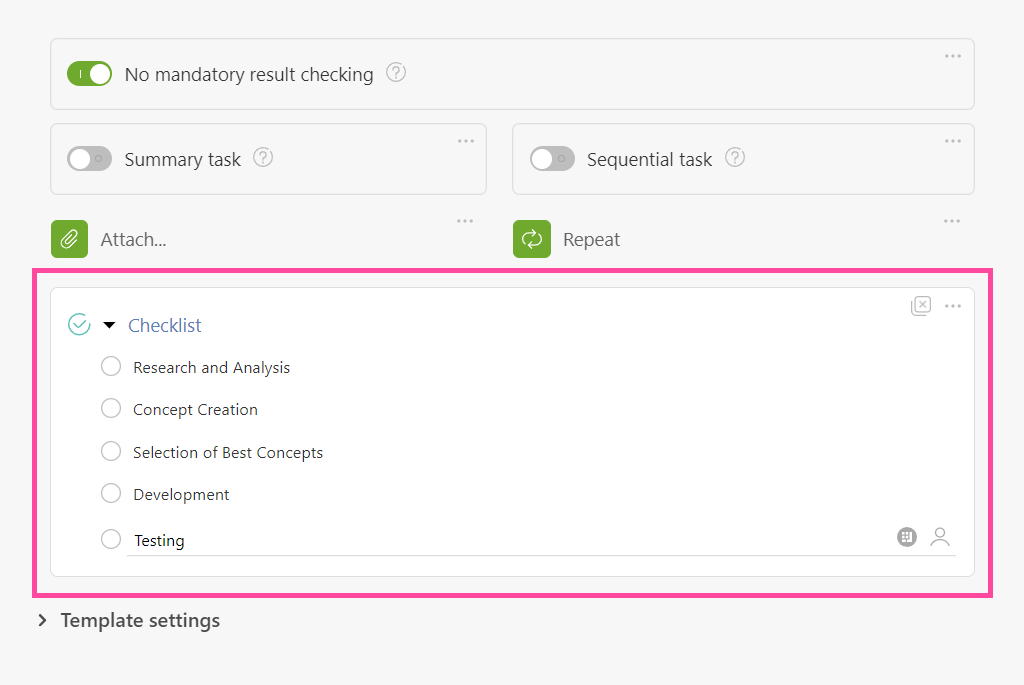
We’ve also transitioned the checklist into its own distinct block for convenience.
Reasons for Creating a New Task Form in Planfix
Such a significant change has several purposes:
First, we changed the arrangement of the fields to a grid and simplified their movement across the task management form. Yes, the form looks a bit bigger, but that was intentional. Now, you can position up to 4 fields in a row, which we think you’ll agree is much more convenient.
Second, adding a new field to the template has become much easier. This should simplify project management for our new users who have expressed frustration upon opening Planfix and finding it cumbersome and illogical, as the old interface didn’t work.
Conclusion
The new task creation form will continue to evolve. It was just introduced, and it may not work as expected in some scenarios. Predicting and testing everything is impossible, so let us know if you encounter such cases. We’ll then correct and improve it.
This is how we envision the future interface of Planfix. Of course, we still have a lot of work to do on the new task form and on Planfix as a whole. There will be more changes and additions to come, even later this year. In the meantime, we’re open to all suggestions and ready to discuss them, including changes to the new daily task creation form.
Evolution may have a beginning, but it has no end.

