
The easiest way to show your customers or counterparties that you care is to send them a message notifying them of important updates. This can be as simple as:
- The contract is prepared.
- The order is sent.
- Access to the course is granted.
- A new dress is on sale!
- Perhaps it’s time to consider buying more shares?
Meanwhile, the customer will be sorting through notifications sent by a variety of companies. Let’s give them space to manage their notifications while we explore another aspect of this process – automation.
How Planfix Scripts Work
Automated scripts are pre-written commands or sequences of actions that are designed to automatically perform tasks or processes without requiring manual intervention. Planfix scripts can streamline recurring tasks, such as sending automated emails, updating customer records, or generating reports, saving time and improving efficiency for users. Find out more about Planfix scripts in the article “How Planfix Scripts Work”.
Why to Use the Automated Email Script
How to view a sent email in Planfix and understand what It conveys? For some Planfix Automation users, viewing sent emails can be a challenging process. Let’s clarify this.
First Script
Imagine you run a super techy company where all business processes are detailed and automated—a best-case scenario. Tasks from counterparties are recorded in the Planfix chronicle. Employees fill out the necessary fields at different stages, a contract is automatically generated, and a notification email is sent to the counterparty using a prepared template.
Second Script
Suppose you own an online language school. With Planfix, you manage your student applications. Once everything is prepared for courses, you set a message and automatically notify the student that the class is ready.
To set up an automatic script or a button that sends such an automated email looks as follows:
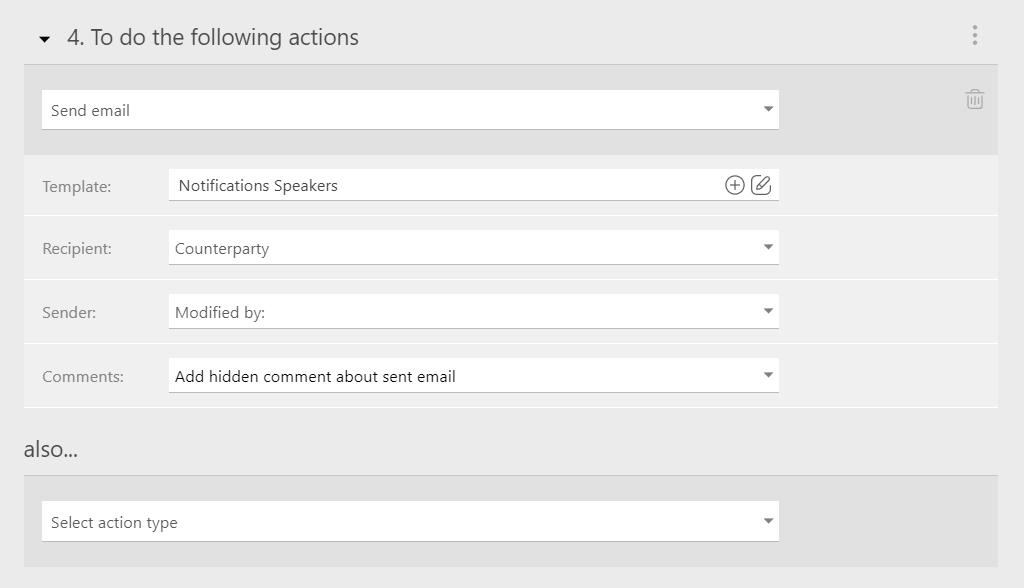
Configuration of an automatic script or button for set notifications.
Adding Emails to Tasks: How It Used to Be
When a script is triggered or an employee clicks a button, a system action is recorded in the task, and the email is sent out:
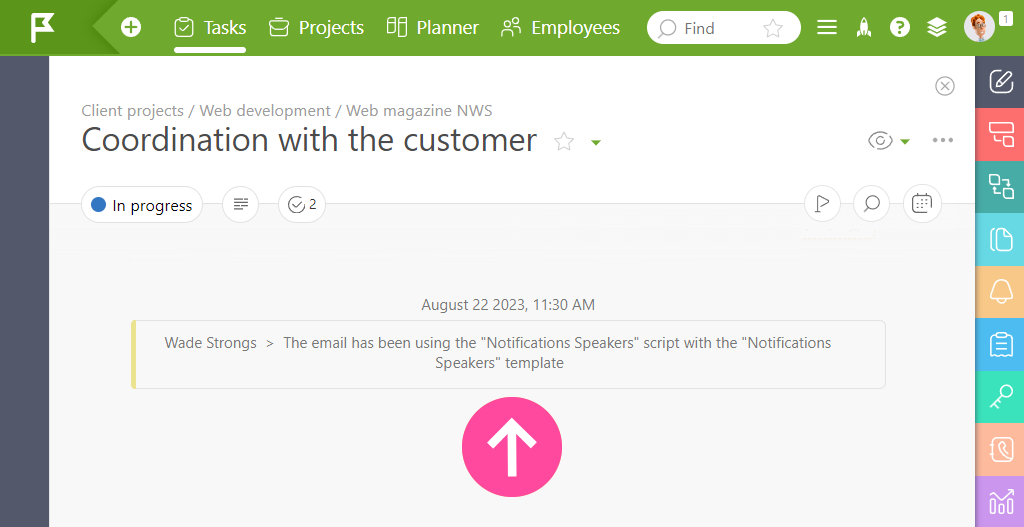
Here’s an example of the old version of the system.
The old version caused some inconvenience:
- This system action is only visible when “All Actions” are selected by default. Only comments are displayed initially. In other words, no one could see this action until they changed their display mode.
- Even after switching, this action would be difficult to find because many similar-looking system actions surround it.
- You often had to ask the support service how to view what exactly was sent in the email.
- Sometimes, it was difficult to understand what the contact had actually replied to.
Adding Emails to Tasks: How It Works Now
We’ve made changes, and now it operates as follows:
- An automatic task script or button is used to send an email.
- Planfix saves the text as a file.
- The system action regarding an outgoing email is logged in the task as a standard comment:
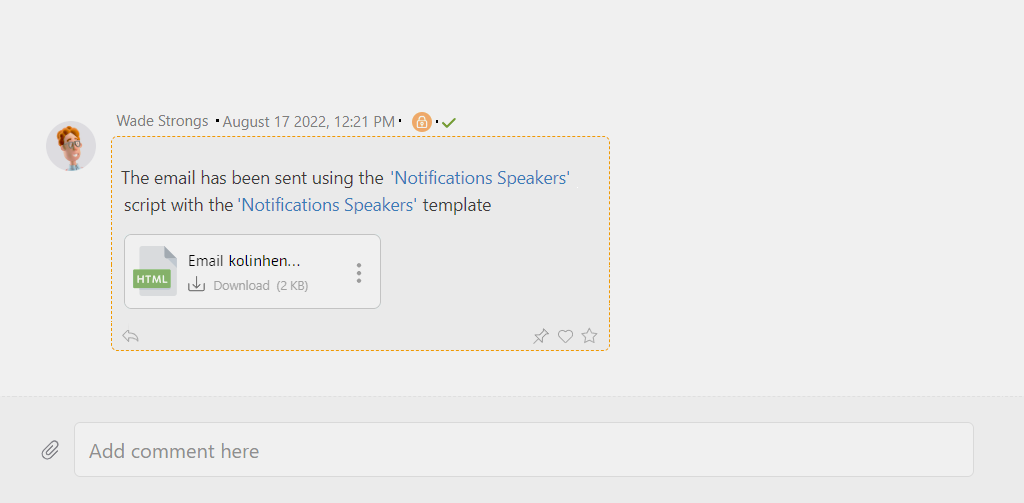
This is an example of the new system action.
Note that the comment includes:
- which template and task scripts were used to send the email,
- a file with the content of the email,
- the filename, showing the sender and recipient of the email.
Furthermore, when you set up an automated script or button, you can specify the visibility of such an automated message.
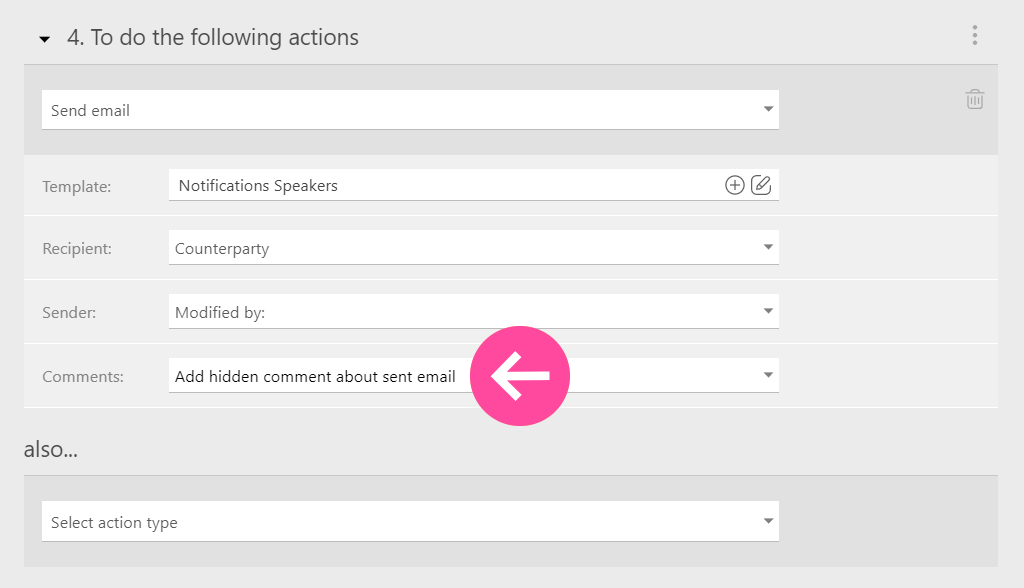
Adjusting the visibility of the email comment.
The Results
The system action is visible under all display settings unless the comment is hidden.
- Its visibility has increased.
- Now you can see what was sent in the email.
- It is clearer and easier to understand which email a contact is responding to when they reply.
An important note: A script that tracks the “Comment added” event does not work when the system comment described above is added.

