
How often have you wanted to visualize the entire process of working on a product? We’ve often felt that way too. We needed a tool that could graphically depict the workflow and answer straightforward questions:
- Which phase are we in currently?
- If we’re on a series of tasks, which one is active now?
- Which one comes next?
- After selecting a task, what’s necessary for its completion before diving into Planfix to work on it?
- What factors are causing delays?
Such insights are vital during product development. But what if the team is in the initial planning stages for a new launch? In that scenario, we aim to:
- Map out the primary blocks needing completion, link them, and indicate the sequence of tasks to be executed.
- Later, if necessary, further break these down and track which ones are completed. These don’t need to be subtasks.
- Eventually, you find yourself managing a host of unrelated tasks across various projects, and you’re required to manually connect them. It’s frustrating because you need to recall your task’s stage, the solution to the task you’re waiting on, the title of the task you wish to review, and so on.
What if there’s no alternative, and you need to link identical tasks in multiple contexts with entirely different tasks, doing so with different methods?
Reflecting on this, we were inspired to introduce a novel Planner type to Planfix – the Whiteboard.
Whiteboard in Planfix: Complete Guide
Adding a whiteboard diagram online to the Planner follows the standard procedure:
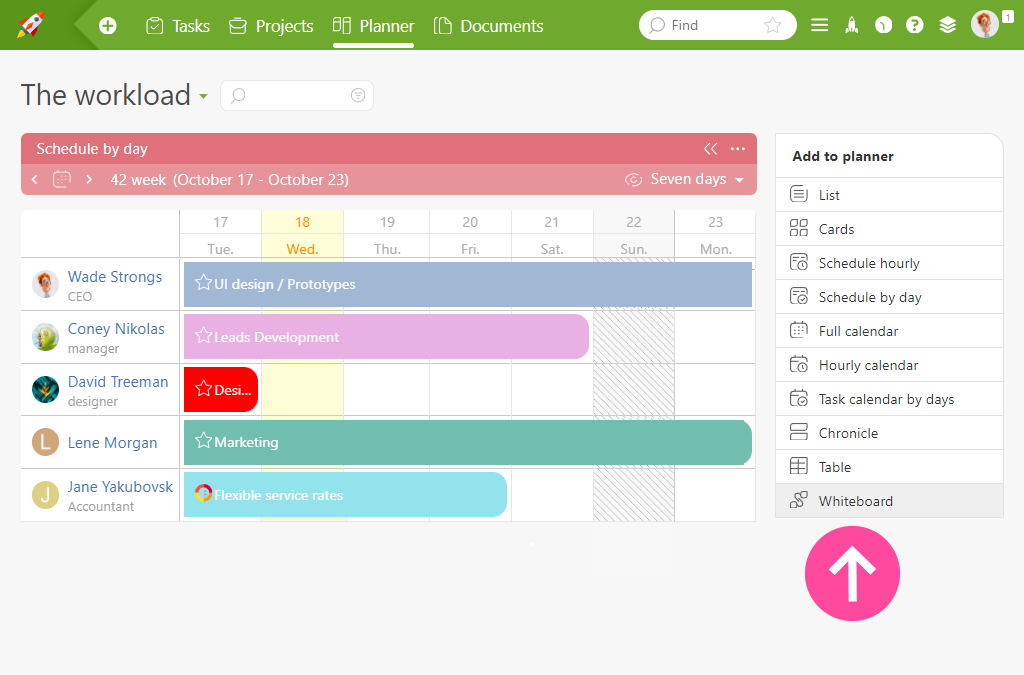
Adding a whiteboard diagram to the Planner.
Empty whiteboard diagram.
Getting Started: Hello, World!
The whiteboard diagram for project management is included in both the “Plan B” and “Plan X” payment plans.
You can begin by designing a diagram (board) from scratch, organizing ideas into blocks, and making connections between them. If necessary, you can then transform a group of blocks into tasks and delegate them to team members.
Alternatively, you can insert pre-existing tasks directly into the whiteboard diagram either by dragging and dropping them from adjacent planning lists or by choosing them from the general task list.
Click the plus icon to introduce new blocks:
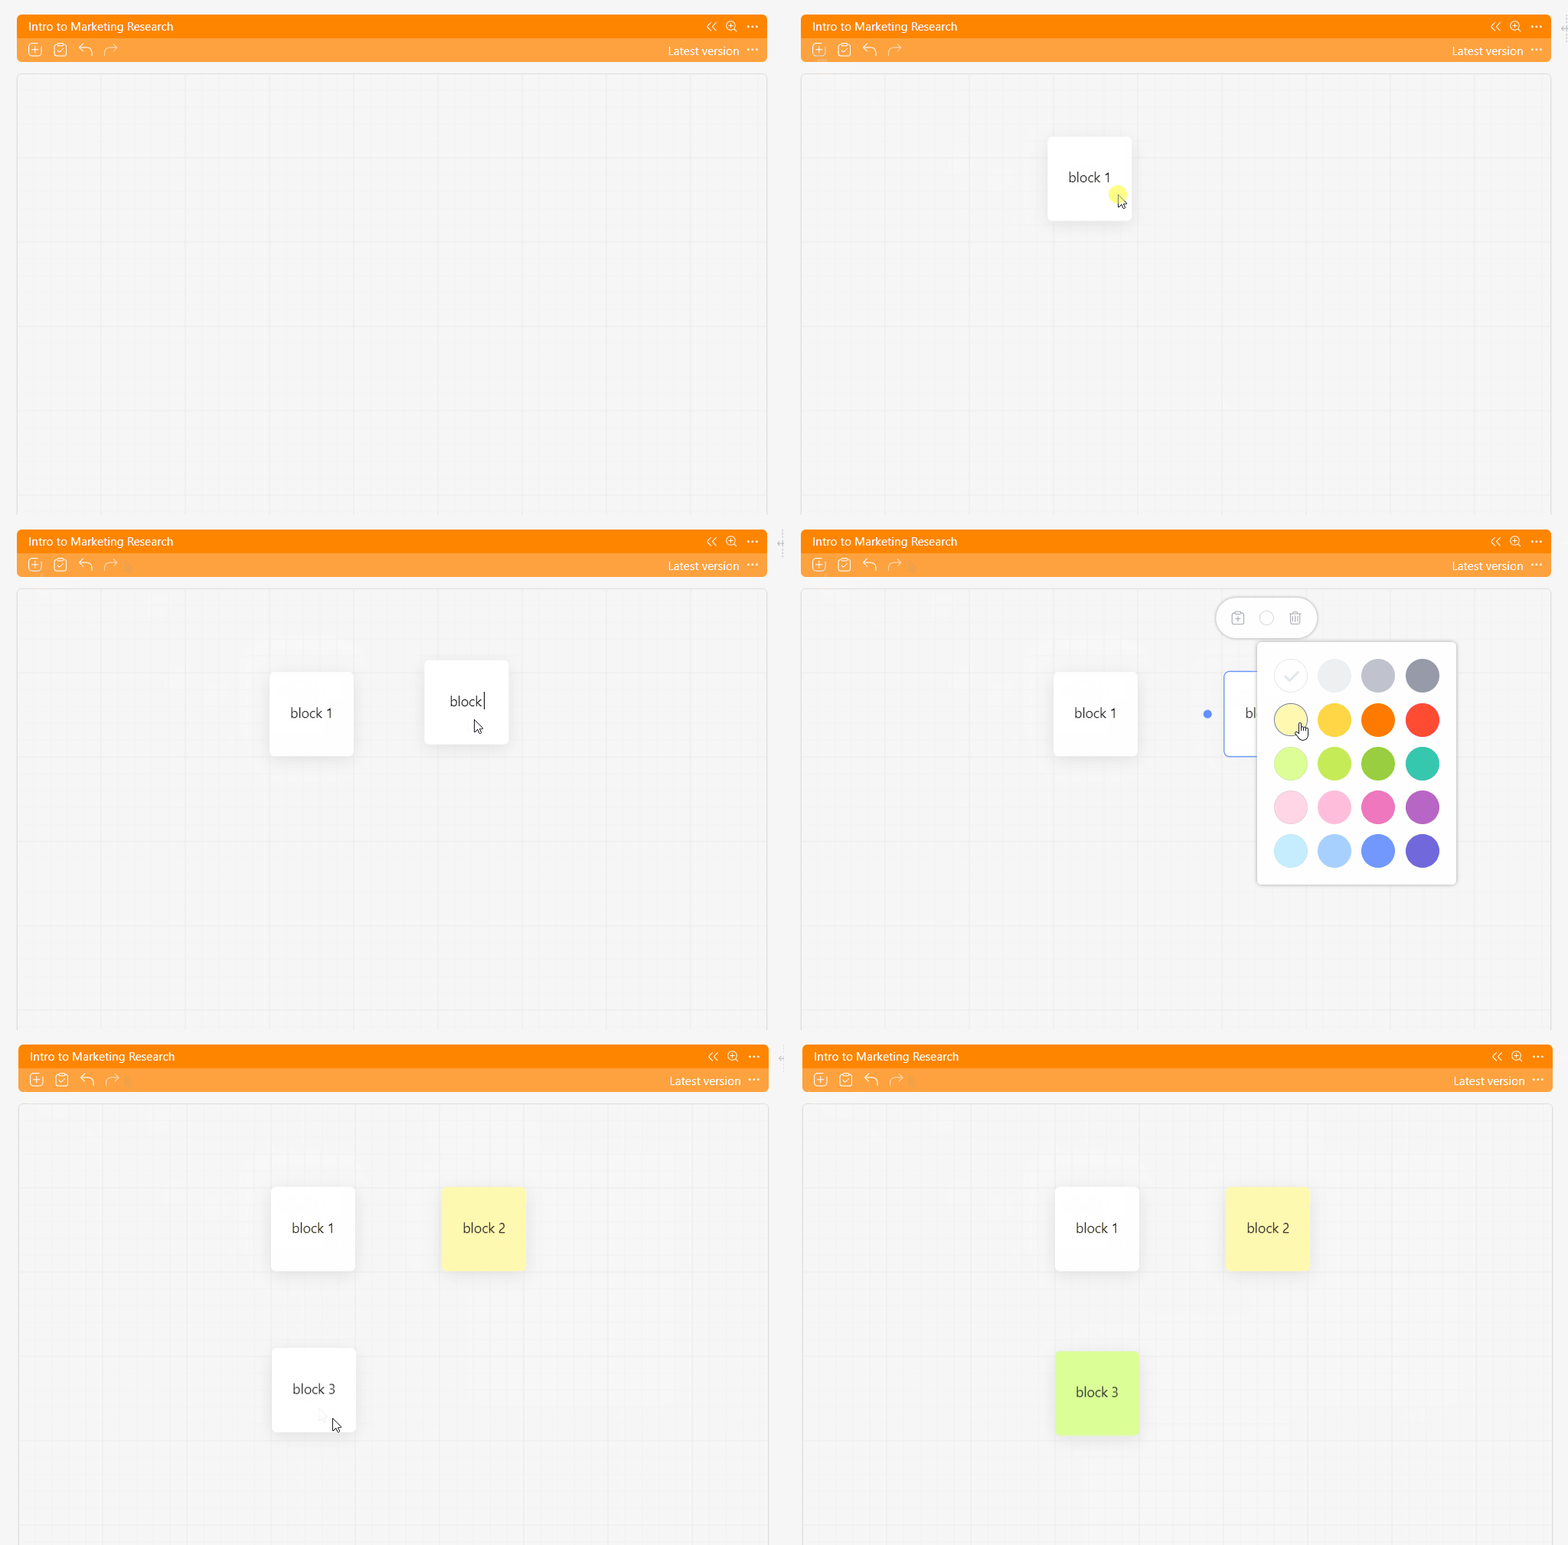
Demonstration of adding new blocks to the whiteboard diagram.
Or click on the existing task icons to pick from the list:
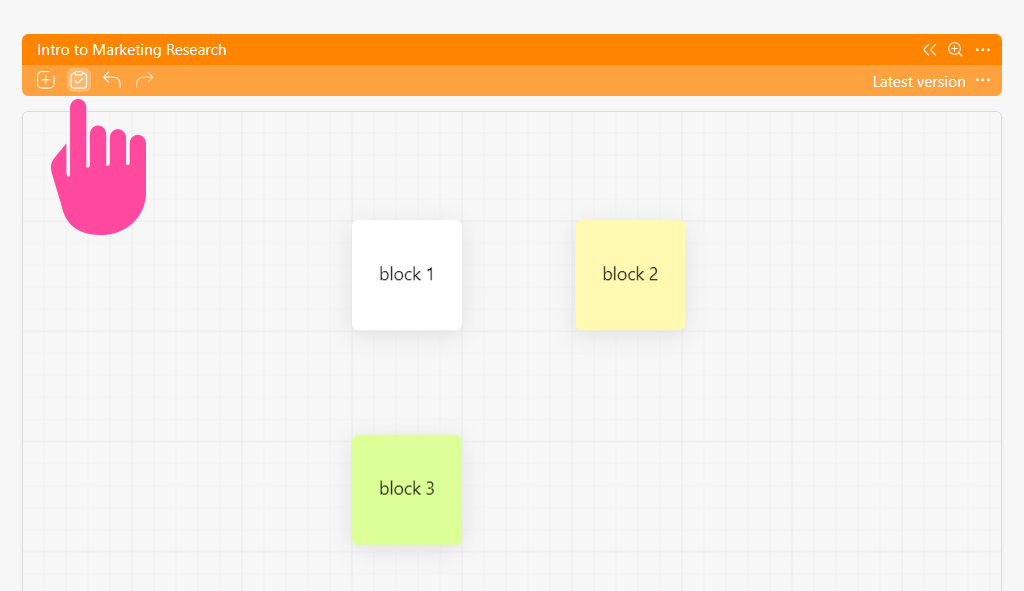
Selecting a task from the general task list.
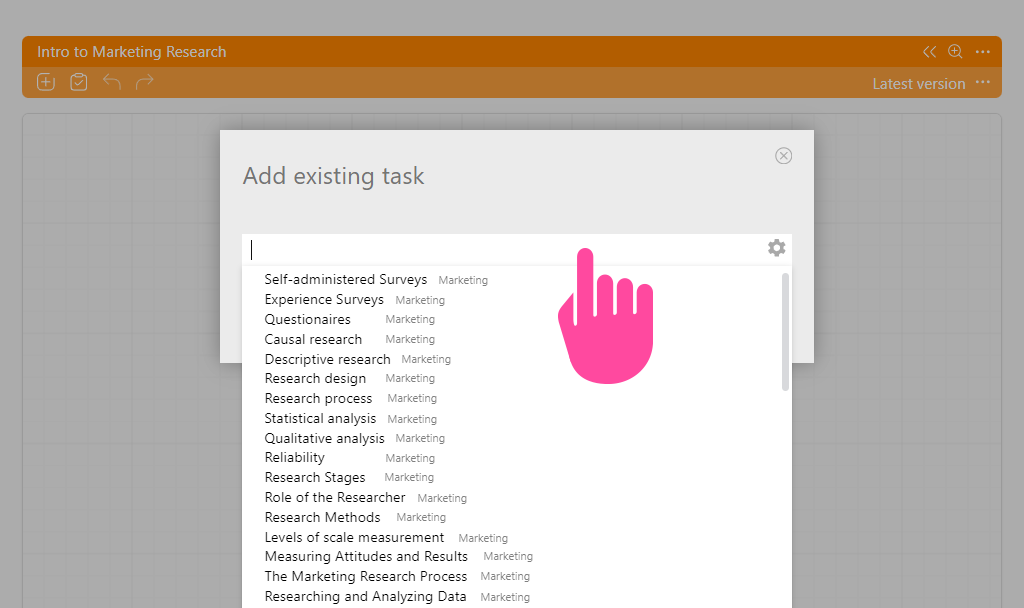
List of available tasks that can be incorporated into the whiteboard diagram.
Special guides help to position new blocks or blocks already on the board:
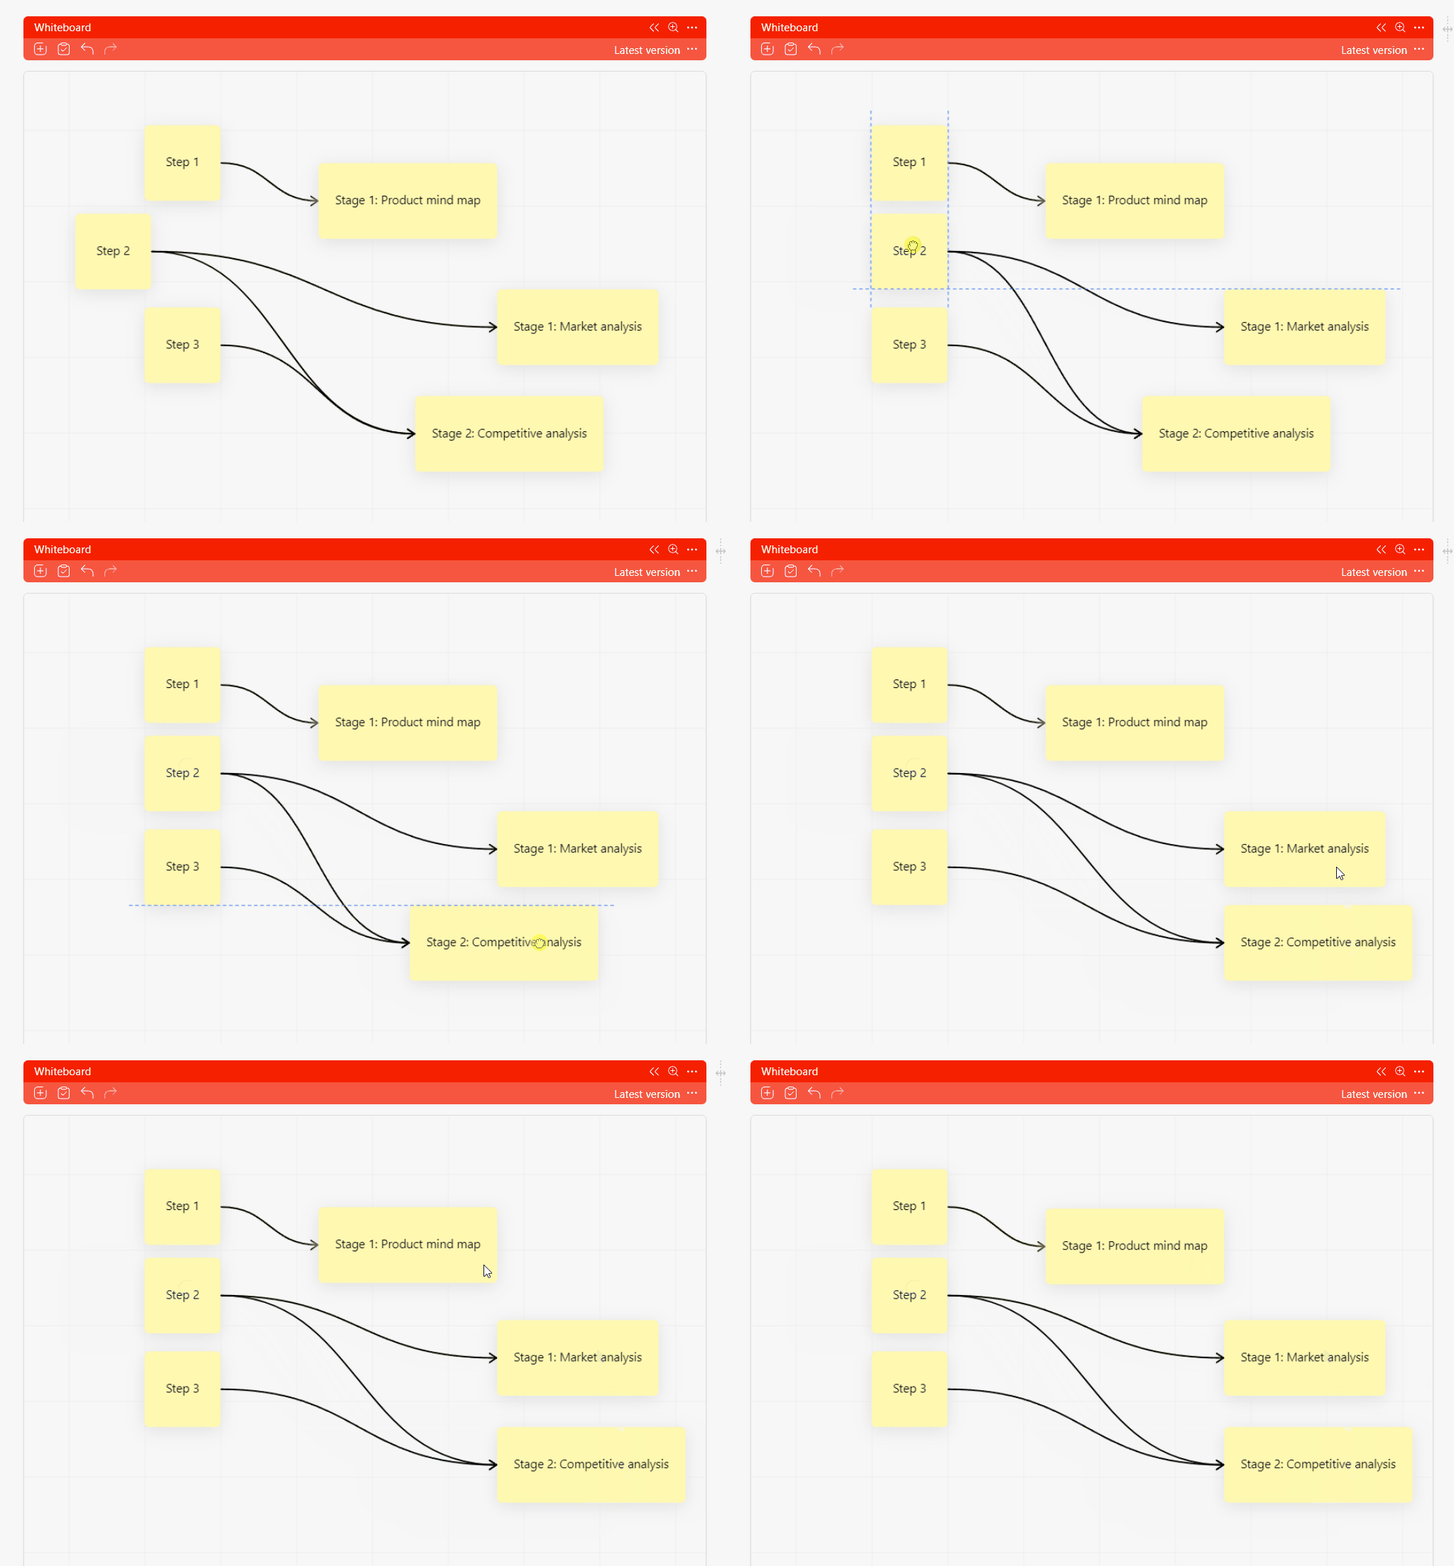
Arranging the blocks.
Changes to the diagram (board) are automatically saved, allowing you to revert to a prior version if necessary:
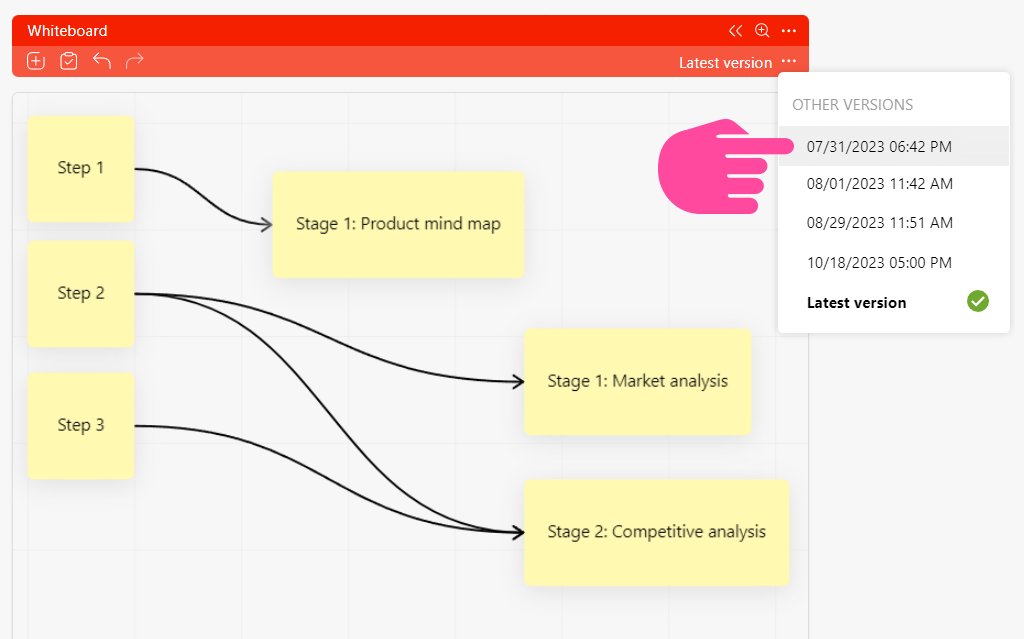
Change history.
A panel displaying tasks from the whiteboard diagram will appear when you click the extended list icon on the right. If no tasks are present, the list will be blank:
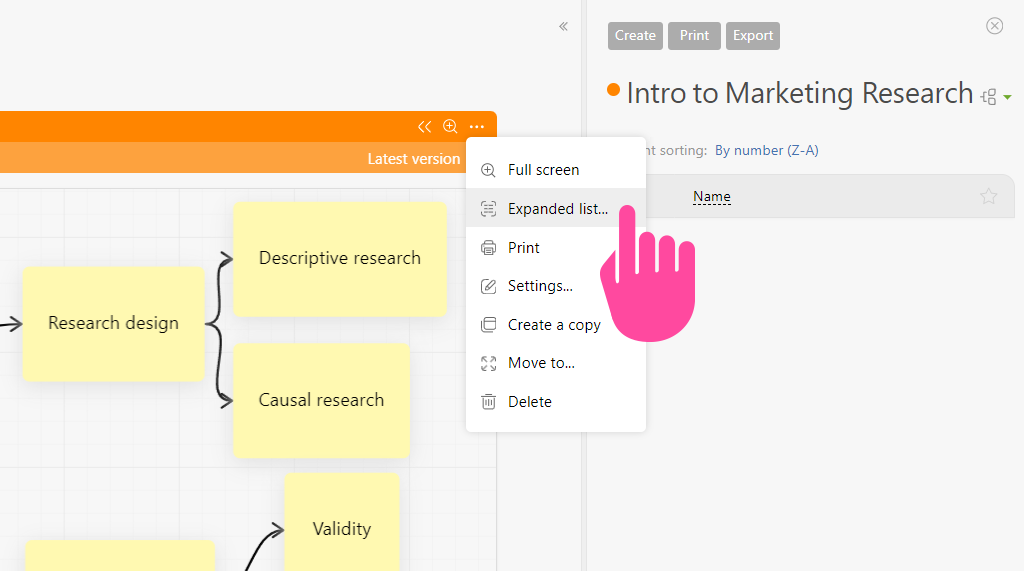
Extended list of connection diagrams (Whiteboard).
Clicking on a block in the whiteboard diagram reveals additional options for block interactions. The following actions are available:
- Convert to task
- Set color
- Delete
- Establish a connection with another block
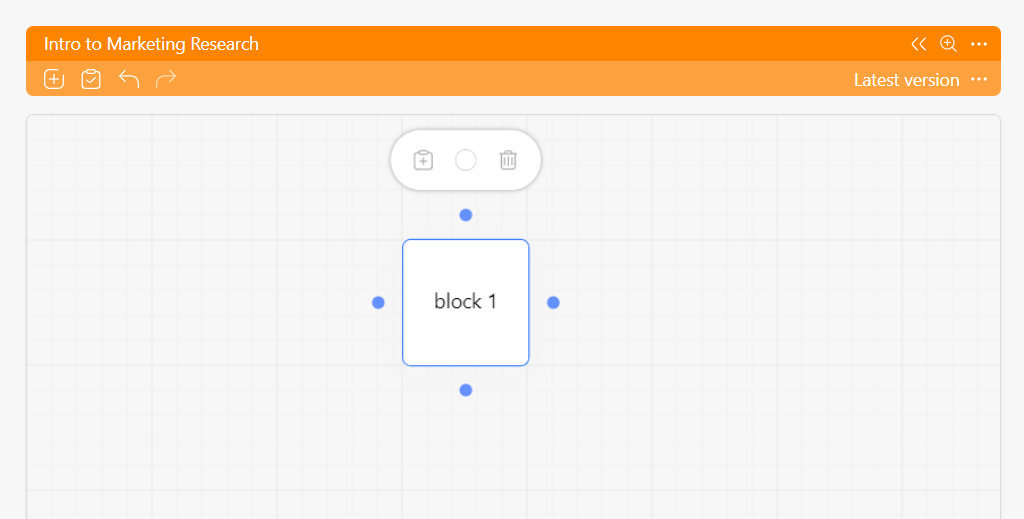
Additional block features.
You can rename a block by double-clicking it. Connections are formed as illustrated here:
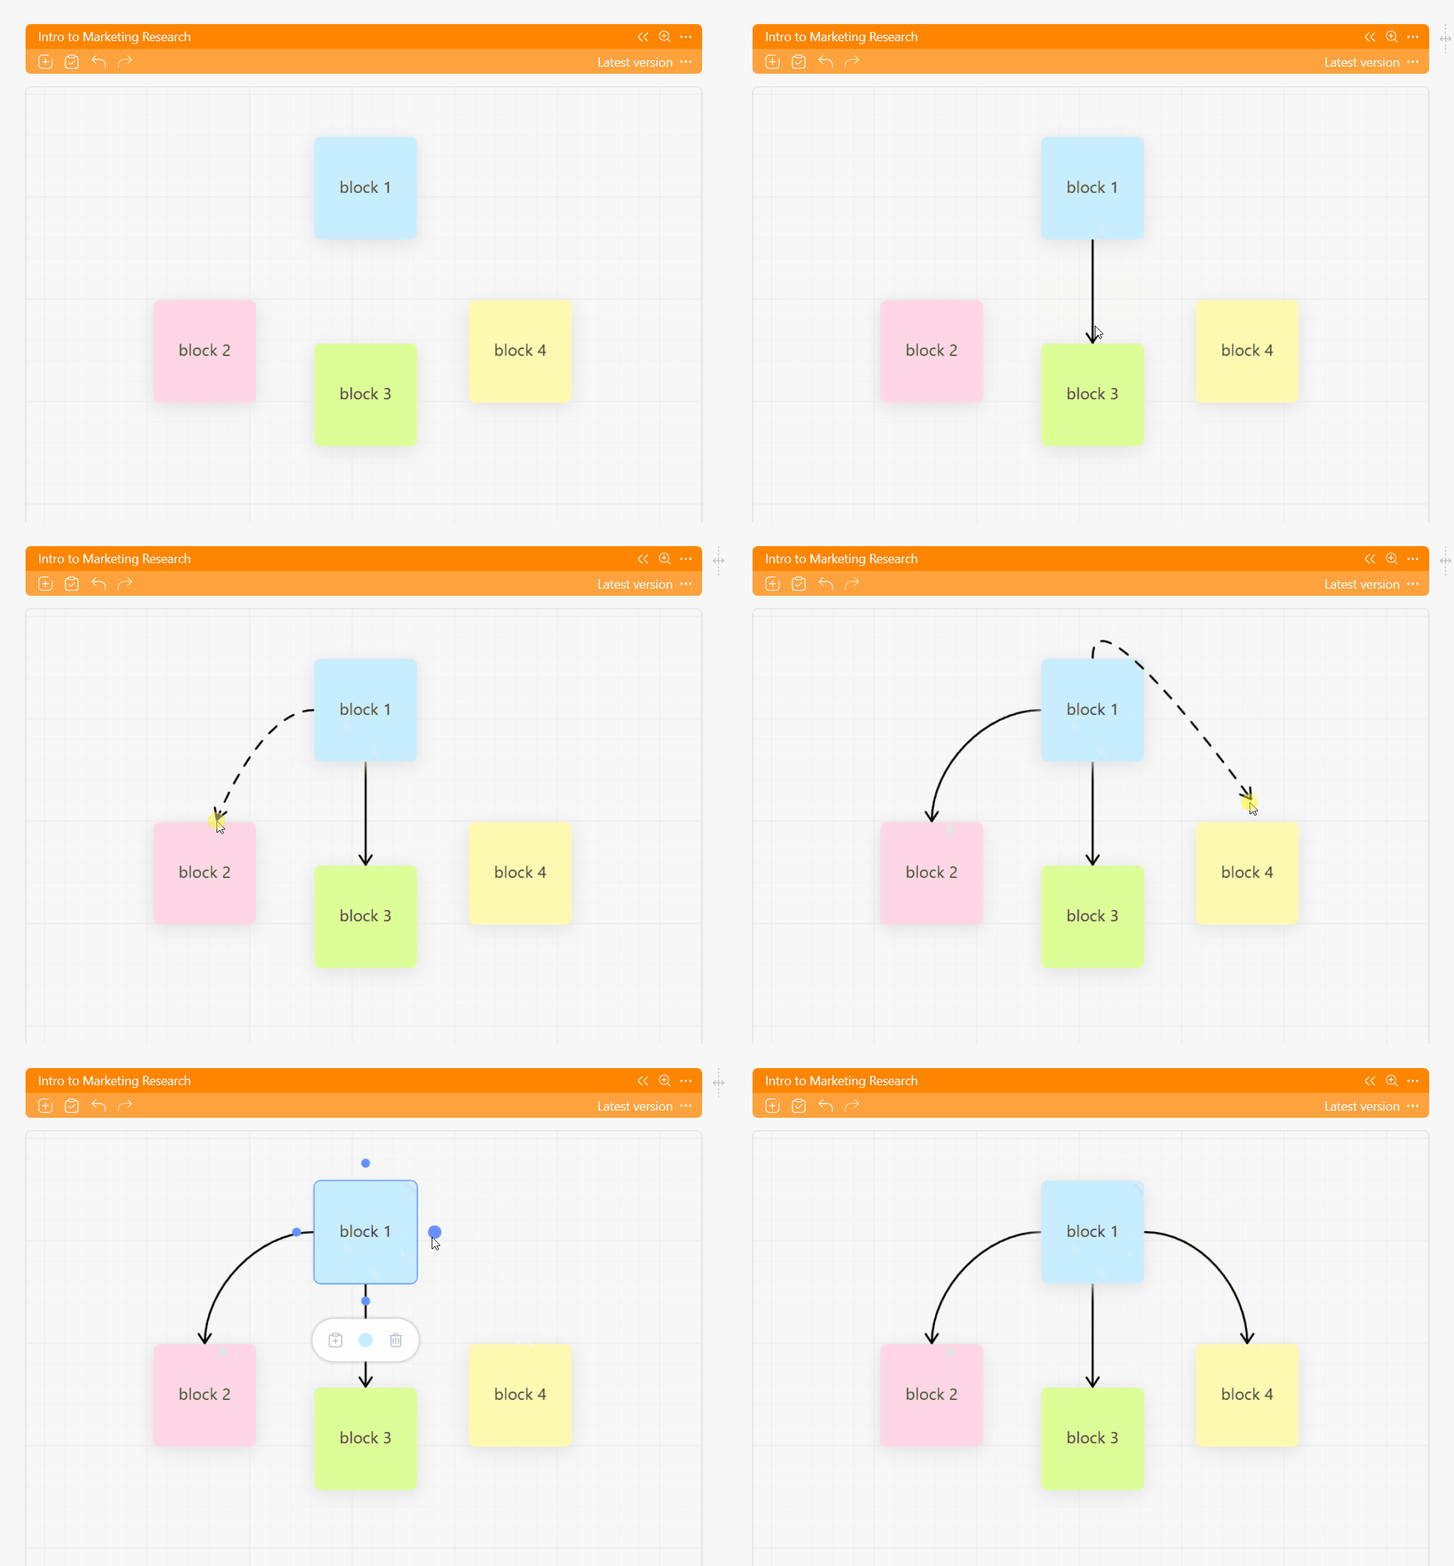
Establishing connections between blocks or tasks.
Whiteboard Navigation
Ease of navigation is key to a comfortable experience with the chart (board). We have taken into account the user experience in other systems and tried to make it as comfortable as possible:
- Mouse wheel up-down = board zoom. Down to zoom out, up to zoom in.
- Holding RMB (right mouse button) on an empty space or holding the space bar key + LMB (left mouse button) = moves the board in any direction.
- LMB clicking on a block = selects a card and displays additional options.
- Clicking LMB repeatedly on blocks = selects multiple cards at once.
- Clicking and dragging around the blocks while holding LMB = selects multiple cards at once. Selected cards can be moved by holding down any card with LMB.
- The CTRL + Z keys together will undo the last changes made.
Creating a Task Card in Whiteboard
Blocks in the connection diagram (Whiteboard) can be converted into tasks. Select the desired block on the board with a single mouse click and click on the corresponding icon:
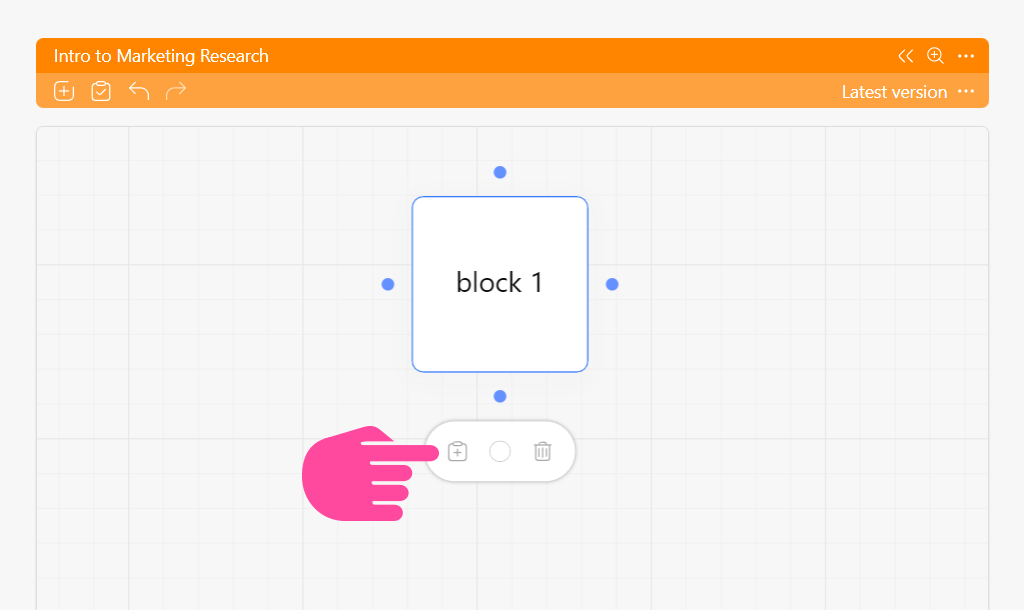
Create a task from a block.
A new window for creating tasks will be opened. The “Template” field auto-fills with the default task template from the settings of the user who created the diagram (board), and the “Title” field is populated with the block title.
Otherwise, converting a block into a task is no different from creating a new task in Planfix. After you save the settings, the block becomes a task in the connection diagram (Whiteboard):
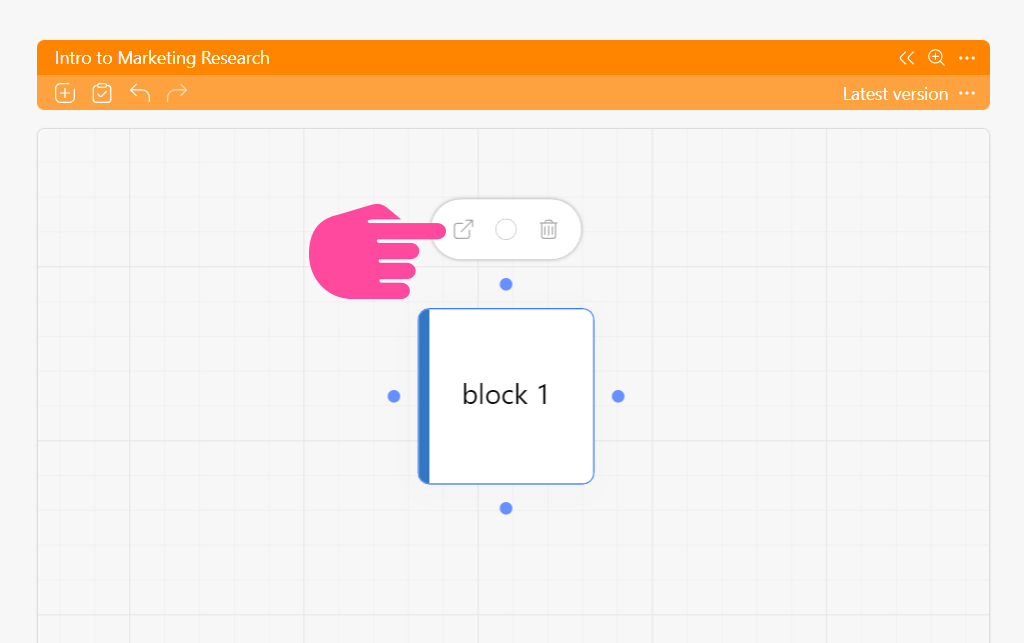
Transition to task.
Note that the title is displayed in the color of the task status. Clicking on it will display a task transition icon. Clicking on this icon will open the task panel on the right, consistent with Planfix’s usual behavior.
Access to the Whiteboard in Planfix
The most important thing to remember is that there are two independent levels of employee access:
First — At the Planner Level.
- Everyone accessing the Planner will see the connection diagram (Whiteboard) by default.
- Only its author can modify the diagram (board) by default.
Second — At the Task Level.
- A user who sees the tasks in the connection diagram (Whiteboard) but does not have access to them sees the default Planfix window requesting access if they attempt to transition to those tasks.
Example of a Connection Diagram (Whiteboard)
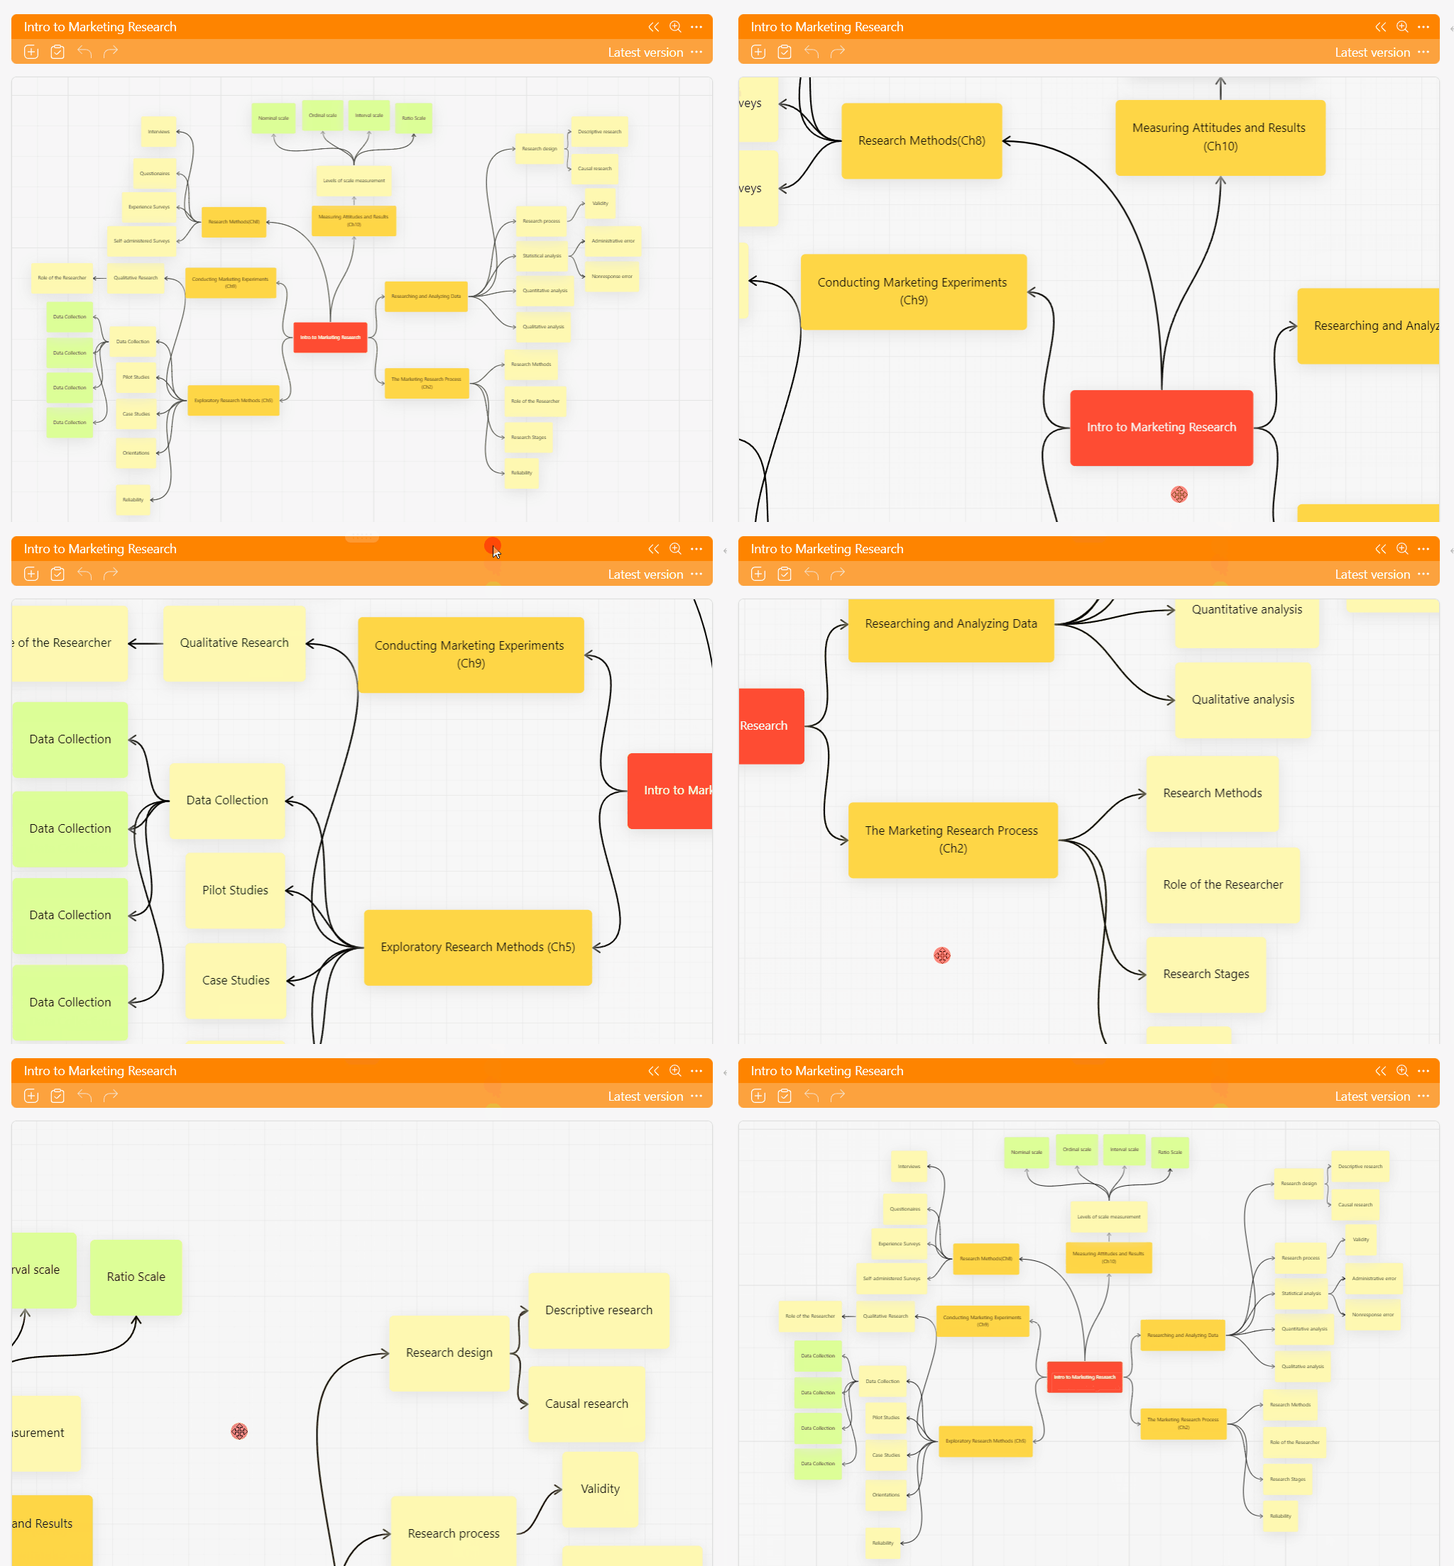
Example of a diagram (Whiteboard).
Note that the established connections between tasks only “live” within a diagram (mind map). You can simply drag the same tasks from the planner list to different diagrams, connecting those tasks differently.
Most importantly, don’t confuse the connections in the diagram (board) with the connections between tasks in the “Dependencies” section, which affect the task’s scheduled start or due dates.
Conclusion
The Whiteboard is a tool that allows you to turn an idea into a project, break the project down into tasks, set assignees, communicate within and among those tasks, and go through the entire project lifecycle to full implementation using a single project management system with whiteboard.
Implementing the Whiteboard is just the first step, and we still have a lot of work ahead of us, but you can already “feel” the first results coming together with us. Please share your impressions of working with Whiteboard for task management with us in the comments. We will be happy to consider your suggestions as we continue to improve this feature.
