
Every client message has the potential to contain something critical. And when your inbox starts filling up with dozens (or even hundreds) of incoming requests, manually sorting through them becomes a full-time job.
The good news? That job is now officially below your pay grade. Planfix has just introduced a brand – new automation of customer service feature called “Send request to Planfix AI”. And it’s specifically built to take that mind-numbing email routine off your hands.
Let the AI Sort the Mess
Every day, messages roll in from every direction – social media forms, website contact pages, newsletter replies. All of these will be funneled into one virtual email address.
Your communications manager could spend hours manually reading and forwarding requests to the right people. Even worse, you could end up doing it. Or you could let Planfix automatically analyze and categorize each request. Trust us: the robot’s got it covered.
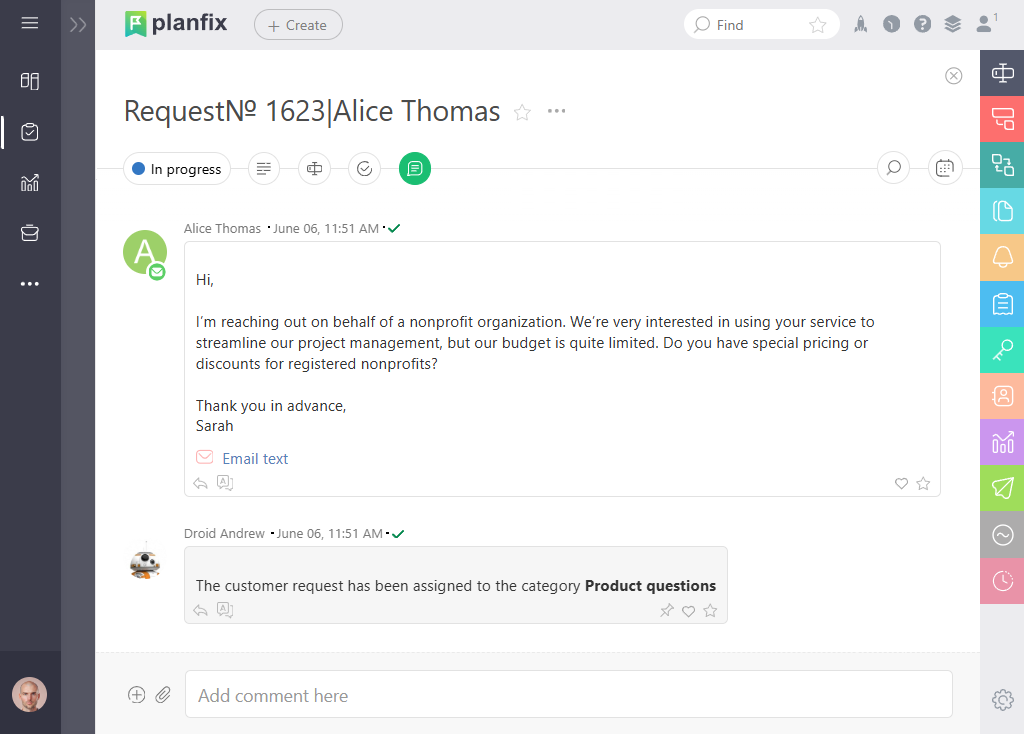
Setting Up AI-Based Request Sorting in 5 Easy Steps
Here’s how to automatically classify incoming messages using Planfix AI. Don’t worry, there’s no coding required or additional integration, just a bit of smart configuration for automated customer experience. We’ve made it as straightforward as possible so you can start enjoying the benefits even faster.
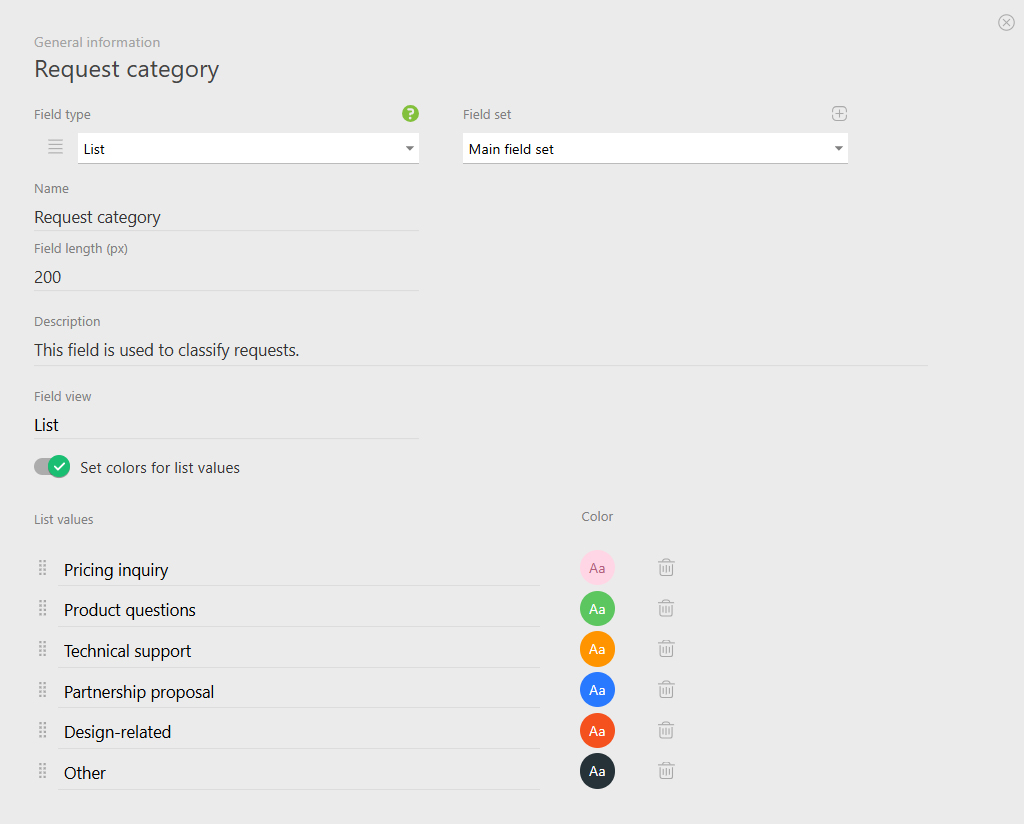
🔵 1. Create a List of Request Types
Start by listing the messages your team receives most often. Then, create a custom field – a list – and fill it with those categories.
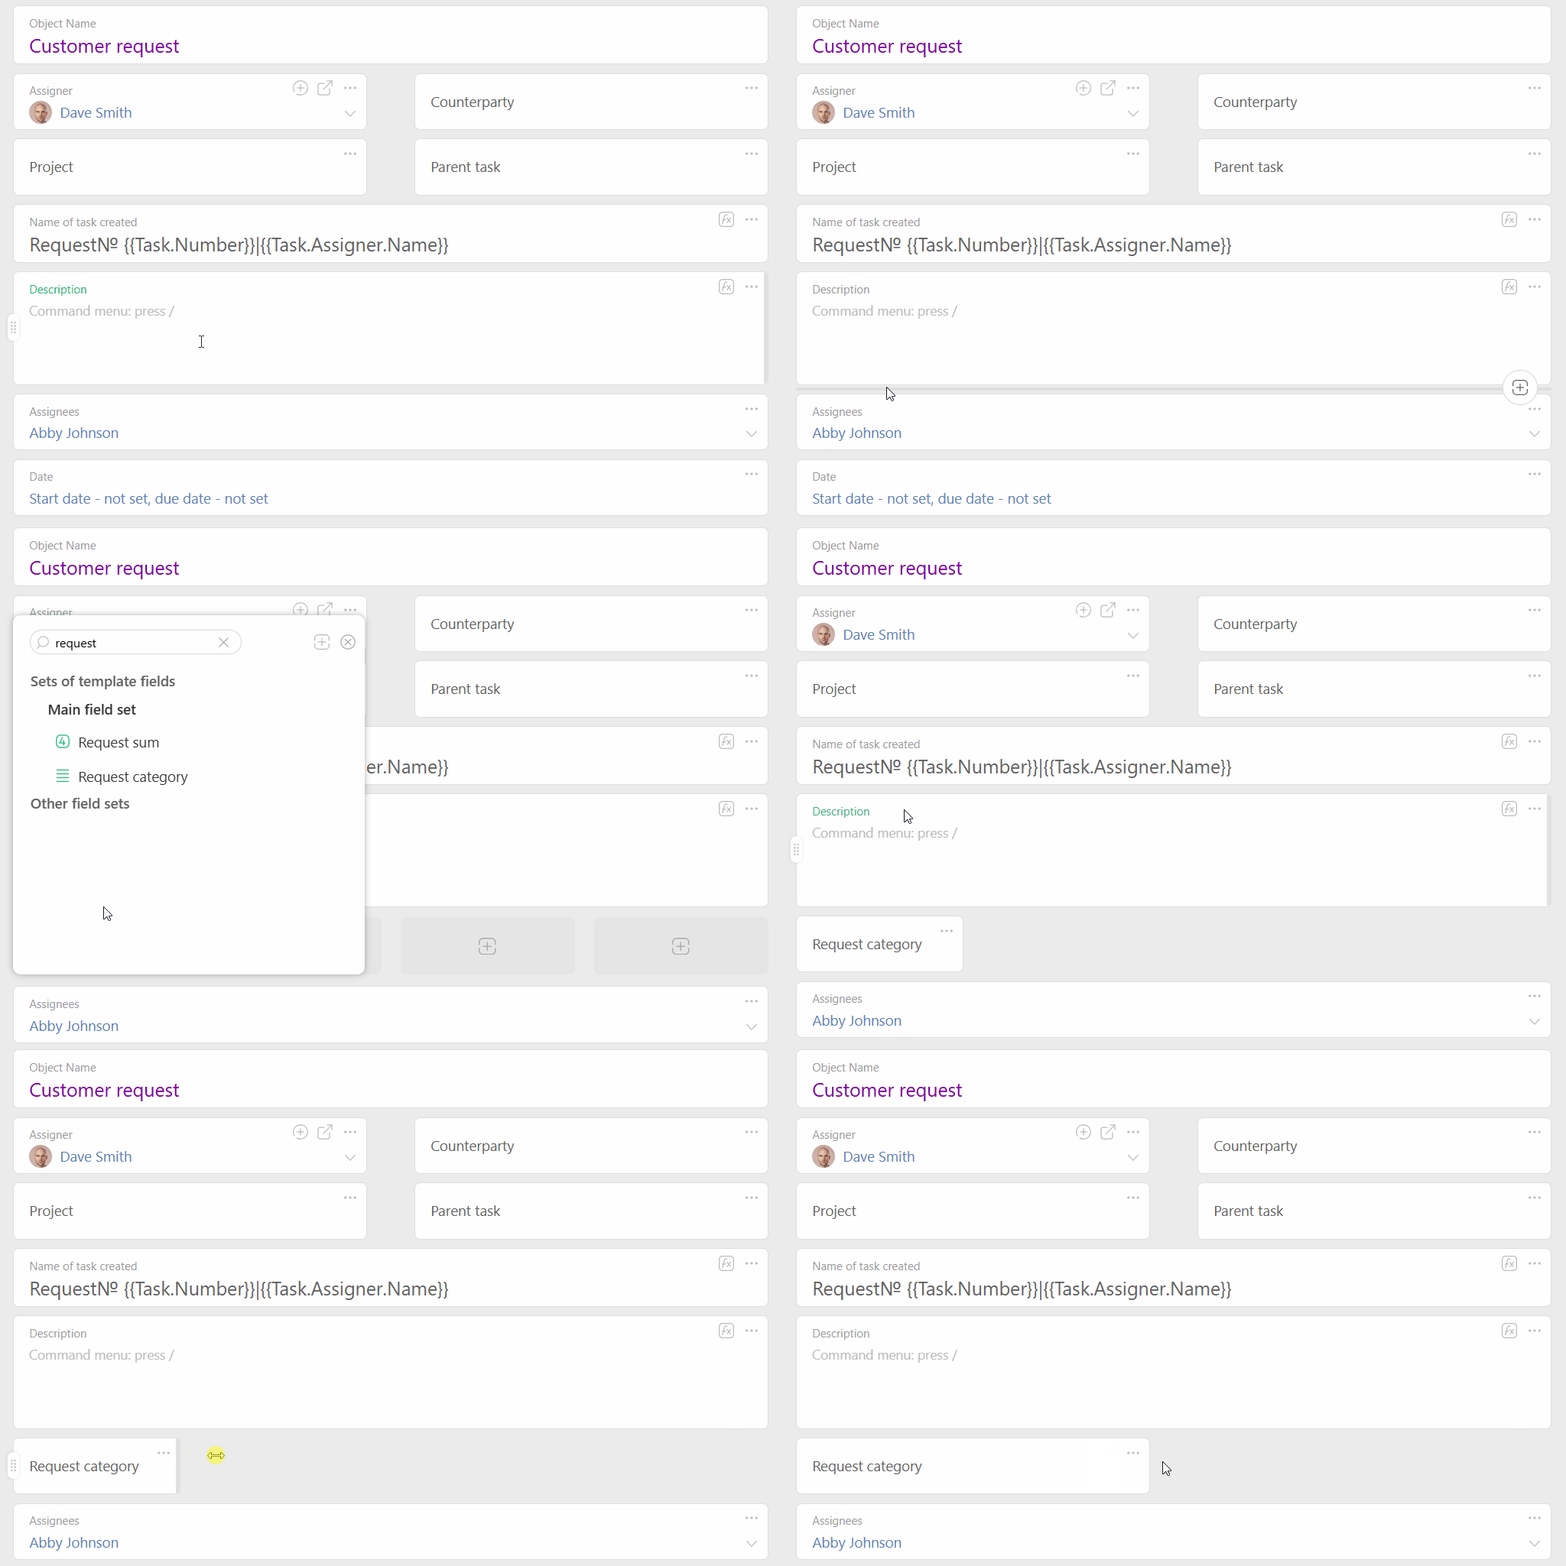
🟢 2. Add the Field to your Base Object
This is the Object that Planfix will use to create tasks from incoming emails. Simply attach your new field to it, and that’s where the category will be stored.
🟡 3. Set Up Email Handling Rules
Each virtual email in Planfix can follow its own logic.
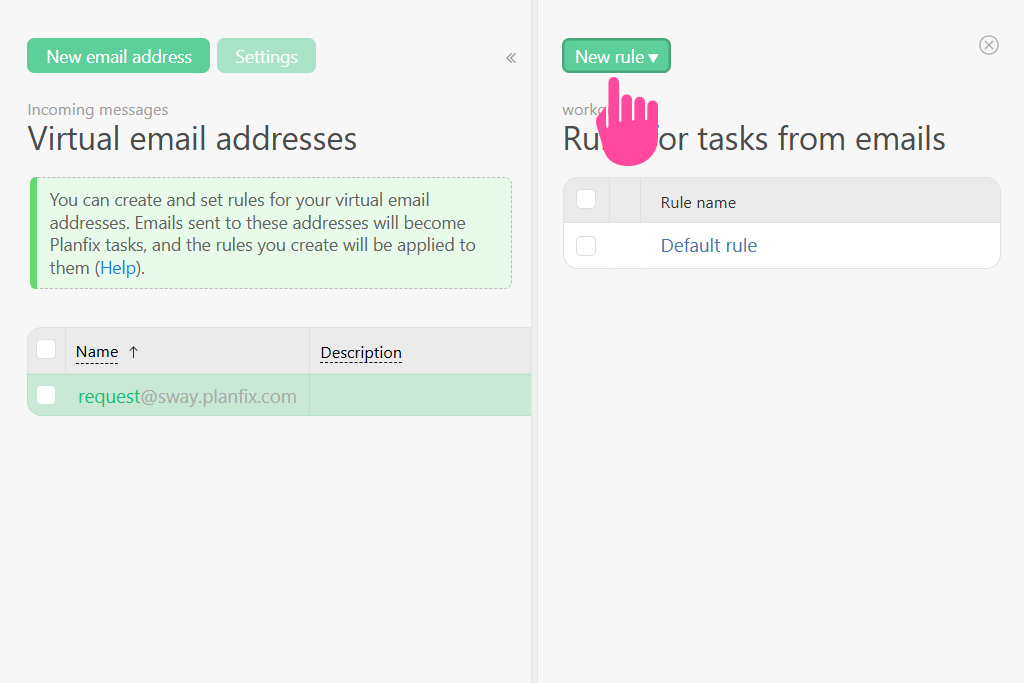
In the rule, you define which Object to use when turning a new email into a task.
🟠 4. Build the Prompt for Planfix AI
Here’s where the real magic starts. Add a “Send request to Planfix AI” operation to your rule. It’s available in email parsing, scripts, buttons, and webhooks.
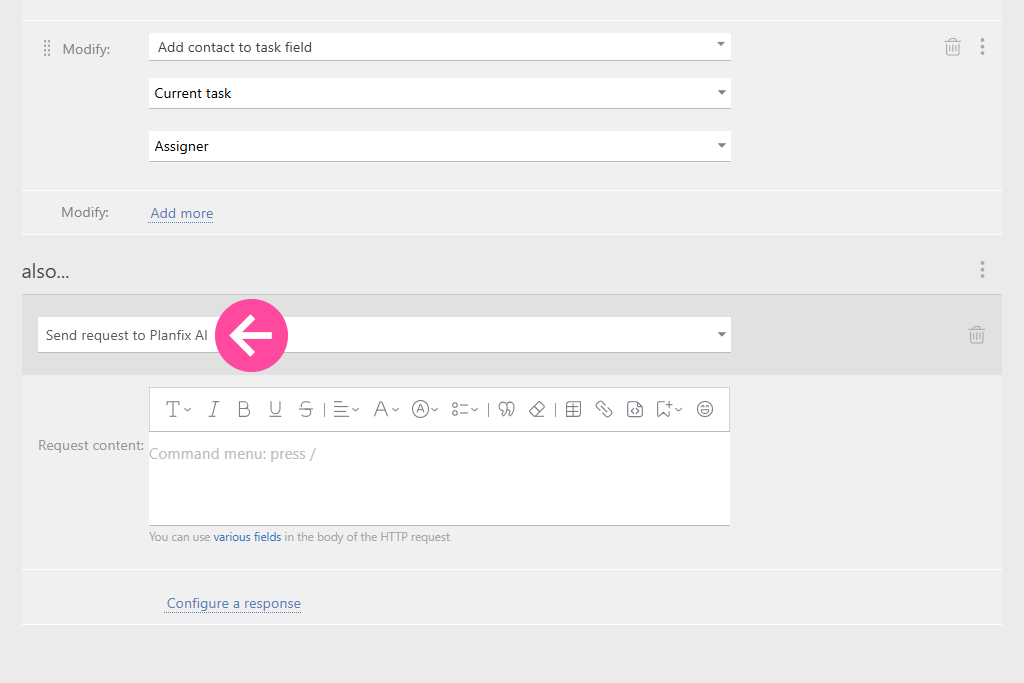
Now you just write your prompt. The goal here is to explain what you want the AI to do.
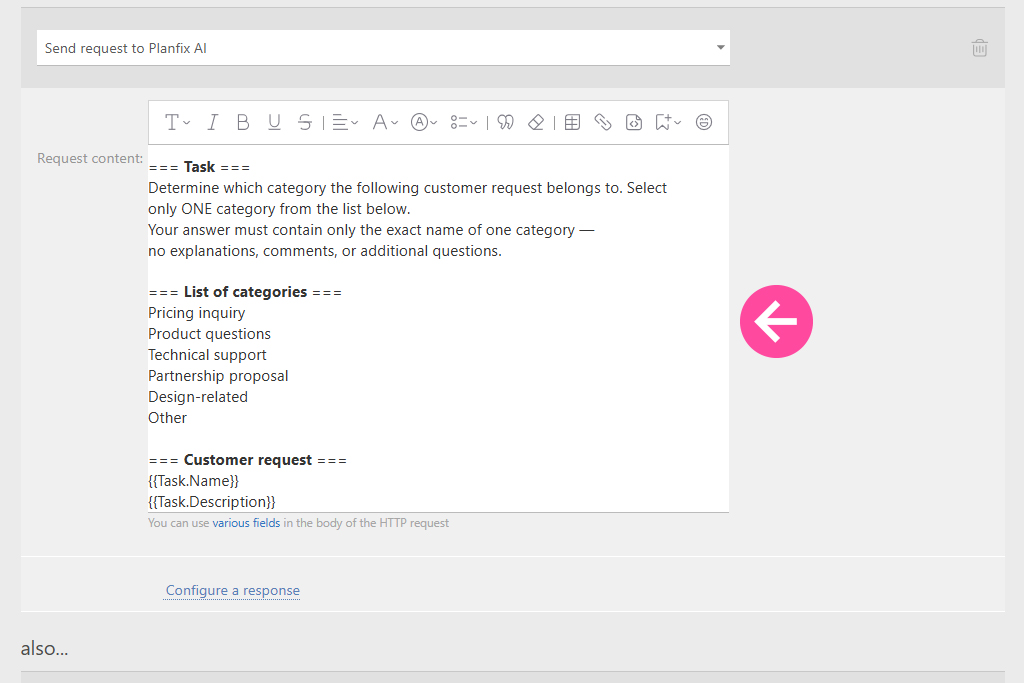
You can also use variables to pass in task names, descriptions, or field values. Planfix AI will get that data with your request.
🔴 5. Parse the AI’s Response
Finally, you need to tell Planfix where to put the answer. In your rule, map the AI’s “Response” to your custom category field.
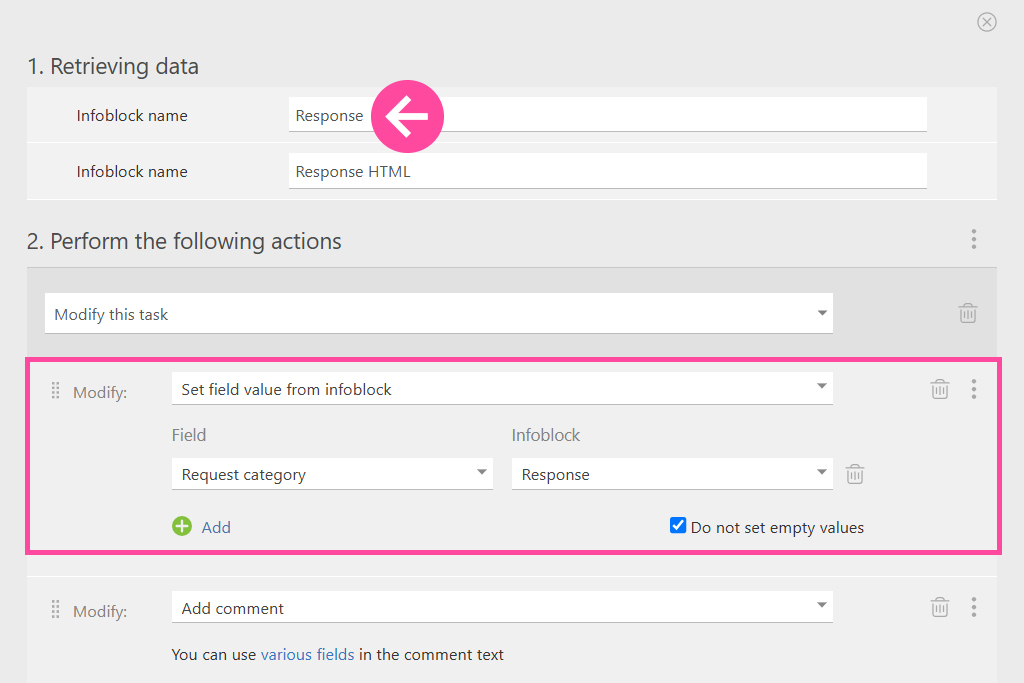
Want to give your team extra context? You can also store the AI’s explanation in another field using a variable. The text will appear automatically when the script runs.
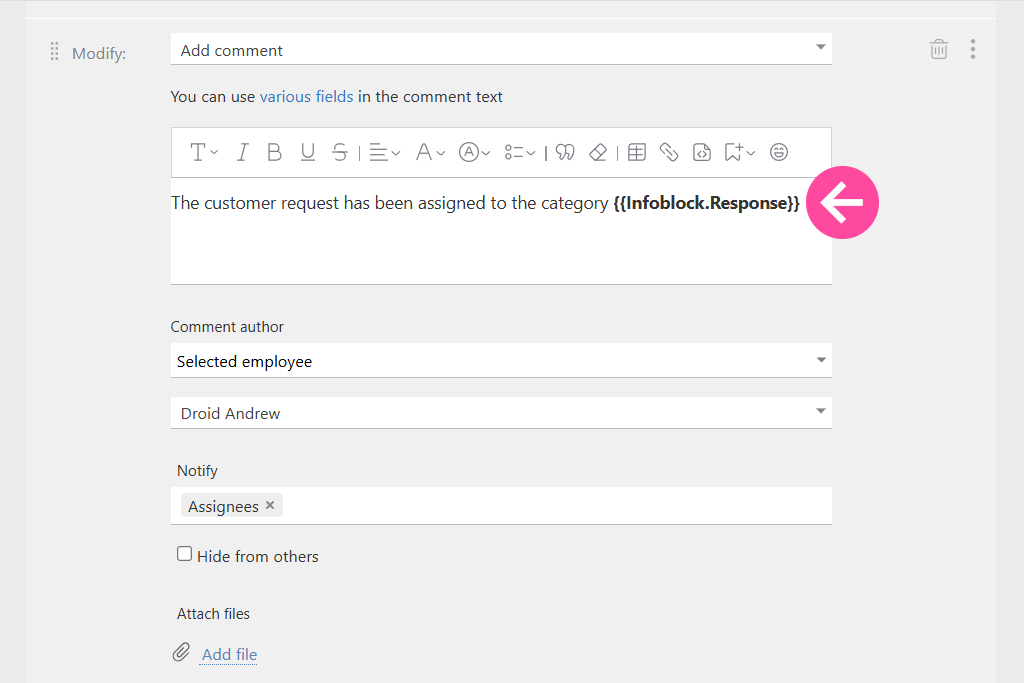
And that’s it! From now on, every message that comes in will be instantly and accurately categorized by your AI assistant.
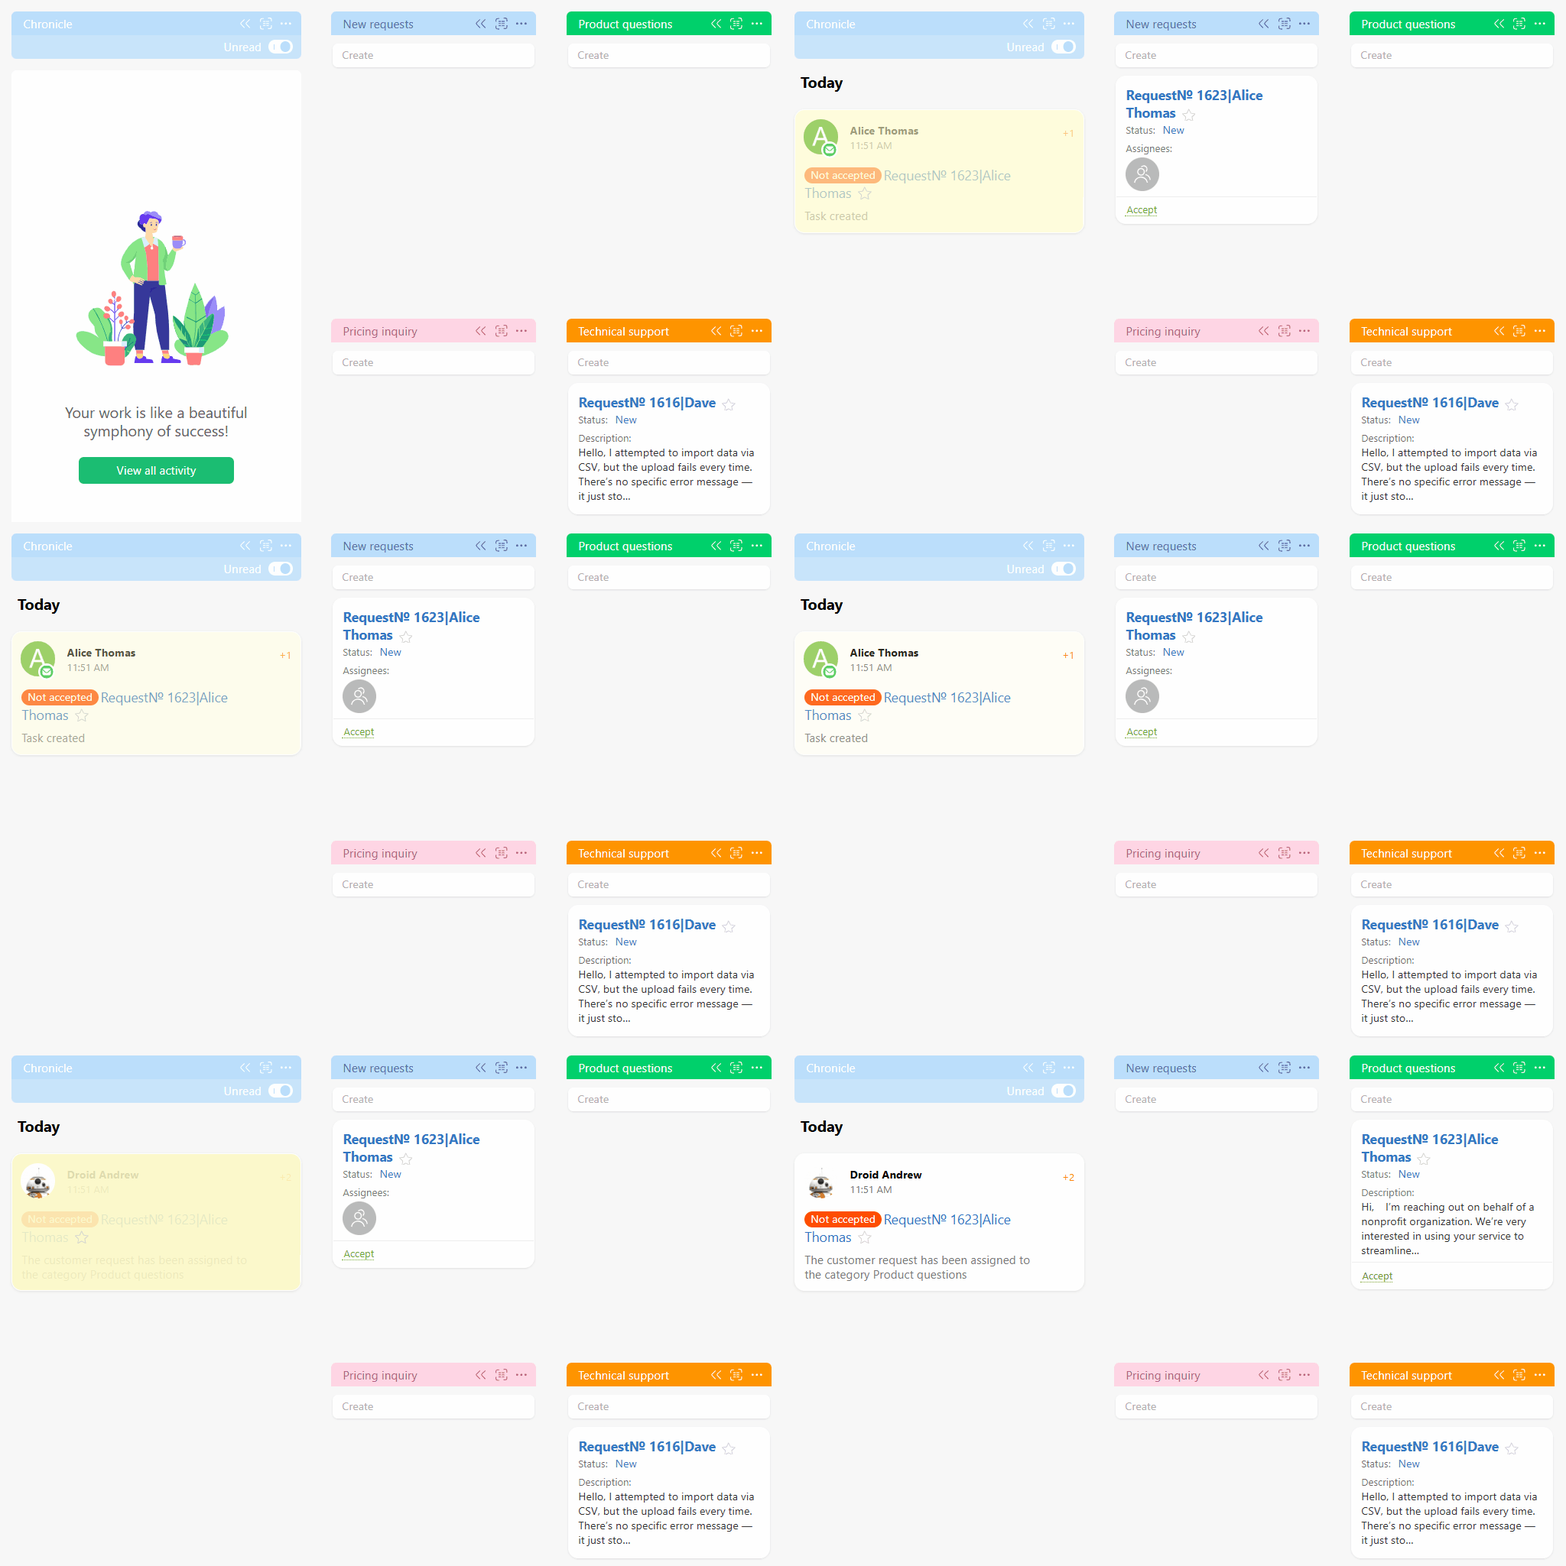
What Else Can You Automate with Planfix AI?
Sorting incoming messages is just the start. With Planfix, you can easily automate what happens next, like routing tasks to the right people based on topic or sending instant replies using prewritten prompts.
And even that is just scratching the surface.
Planfix AI can handle almost any text-based process that usually eats up way too much time. Here are just some of the most common automation solutions:
- Automatically tagging tasks or contacts by type.
- Detecting tone in messages between customers and support.
- Rewriting or translating content.
- Suggesting next steps to employees and checking tasks against internal scripts.
It’s more than just an automation of customer service or CRM automation – it’s a full system for managing incoming information. So, why not let Planfix AI handle the busy work, transforming customer experience with AI and automation, allowing your team to focus on real problem-solving?

