We get asked often how to set up a work calendar in Planfix that shows employees’ vacation days, sick days, and other time off. Today’s case will be useful both for those who want this type of calendar and for those who would like a demonstration of a general approach to solving business tasks using Planfix.

Let’s find out which Planfix tools and features can be used to set up a work calendar in your company.
The Task at Hand
Our input data will be the following:
- employees enter data about requested vacation days or time off (including personal days)
- managers should be able to view this data in a calendar, broken out by employee, to get an idea of who will be available when.
Implementing the Workflow
We’ll need:
- A project, which all of these tasks will be a part of. Let’s call it “Work calendar.” You shouldn’t need any additional information to create the project.
- The “Time off” task template. We suggest optimizing it a bit by removing the extra fields.
We’ll also add a custom field to the template, called “Personal.” This is used so you can exclude personal time from an employee’s paid time.
Now, when an employee needs to take time off, they can:
— create a task using the “Time off” template
— give the task a descriptive name, such as “Vacation,” “Time off,” “Sick day,” etc.
— as needed, specify that this time off is a personal day
Work Calendar
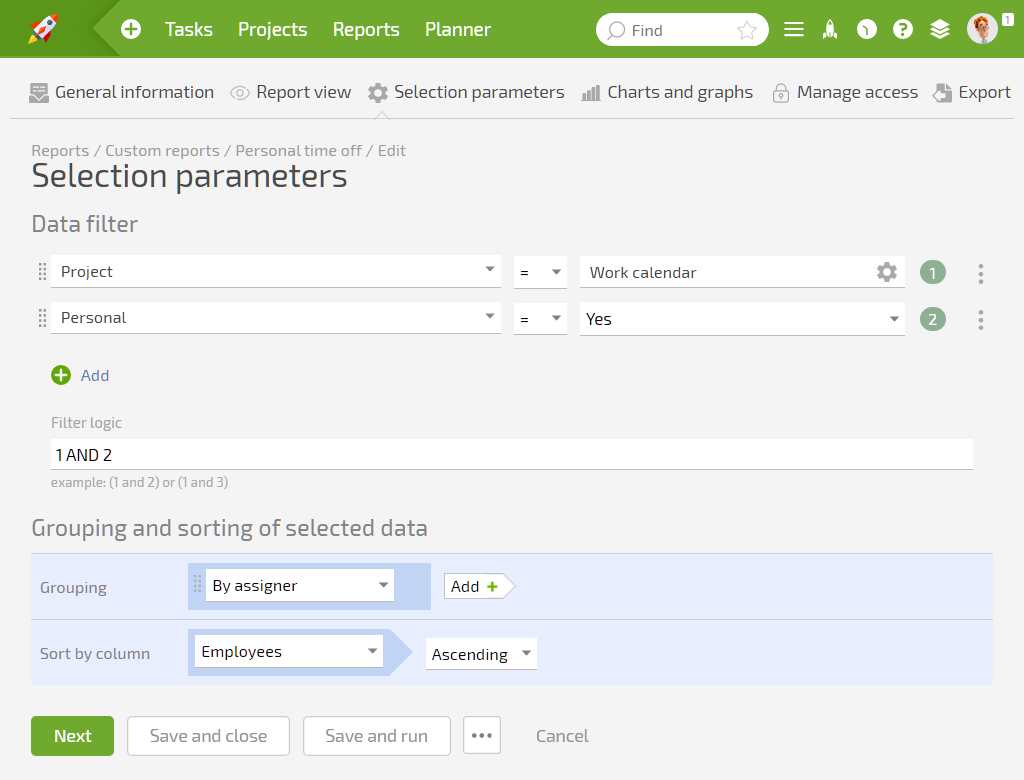
We’ll also need a filter for the tasks in the project that managers can use to view where their team members have run off to. Here are the filter parameters:
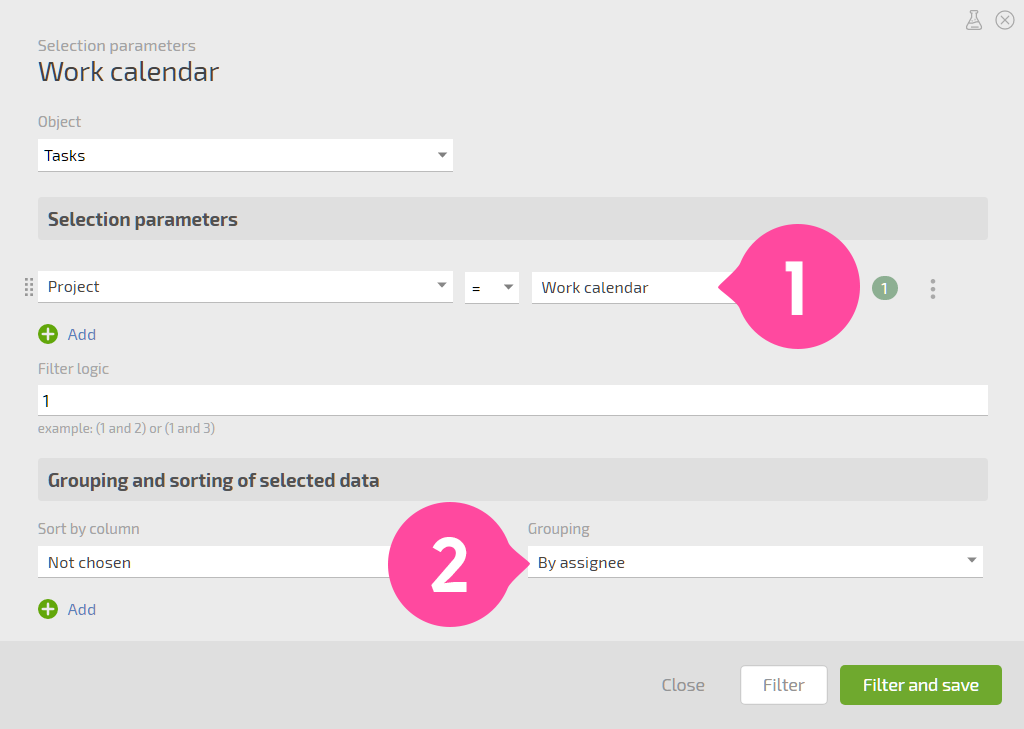
As you can see, we’re just selecting tasks from the “Work calendar” task and grouping them by assigner. Because each employee creates their own tasks for their time off, tasks in the list (and on the calendar) can be grouped by employee.
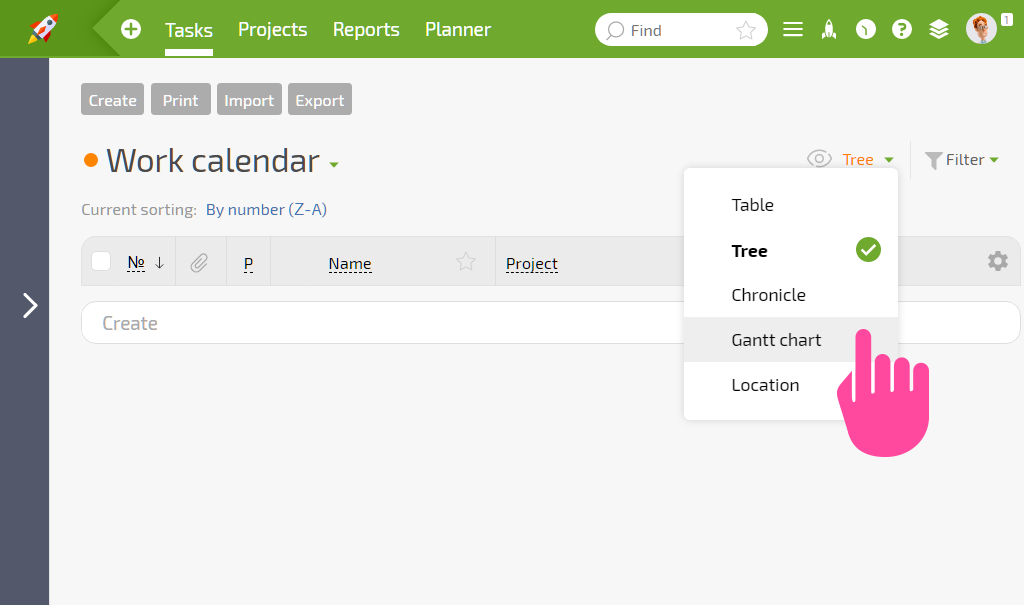
For convenience, we select “Gantt chart” as the display type:
And then we get a time-off graphic:
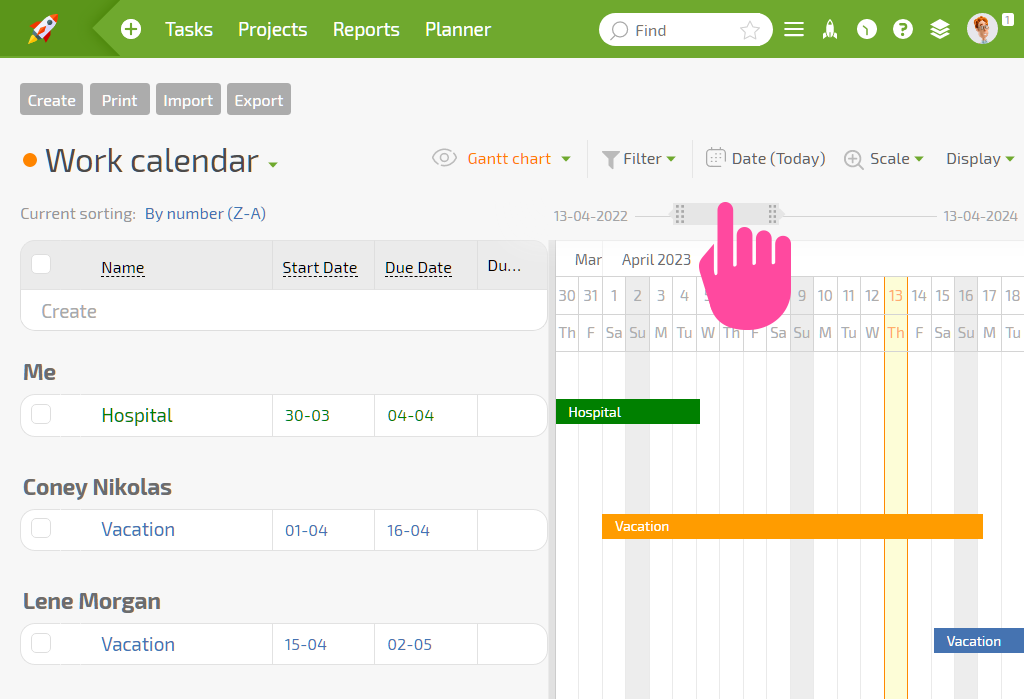
As you can see, this is a great visual. You can change the calendar from an hourly to a monthly view, and you can move through the calendar using the slider, so you shouldn’t have any trouble viewing the chart at any level of detail you need.
Personal Days
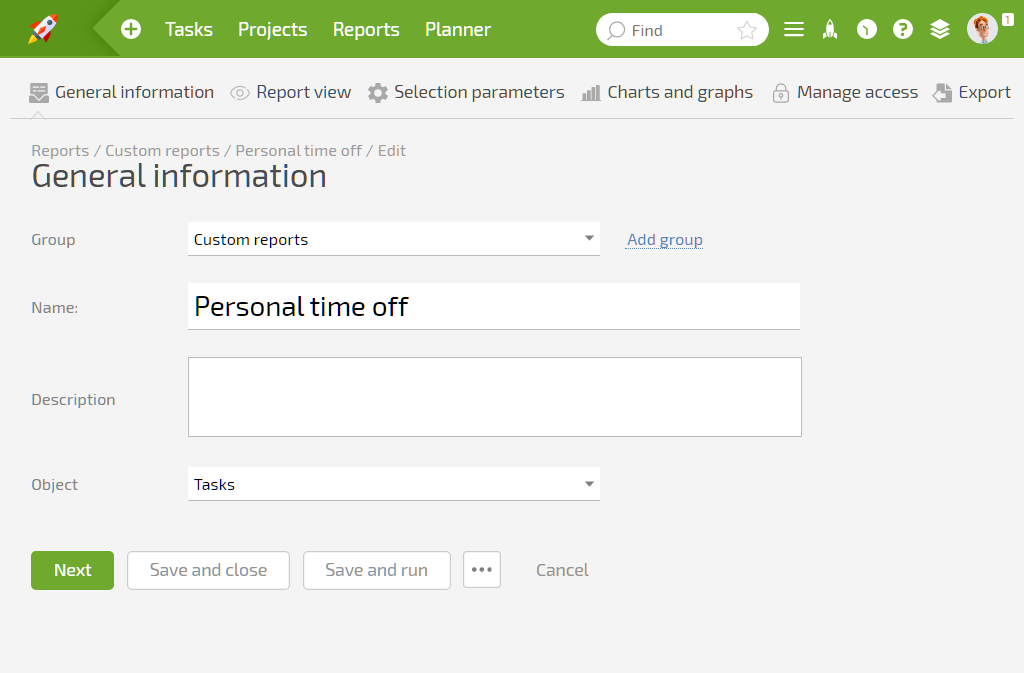
Now let’s create a report called “Personal time off.” This report will show us which employees are using personal time in a given time frame, and how much time they’re using. Here are screenshots of how to set this up:
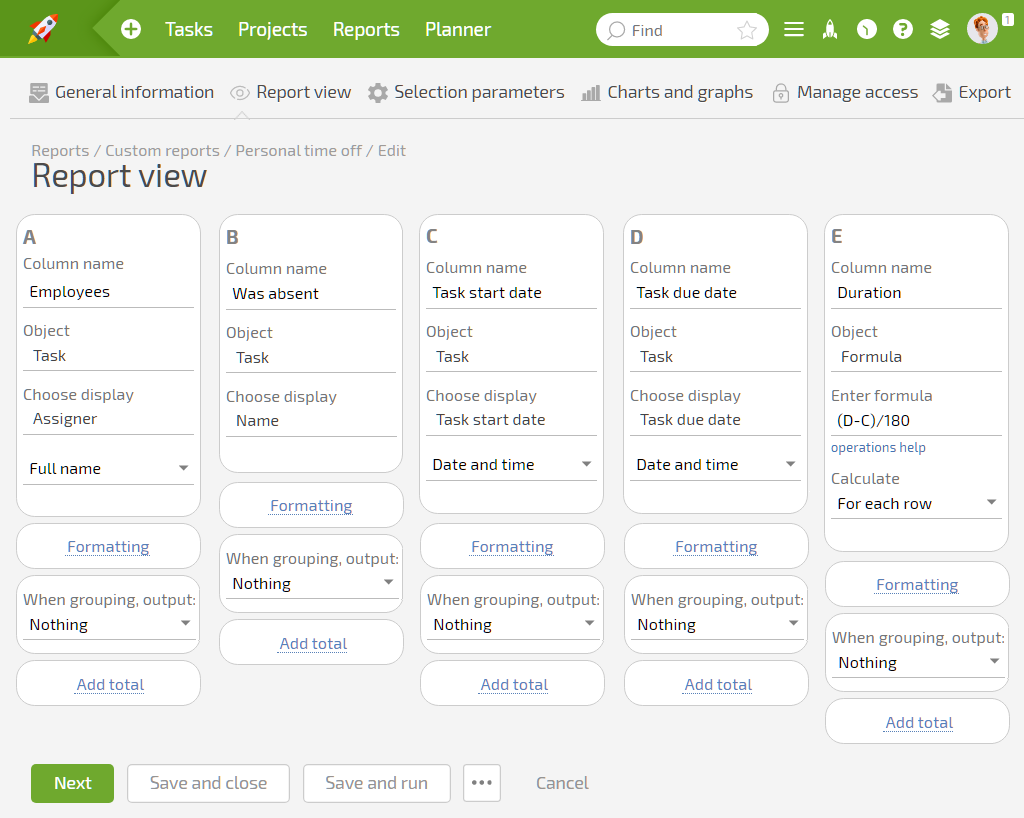
Here’s how the final report looks:
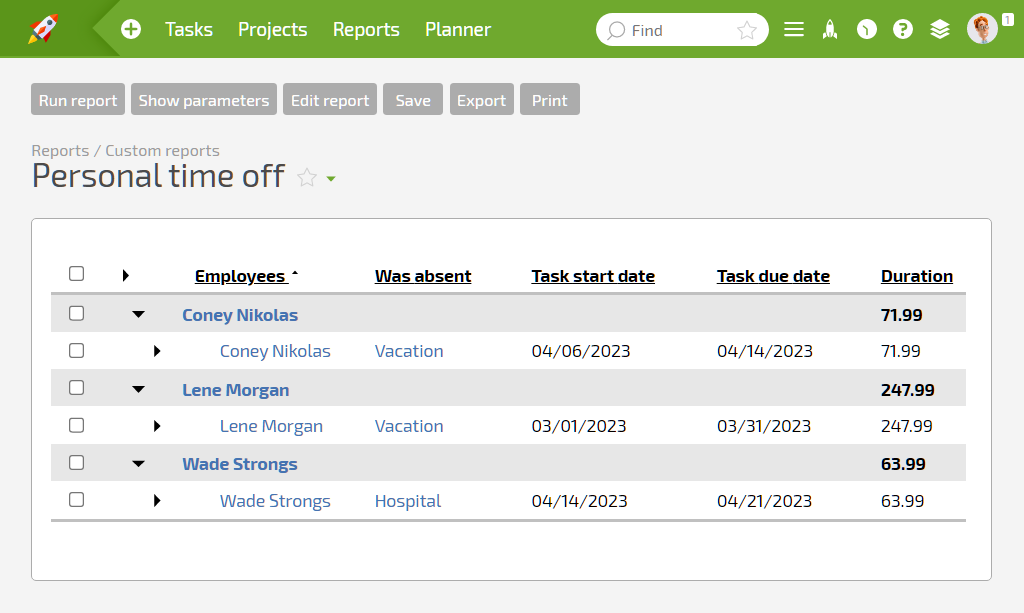
This information can be used for time-management purposes or for determining deductions when Calculating time off in hours instead of dayspaycheck amounts.
With this view, our work calendar is ready to be used, even if all you create is a time-off chart. But if you’re interested in using these tools further, let’s take a look at some additional conditions and scenarios.
Additional Scenarios
Calculating Time off in Hours Instead of Days
You won’t need to change anything here; your employees will just need to specify start and end times for their time off instead of dates. Everything else will work the same: the chart will show who will be out when, or is planning to be out, and the report will be able to isolate personal time off.
Sharing the Chart with Other Employees
Since each instance of time off is a task, simply make these tasks visible to the desired employees. The simplest way to do this is to add them as participants, and you can do this in the “Time off” template (Edit/Participants/Specify/Save).
You can add groups here as well as individual employees. For example, if you create a task using a template that specifies as a participant a group containing every employee in your account, then everyone will have access to this task and will be able to see it in their work calendar. Here, letting everyone view all tasks is useful.
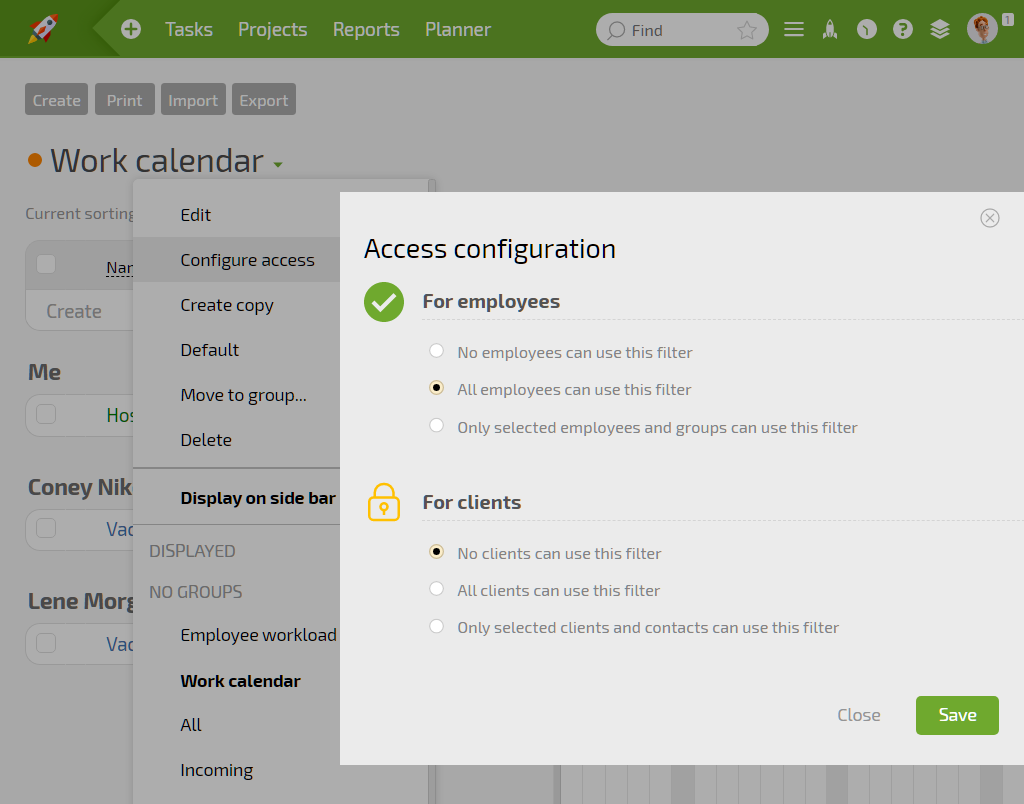
You’ll need to grant employees access to the filter we configured, “Work calendar,” so that they can view it:
Vacation and Time off that Need Approval
How can you set up a workflow for approving time off? Like this:
- add a field called “Assignee” to the template (it’s usually there, but we removed it earlier for optimization purposes)
- provide the manager’s name in this field (if a different individual approves time off, put their name here)
Now, time off tasks will automatically be sent to the requester’s manager for approval. Simple approval can look like this: the manager sees the time-off request and can accept the task (meaning they approve) or decline it (meaning they don’t approve and can write a comment explaining why).
A more complex option would be to create a special status set for time off, which would include a custom status called “Approved.” Edit the “Time off” template and change the status set from the standard one to the custom one we created. Then, tasks created using this template will have the new status set. When this approach is used, managers won’t approve time off by accepting tasks, but by changing them to this new “Approved” status.
For both options, you’ll need to add an additional condition in the “Work calendar” filter and in the “Personal days” report that excludes unapproved time off requests.
If Managers or HR Enter Time off for Employees
Let’s add a field called “Employee” to our template and use it to add the employee who is planning time off. This lets managers enter information without even adding the requester to the task. When doing so, you’ll also need to reconfigure the filter and report a bit. Instead of the assigner or assignee, the conditions should group by the “Employee” field.
But if your situation is more complicated and you’re still not sure how to implement employee work schedules in Planfix, write to our tech support and we’ll help you get your workflows set up.