Have you ever found yourself desperately needing information, only to find it buried in a million Slack messages, outdated Google Docs, or — worst of all— in the brain of someone who’s just gone on vacation? Yes, we’ve all been there.
Big or small, every company accumulates its own labyrinth of information at some point. The challenge lies in organizing it so it doesn’t disappear into the abyss of forgotten files. That’s where Planfix’s Knowledge Base comes into play. Think of it as a super-organized digital librarian who never takes a coffee break.
In this guide, I’ll show you how to set up a Knowledge Base using Planfix Objects. After all, if there’s a better way to do something, why not use it?
The Old Approach vs. the New Approach
Planfix offers two distinct ways to build your Knowledge Base. And while it’s true that some folks still swear by Directories, let’s be honest—objects are way more powerful. Here’s a quick comparison.
Search
Nobody has time for endless scrolling. Using Objects, you can instantly track an article using filters liketitle, creation date, or author
With Directories, you have to manually navigate to the Knowledge Base section and pray that your keyword search works.
Discussions
If your Knowledge Base works with objects, each article or employees manual functions as a task. This allows you to comment, ask questions, and directly discuss topics with your colleagues within the article itself
With directories, there is no integrated comment function. So, if you want to discuss something, you need to create a completely separate task. How annoying is that?
Automation
You can use objects to easily automate repetitive tasks. Want an automatic notification when an article is updated? Done. Need workflows that are triggered whenever someone adds new information? Easy-peasy.
With directories, the capacity of automation is much more limited. Even basic automation requires additional tasks, which is not ideal. NOTE: If you still prefer to use Directories, we’ve covered that setup here: Organize a Knowledge Base in Planfix.
As you can see, objects offer more flexibility, automation, and fewer headaches when managing your Knowledge Base. That’s why we strongly recommend that you use Objects in Planfix.
And if you love a one-click setup, you can install the “Company knowledge base” solution and get it over with.
Just check out Planfix help for installation instructions. However, if you’re a customization nerd like me, I recommend you create it manually.
Step-by-Step Knowledge Base Setup
When it comes to setting up your Knowledge Base, we’ve come up with a handy game plan:
- Create an Object called Knowledge Base.
- Set up fields within the Object.
- Set the default view to the Task description.
- Define statuses for articles (Active, Archived, etc.).
- Create a project to store all Knowledge Base articles.
Now that you understand the steps, let’s dive into the details.
Creating & Configuring the Object
A flexible Object equals a Knowledge Base that adapts to your business. And as you’ve probably guessed, the object setup is key to making this work smoothly.
What Is an Object in Planfix?
Think of each Object as the digital twin of a real thing. That thing might be a task, a meeting, a project, or, in our case, a Knowledge Base article.
Setting Up the Object
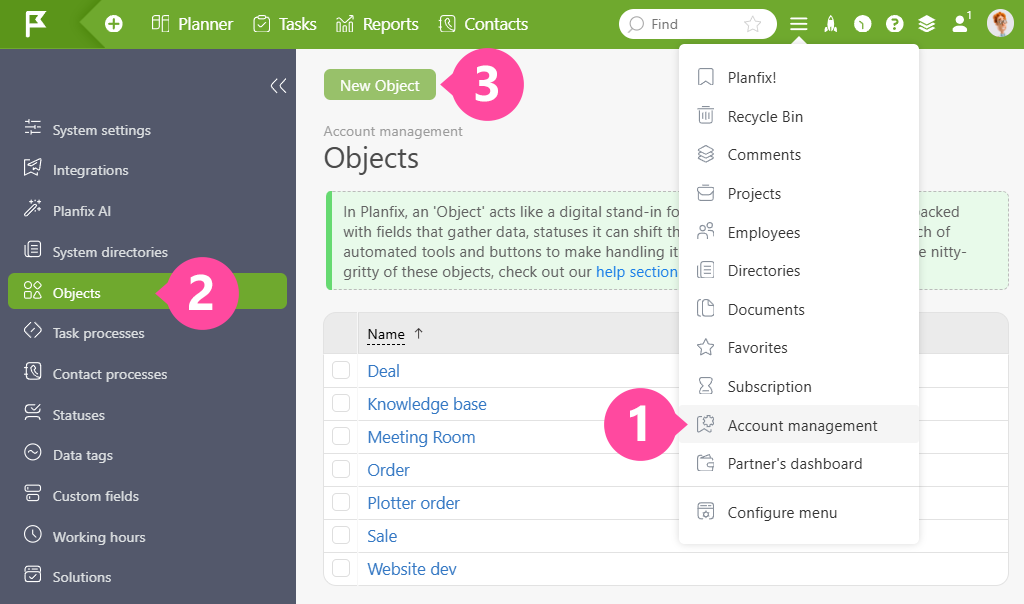
To set up an object, simply navigate to Account Management → Objects → New Object.
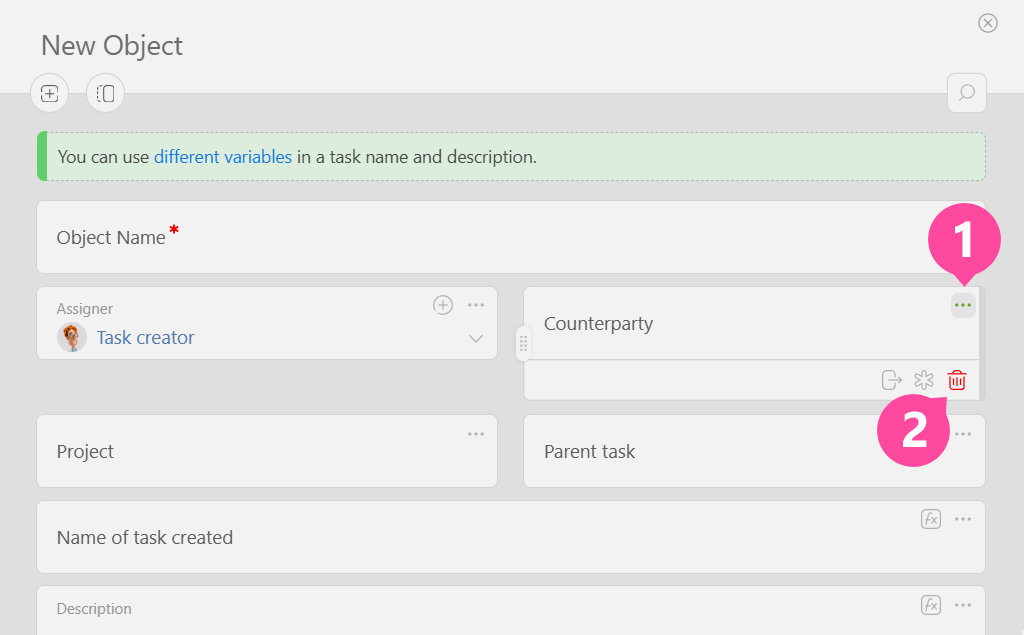
Once inside the Object settings, simply delete fields you don’t need.
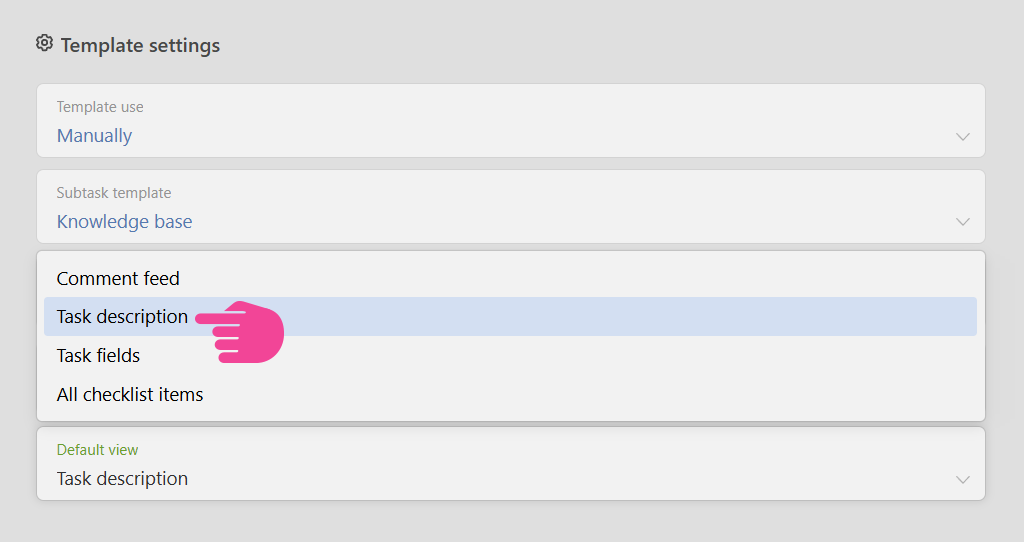
Next, set “Task description” as the default view so articles load correctly.
Now all that’s left is to hit Save and celebrate.
Configuring Statuses
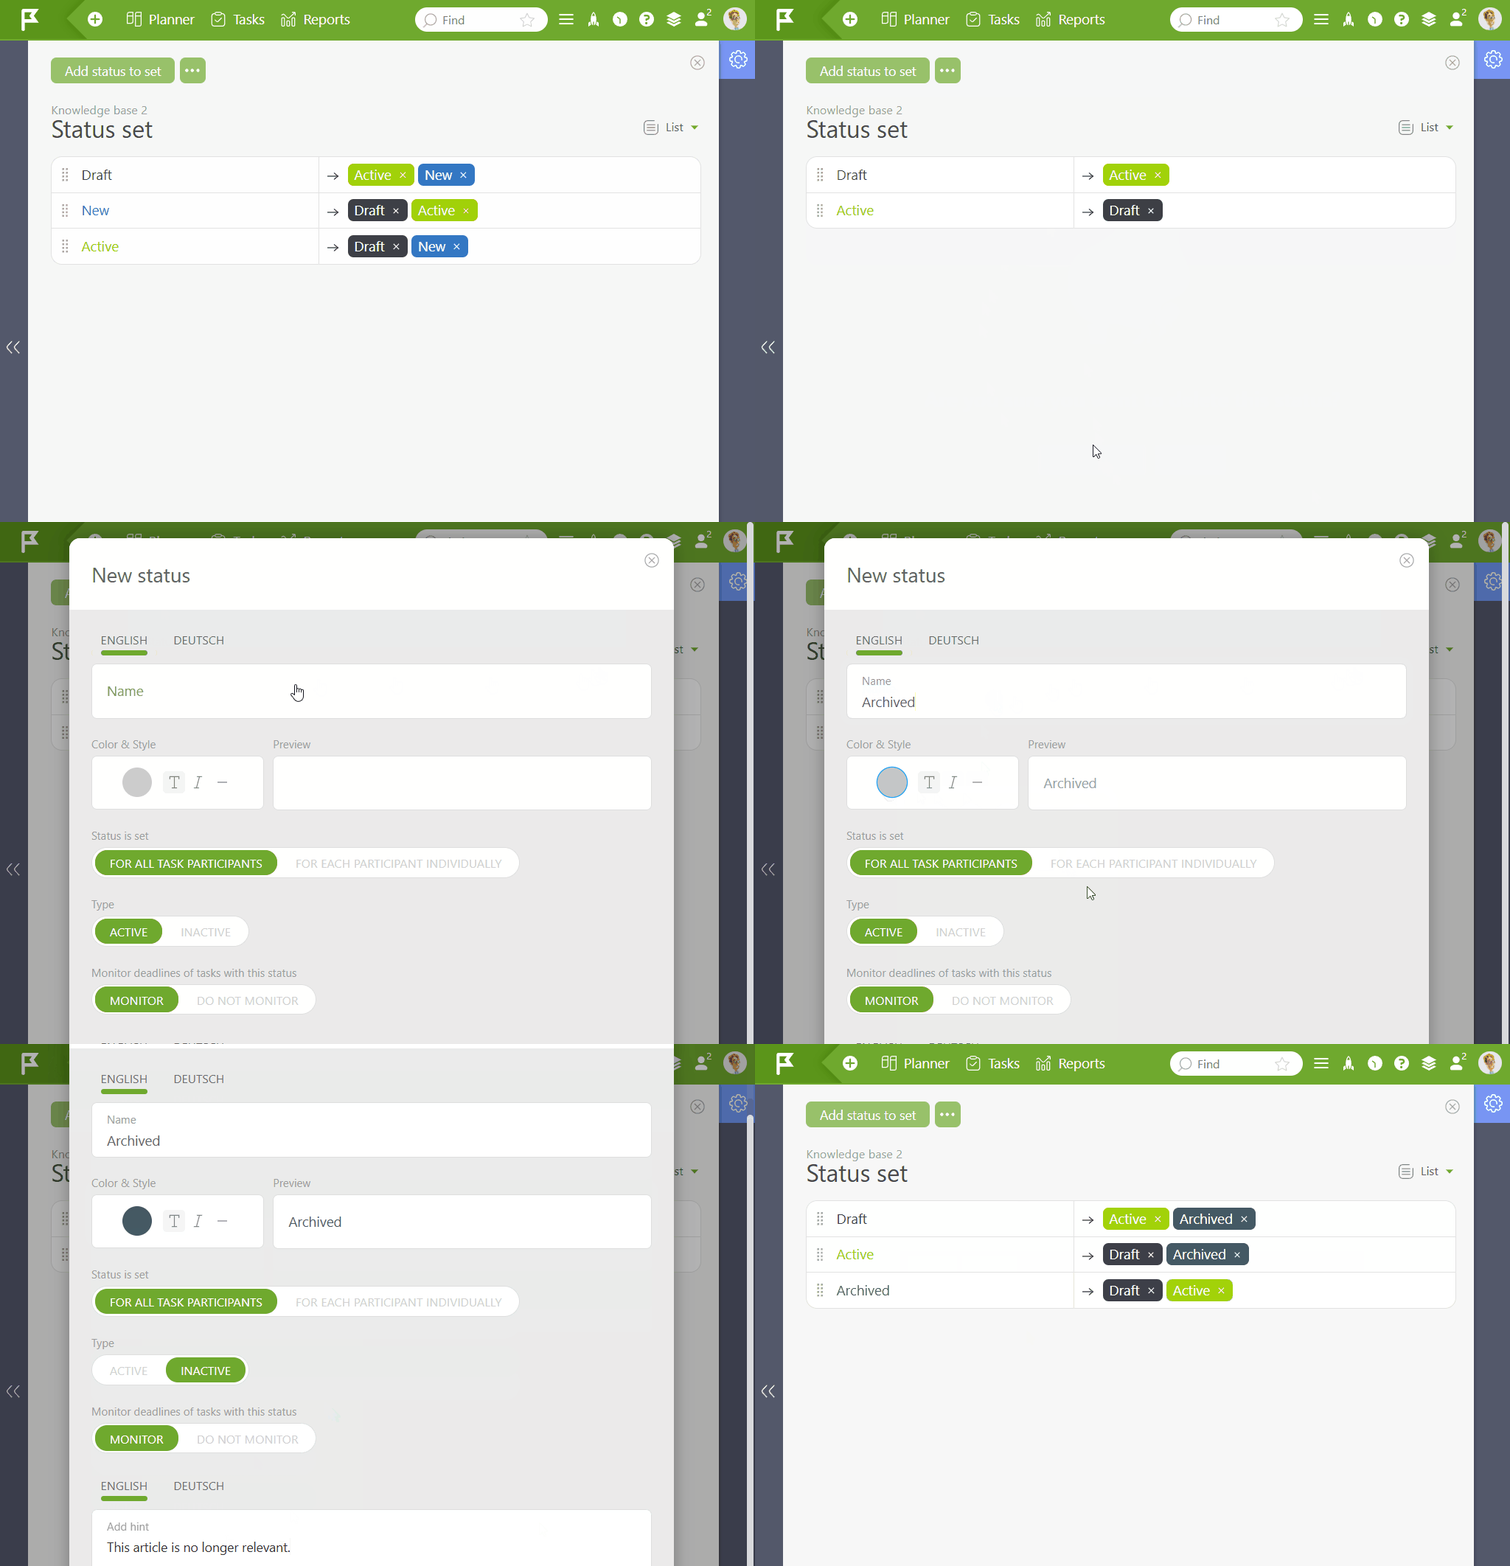
A good Knowledge Base has a clear status. Without it, you’ll quickly find yourself back in the labyrinth again. We recommend two simple statuses:
- Active for those articles currently in use.
- Archived for those outdated articles you don’t want to delete.
So just remove any unnecessary statuses and add new ones.
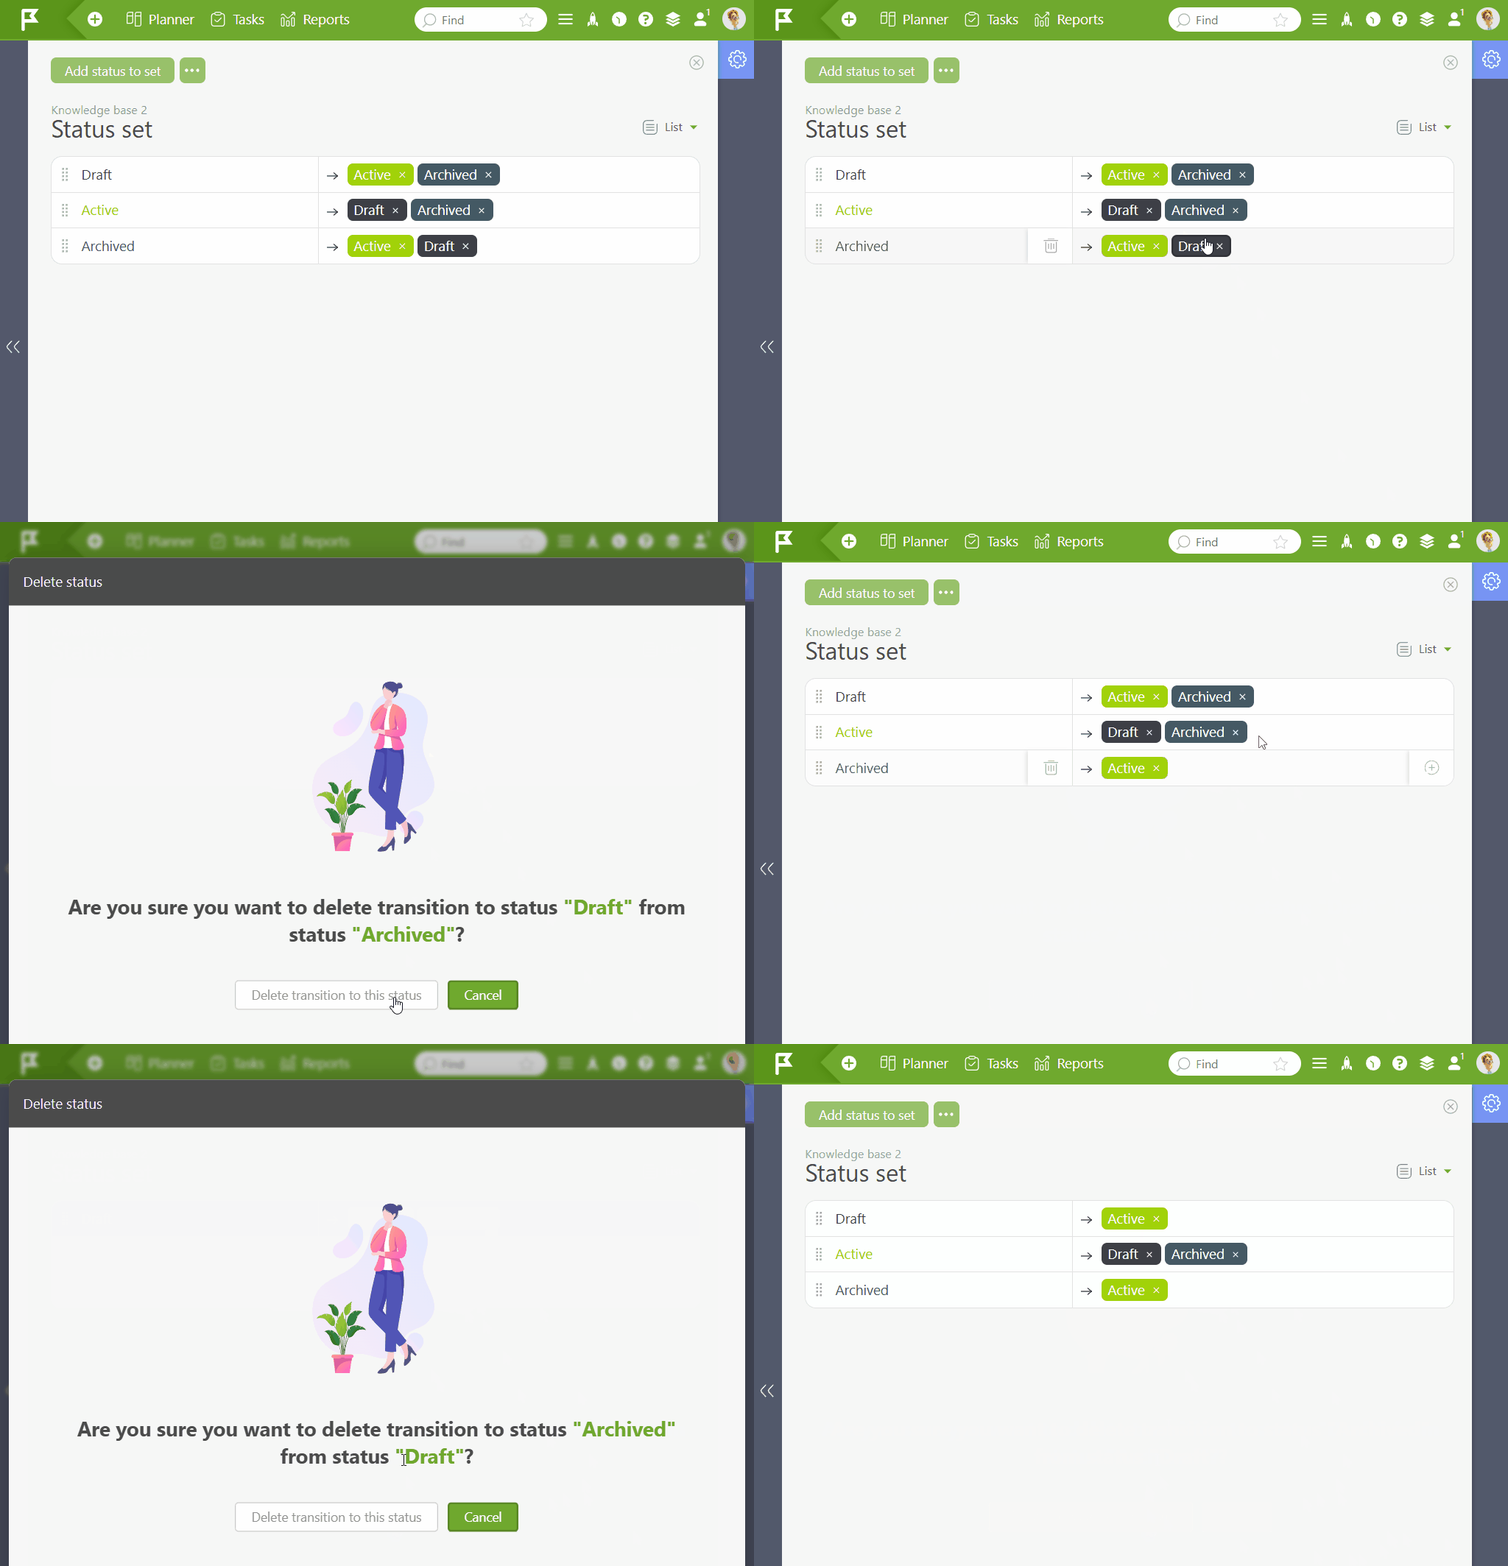
And don’t forget to delete any unwanted status transitions.
Setting Up a Project
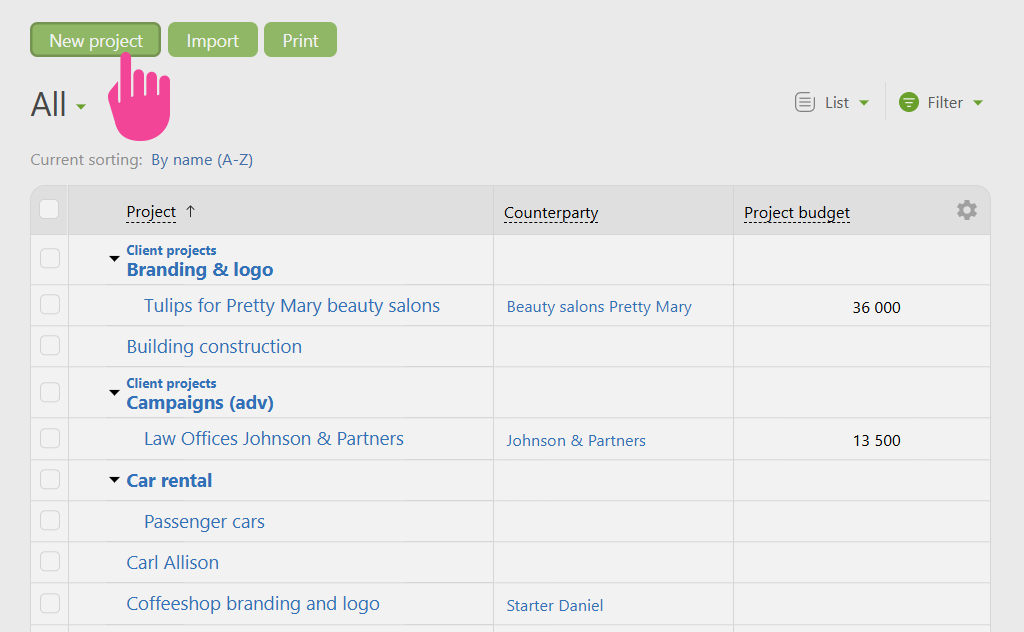
Your Knowledge Base needs a home — so let’s create a project to store all the articles.
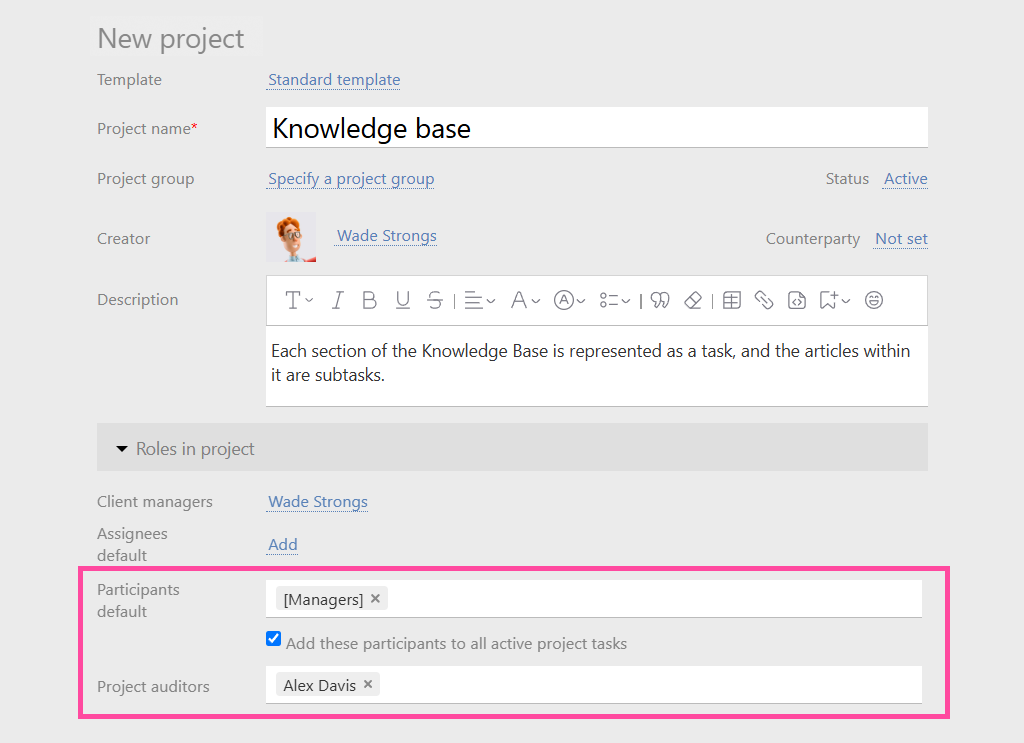
In this case, the default fields will work fine. However, user roles need to be set carefully so that you can control access.
- View articles → Participant
- Edit articles → Auditor
You can easily assign these roles in the Project Roles section.
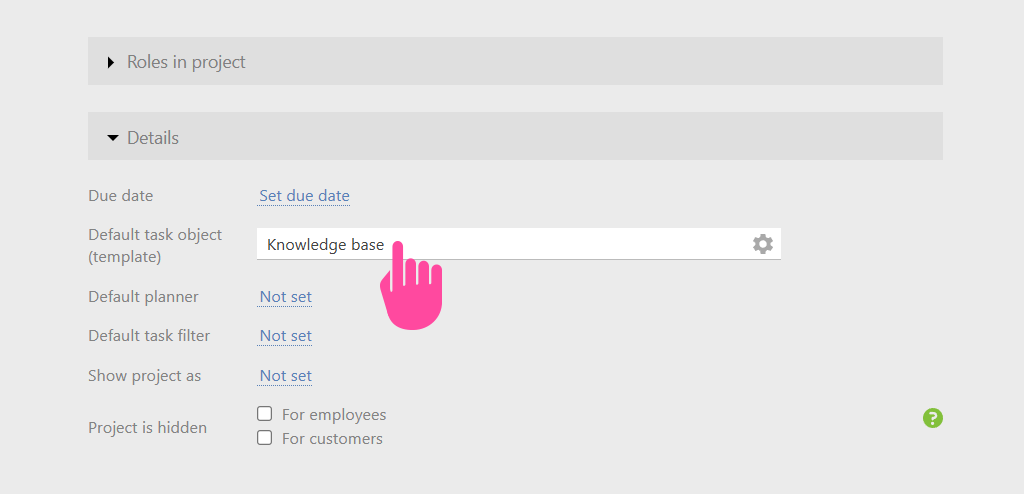
To make sure all articles are created under the correct Object, make sure you set “Knowledge Base” as the default task object in the Details section.
Structuring the Knowledge Base
Here’s the basic structure:
- Project → This is the foundation of the Knowledge Base, and can be added to the menu.
- Sections → These are for the big categories (like “User guides”).
- Subtasks → These are your individual articles.
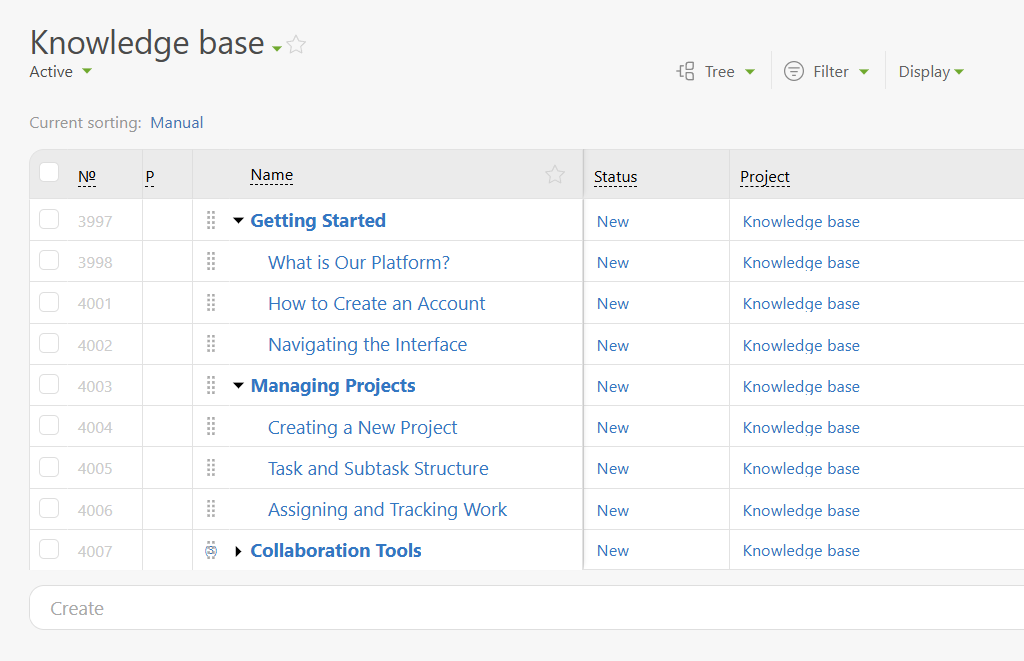
Here’s an example:
- User Guide (Section)
- How to Create an Account (Article)
Tips for Making Your Knowledge Base Awesome
Quick Access: Add It to the Menu
Don’t bury your Knowledge Base deep in your settings. Instead, add it to the main menu for easy access. To do this, simply go to Account Management → Workspaces, then edit an existing workspace or create a new one.
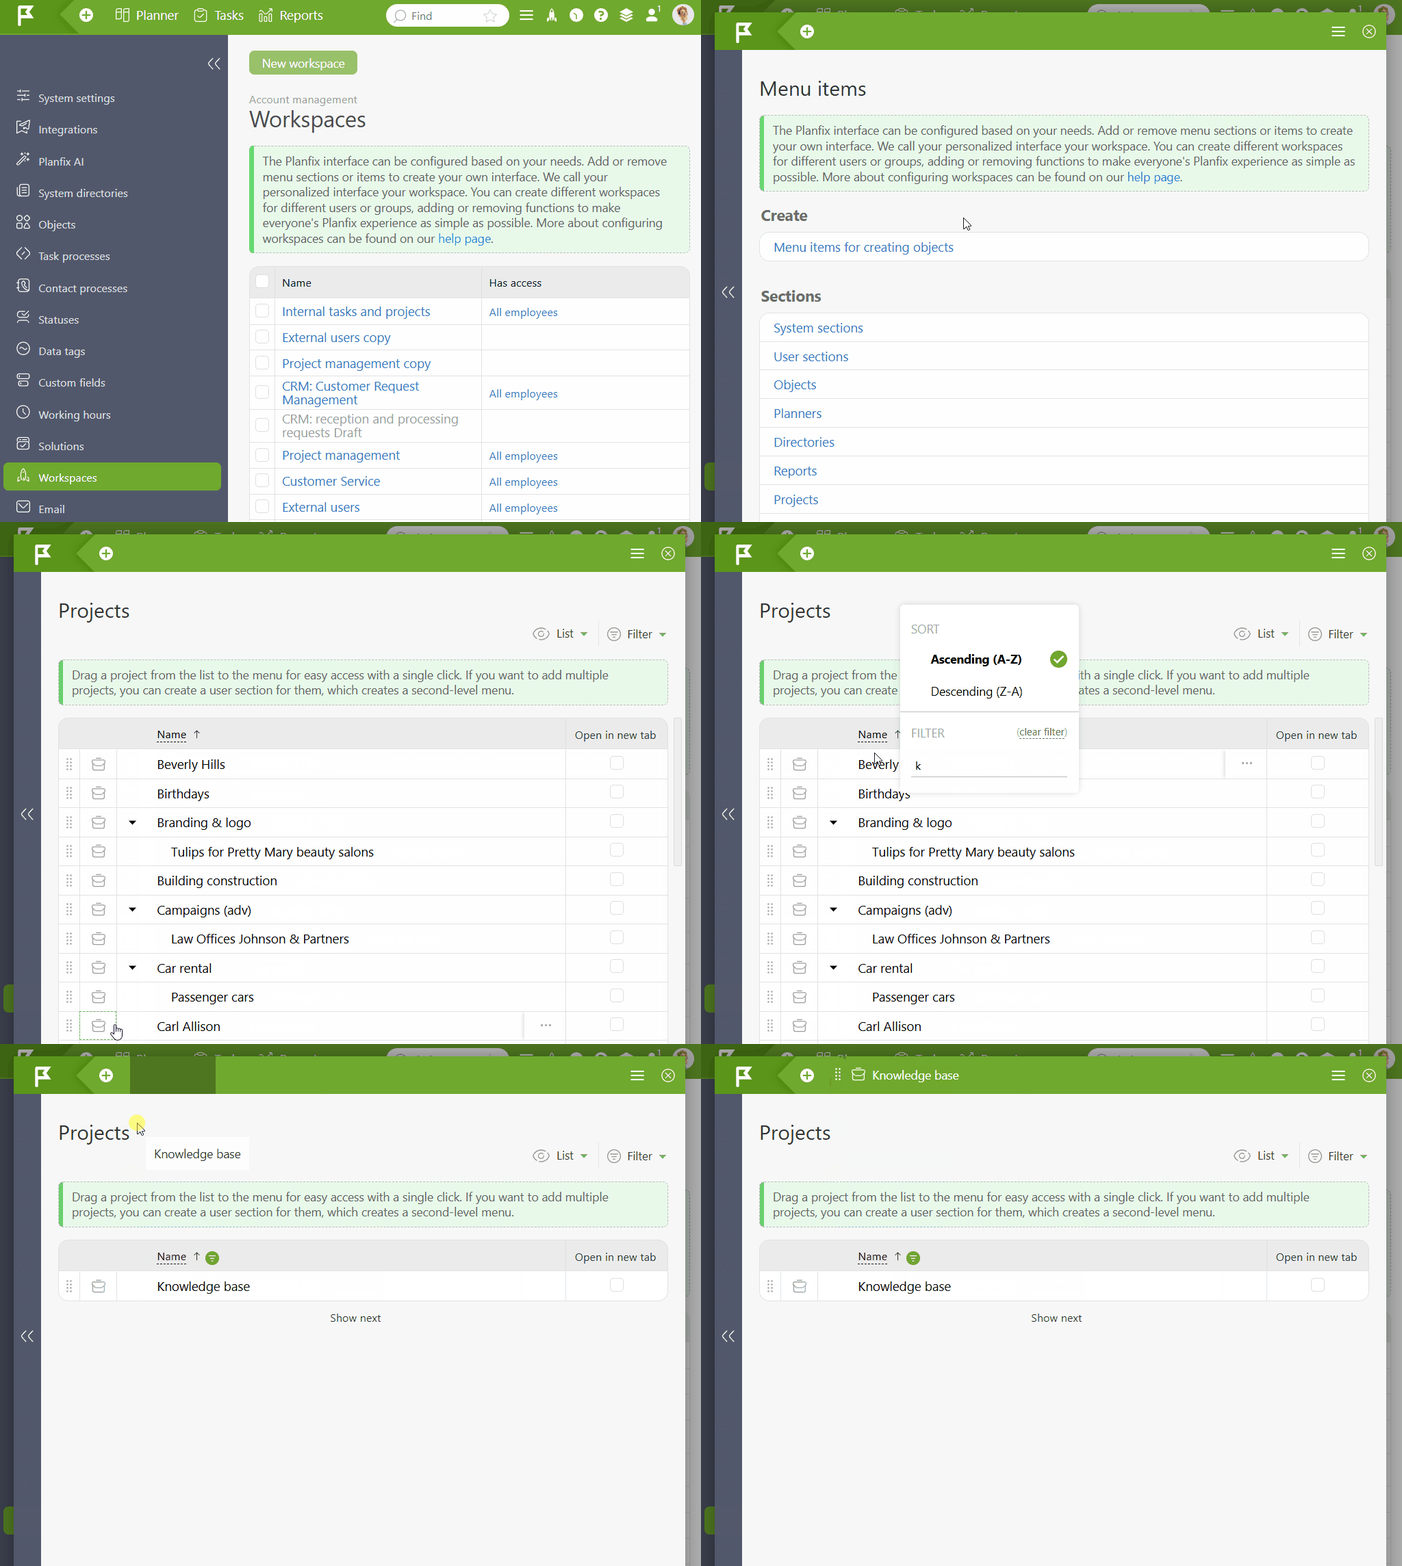
Here, you can see the result.
Organizing Content
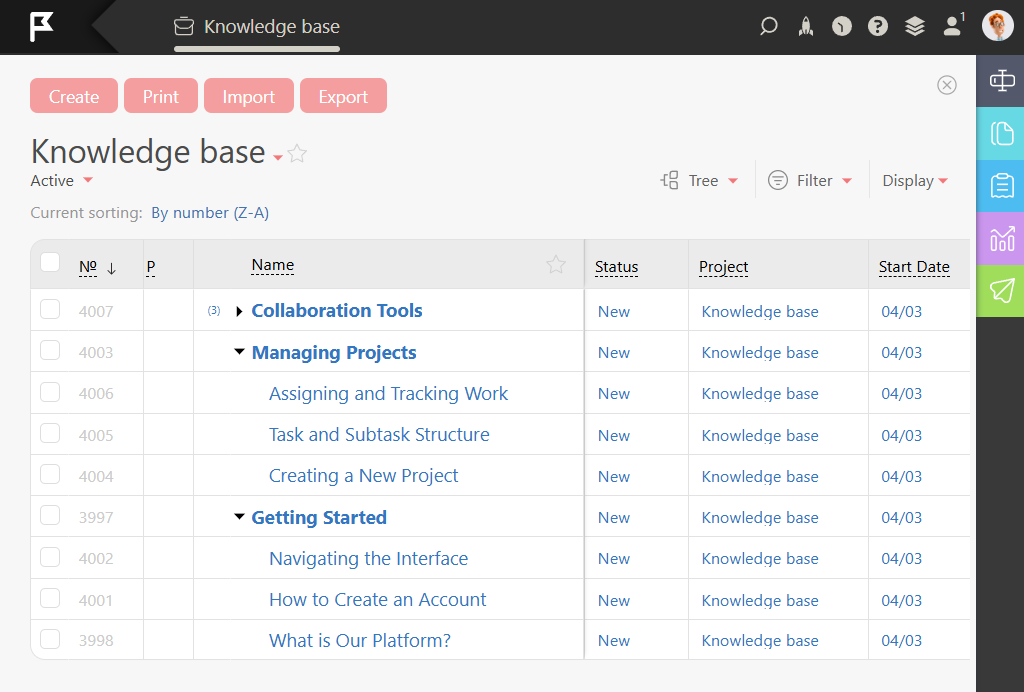
Add an article or employees manual as a subtask under a relevant Knowledge Base section to create a clear and intuitive hierarchy.
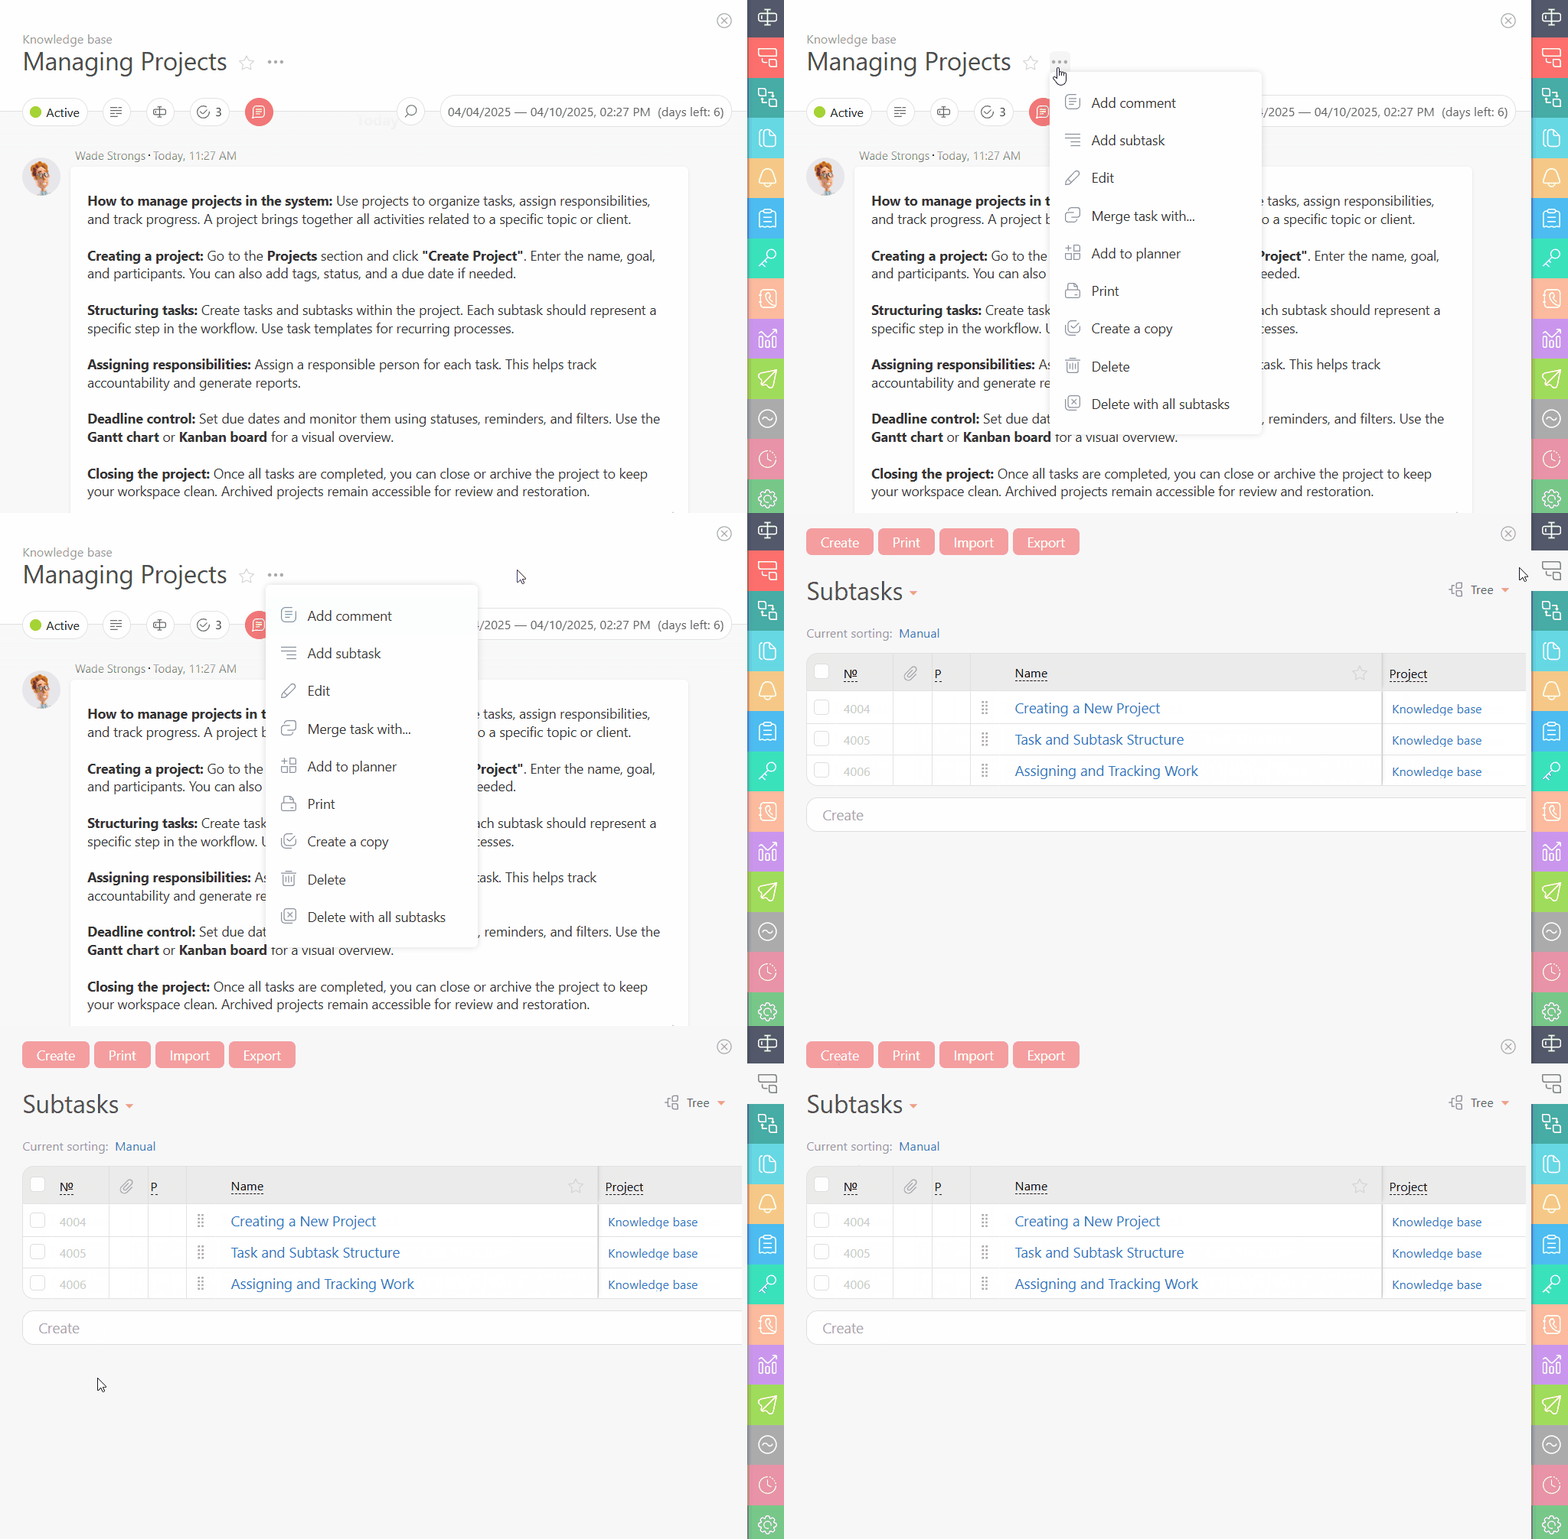
This makes searching and navigating the Knowledge Base much faster and far more efficient.
Internal Links
You can also insert links to related articles directly into the descriptions. This way, when you click on the link, the article will open within the same tab.
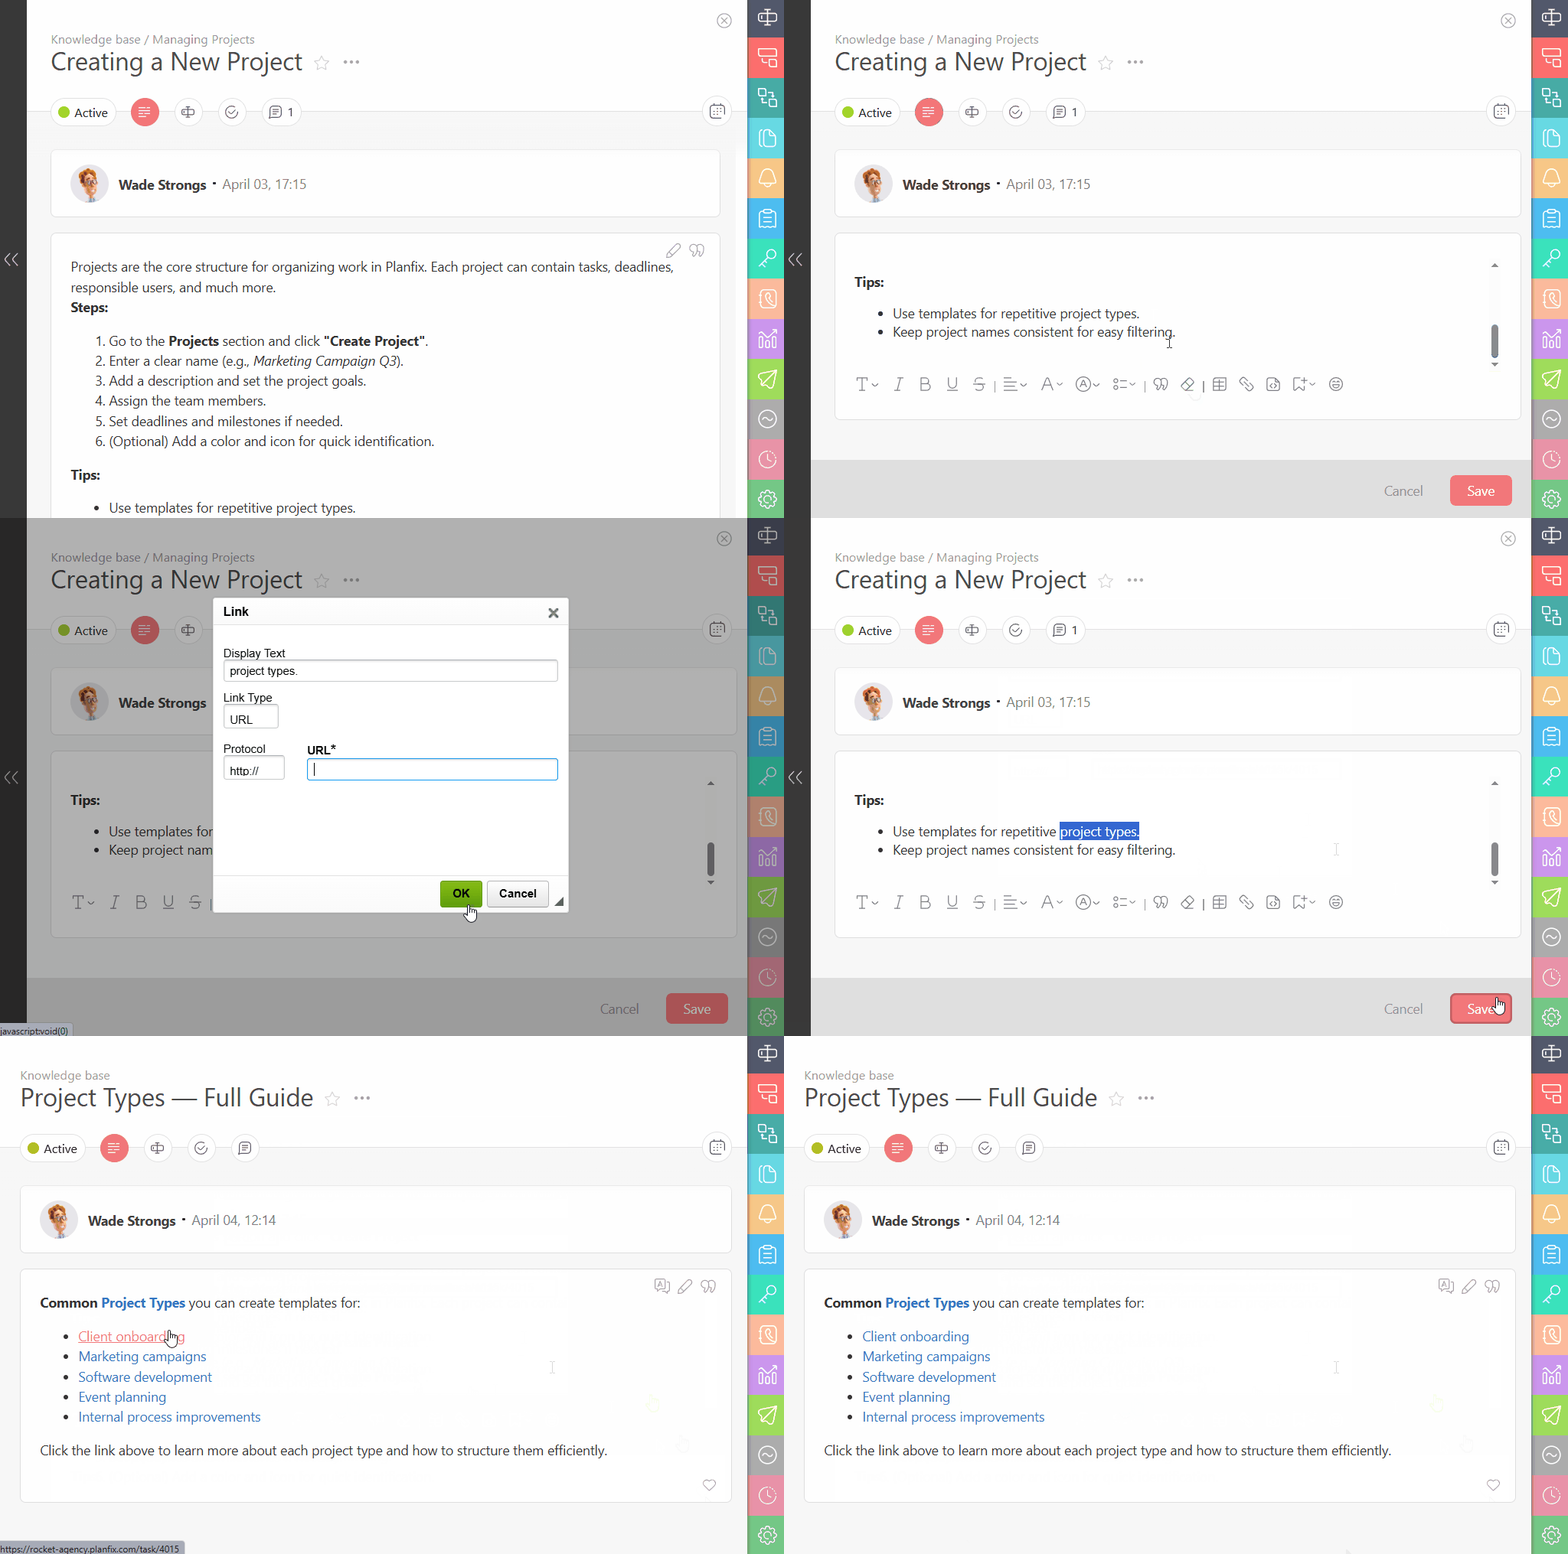
Pro tip: You can link to an article even if it is in draft mode, but only you and the technical administrator can see it.
While in the description, you can also:
- Paste images directly using CTRL + V.
- Create structured content by typing /.
Key Takeaways, or “Why This ROCKS”
Now that you understand the purpose and the process, let’s summarize the benefits and key takeaways. With a Planfix Knowledge Base, you get…
- One-click access from the main menu.
- Organized structure. Articles, employees manuals are grouped into sections, similar to dedicated Knowledge Base platforms.
- Customizable views. You can use subtasks for a tree-like structure.
- Super-fast search with filters.
- Role-based access control.
- Easy editing — just click and update.
- Internal linking. In fact, you can link to other articles directly in the text.
- Extensive formatting. This allows you to add toad images, tables, and lists.
Final Thoughts
Planfix is not a dedicated Knowledge Base platform, and we don’t claim to be. However, we do offer a solid, user-friendly solution that can integrate seamlessly with tasks, projects, and CRM—all in one place.
The best part? We’re making it even better. Future updates will also enable video embedding and maybe even AI-powered article suggestions.
So, set up your Knowledge Base, try it out, and tell us your thoughts. We’d love to hear your feedback!

