Open spaces have replaced traditional offices, but the need for private conversations remains. Today, meeting rooms have become the focal point of offices. We first described a resource management case involving meeting room bookings almost ten years ago and have since updated it.
We’ve decided to compare two planner lists: Schedule Hourly and Hourly Calendar. Both tools allow you to set up flexible meeting room bookings. However, they present the time data tag differently. We will show you the differences so that you can choose the most convenient option. The booking principle remains the same: first come, first served.
Setting Up Meeting Room Booking
The setup involves several steps, including creating the meeting room object and adding data tags for booking. Let’s examine these steps in detail.
Setting Up the Meeting Room Object
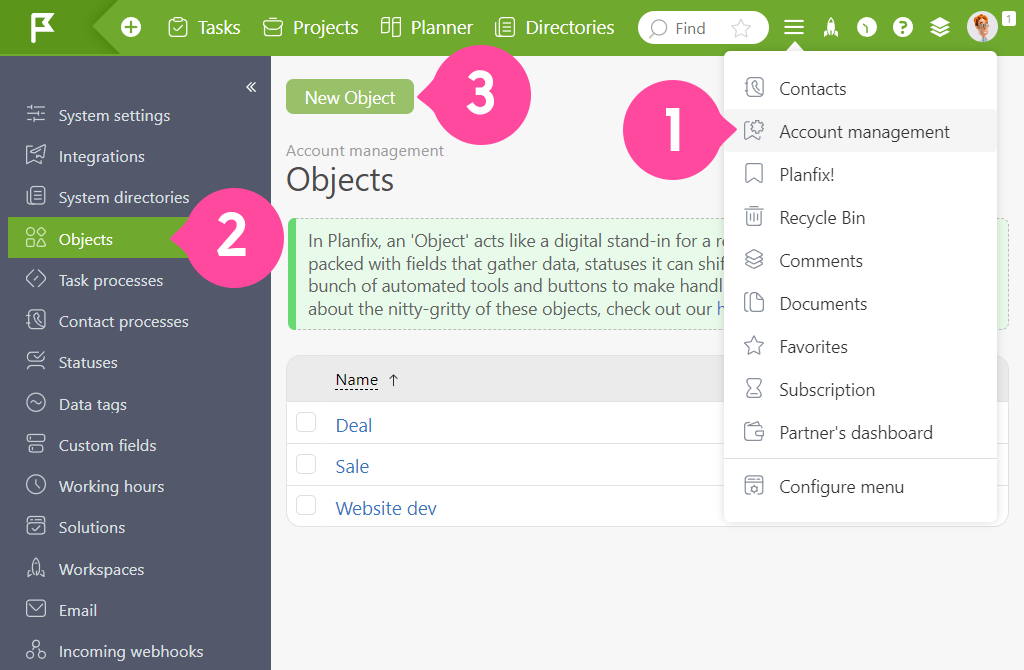
Let’s digitize the meeting room management. First, we create a “Meeting room” object in Planfix. Go to Account Management — Objects — Create new object:
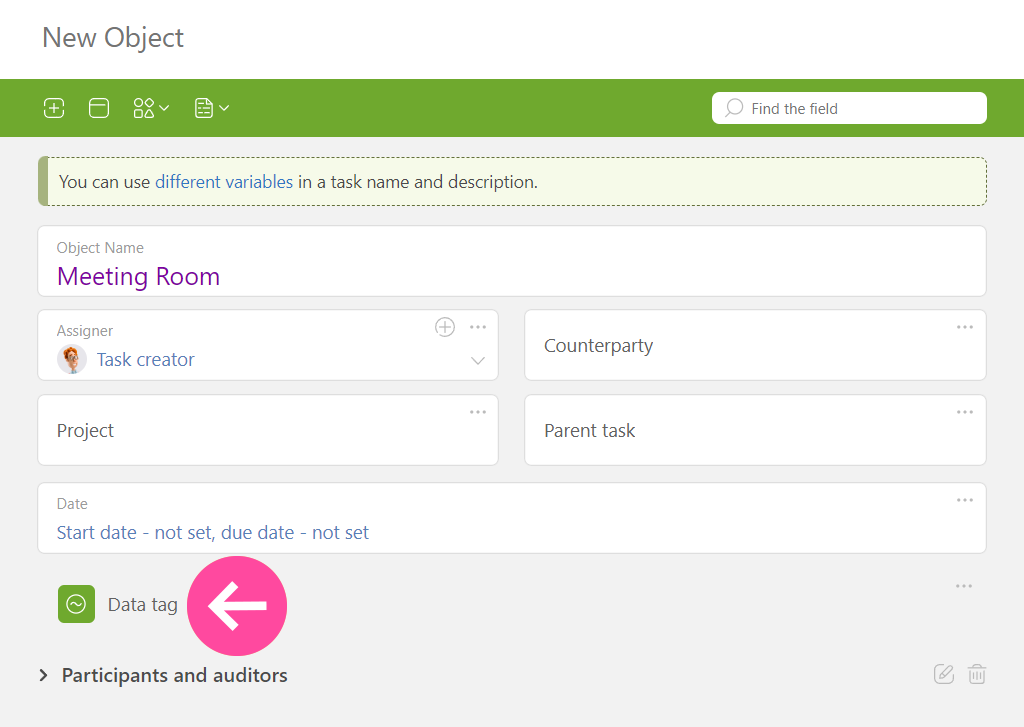
Be sure to add a “Data tag” field to the object to link it to tasks automatically in the future. You can customize other fields as needed:
As soon as you digitize the meeting room, proceed to other settings.
If you haven’t worked with objects before and want to learn more about what they are and how they work, check out this article:
Objects: The Universal Planfix Unit
After reading this material, you will understand the basic principles of objects and know how to configure them flexibly in Planfix according to your needs.
Setting Up Data Tags
We will create separate data tags for the meeting room booking to work with the hourly calendar and schedule. Go to Account Management — Data Tags — Add Data Tag. Note that you need two fields in the data tags: “Date” and “Period of Time:”
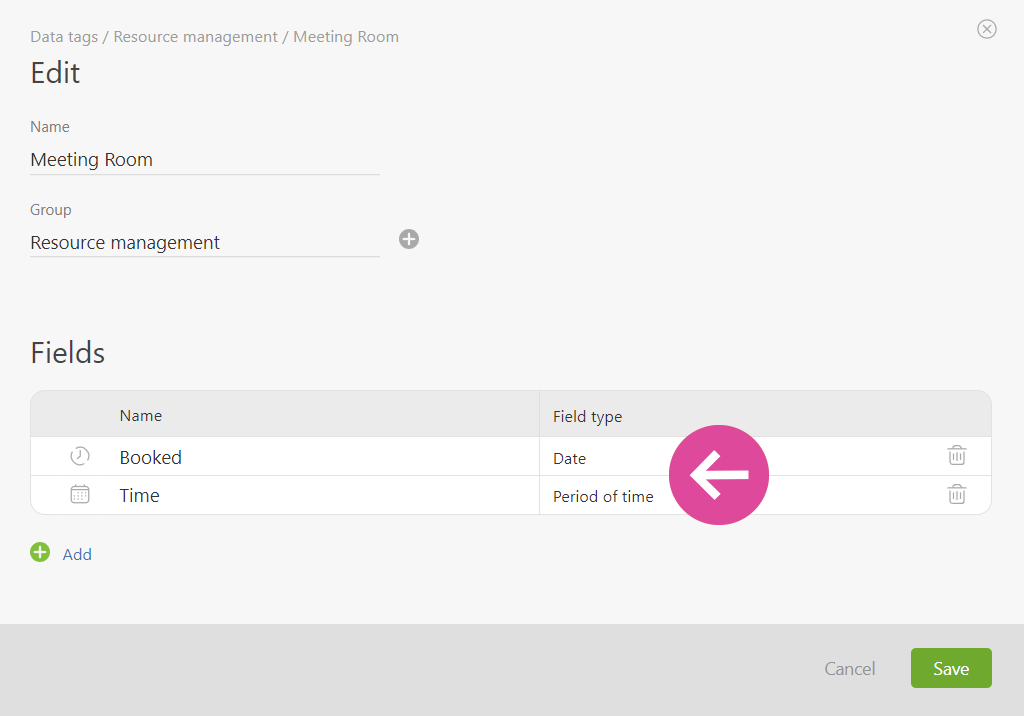
At this stage, you can add other fields, such as “Comment,” so employees can comment on the agreements.
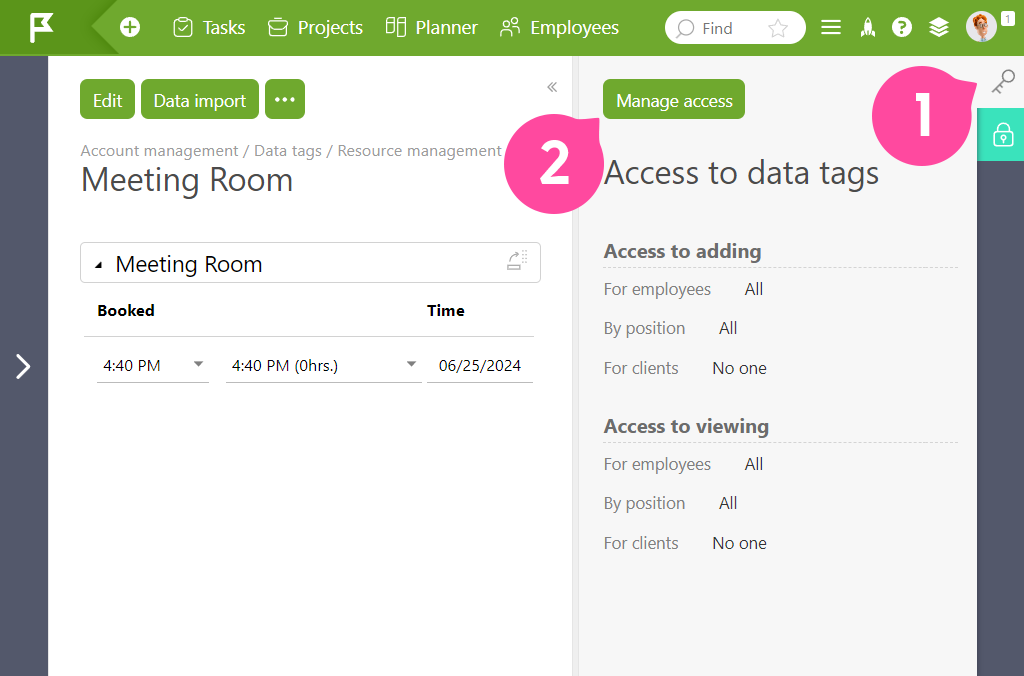
If only certain employees or departments are to use the “Meeting room” data tag, it makes sense to set access permissions exclusively for them:
Setting Up the Booking of Meeting Rooms with the Hourly Calendar
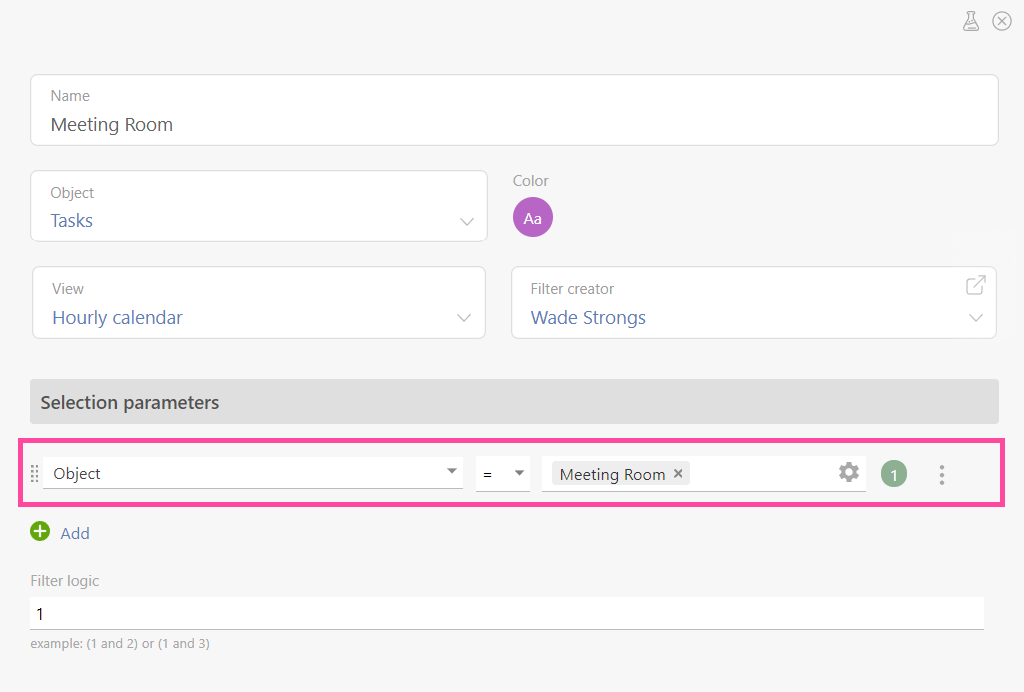
After you have created the analytics, set up the list where it will be displayed. Add an “Hourly calendar” planner with the descriptive name — “Meeting room.” Then specify the previously created object “Meeting room” in the selection parameters:
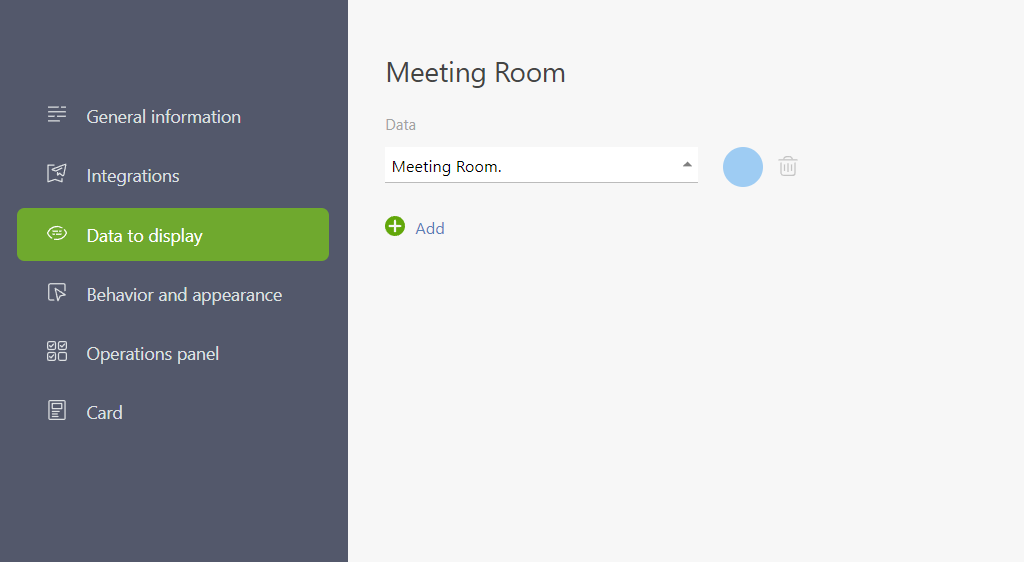
Next, switch to the “Data to display” tab and enter the previously created data tag “Meeting room”:
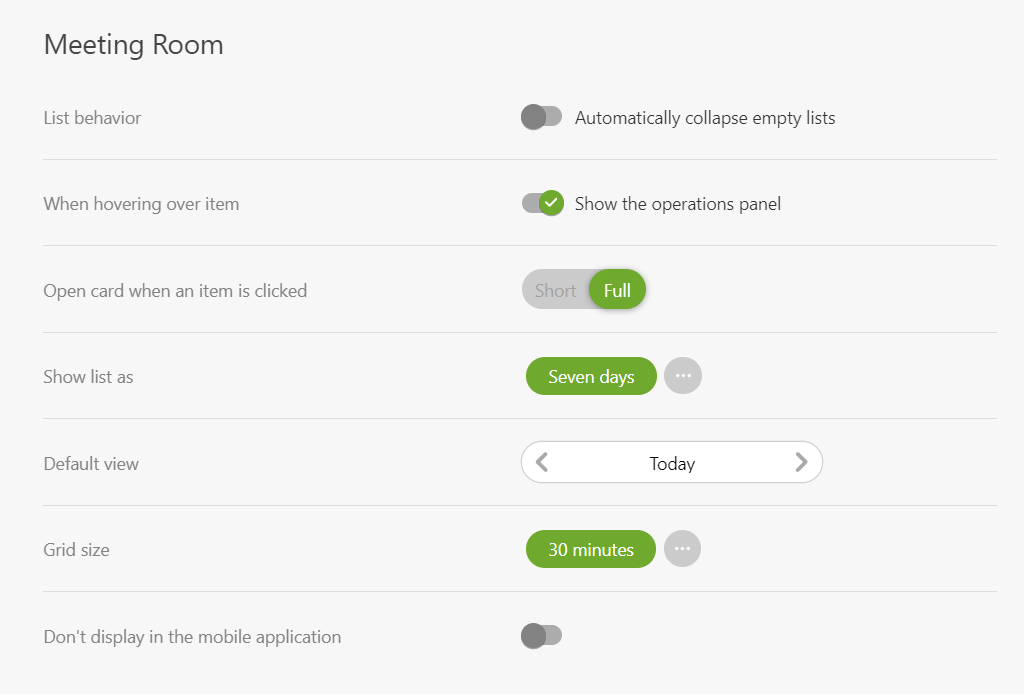
Then continue with the configuration of “Behavior and appearance”:
The result is an hourly calendar where data tags are set by clicking on a free time slot in the calendar or simply dragging the desired task to the timescale:
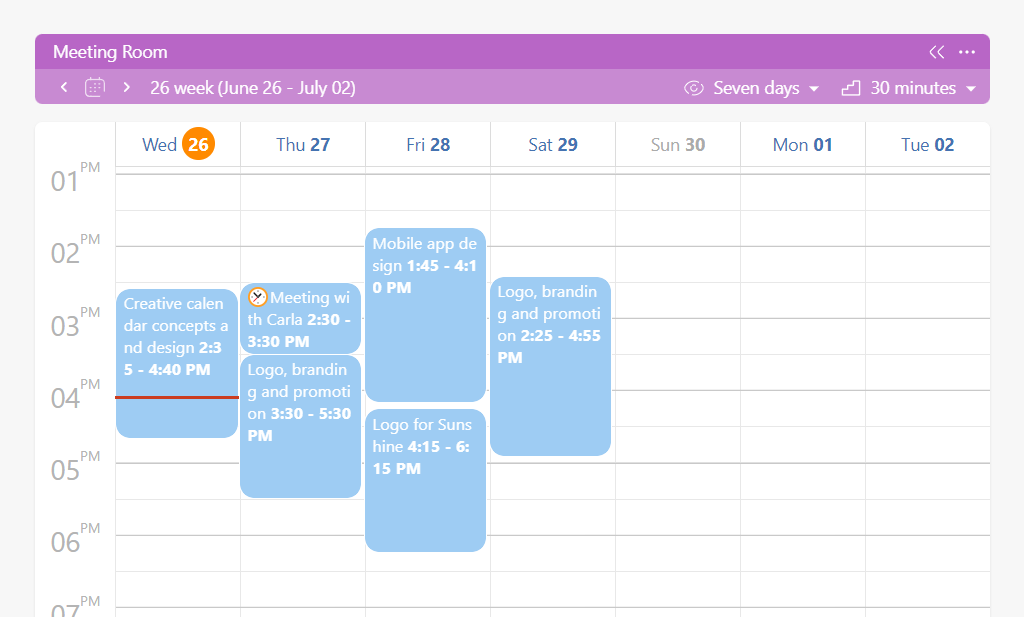
The “Meeting room” data tags are set automatically in such tasks.
Setting Up Meeting Room Booking with the Hourly Schedule
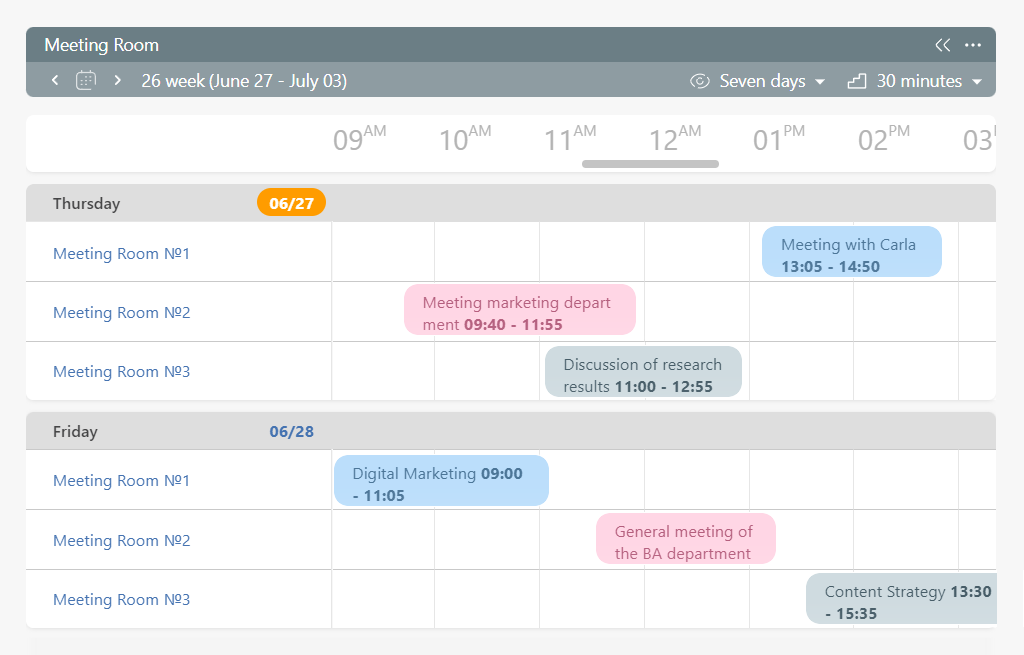
Now, let’s set up meeting room booking using the hourly schedule. Unlike the calendar, it displays the time data tags in several lines, allowing you to display data simultaneously for several employees or, in our example, for several meeting rooms.
Open the previously created “Meeting room” object and add a “List” field to it:
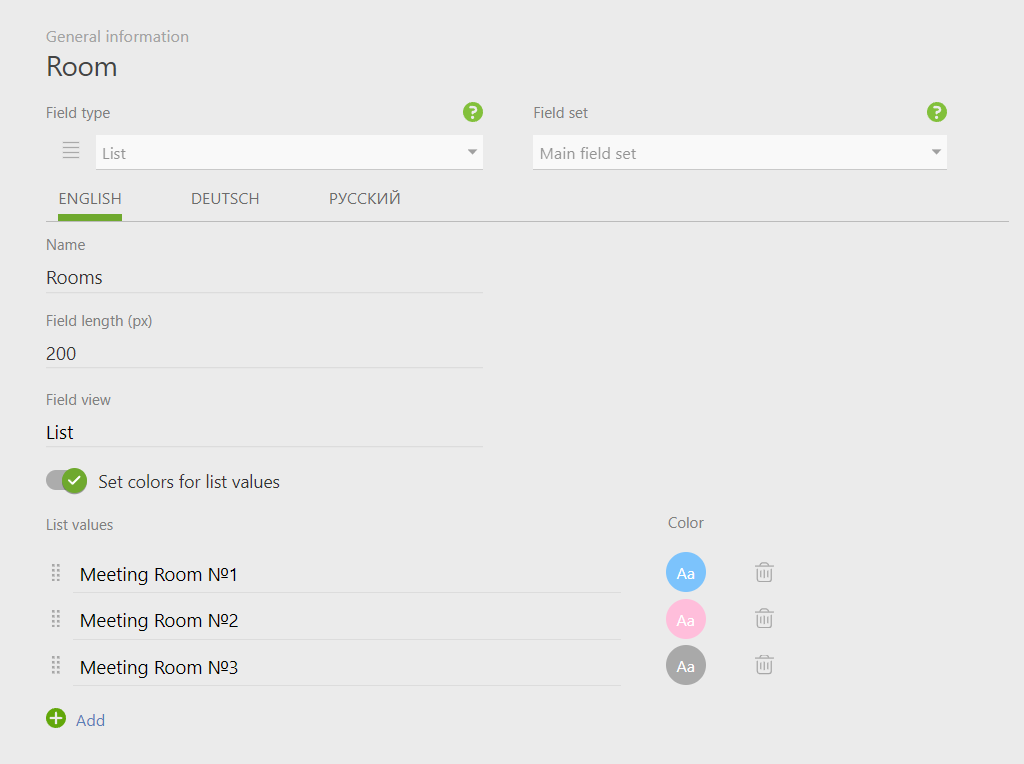
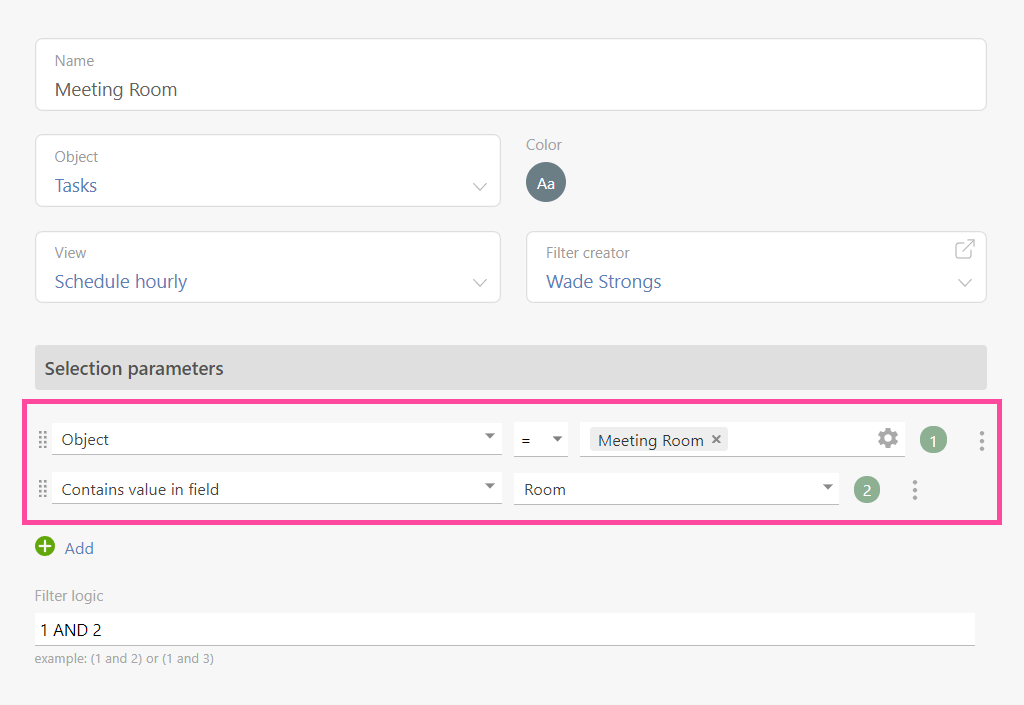
Then create a “Schedule Hourly ” list, and specify the object “Meeting Room” and the created field “Room” in the selection parameters:
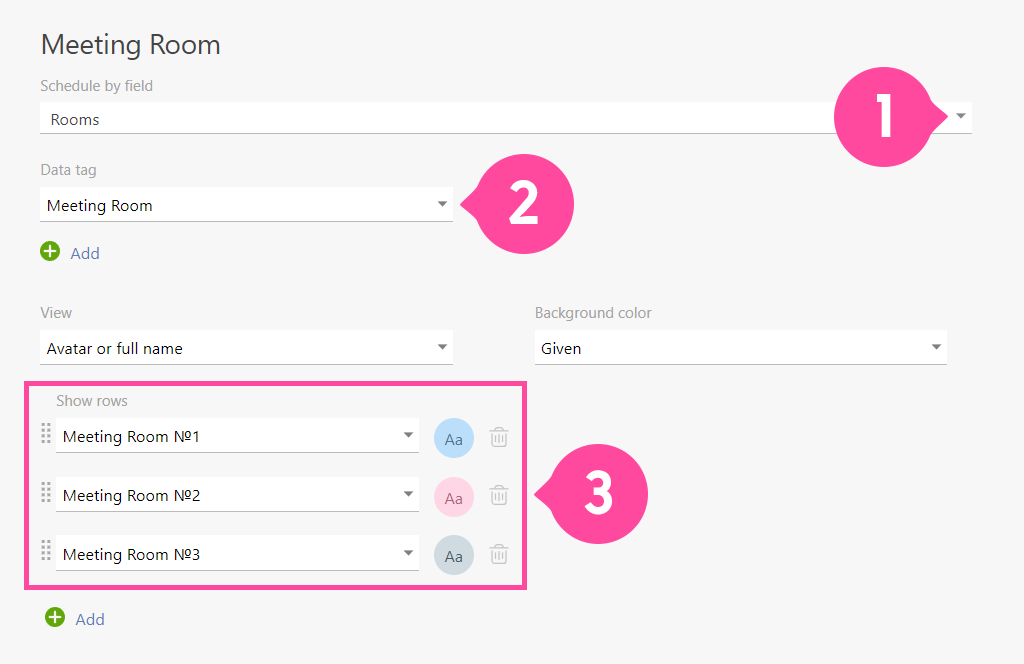
Now set up the “Data to display”:
- Specify the field for displaying the schedule
- Select the data tag that to be added automatically to the task
- Add rows to be displayed in the schedule—in our case, several meeting rooms of different colors:
The schedule will show three meeting rooms where any employee can book a convenient time:
What’s Better: Calendar or Schedule?
Choosing between a calendar and a schedule depends on your needs and work specifics. Each of these columns in the Planfix planner has its advantages. Let’s take a closer look at each.
Hourly Calendar
The hourly calendar breaks down the entire day by hours, helping you better plan and manage your time. It is especially useful for those with many meetings and events. For example, a manager can schedule meetings with the team or customers, and a doctor can schedule patient appointments.
Schedule Hourly
As in our example, the hourly schedule displays data from the data tags broken down by hours and for individual employees or meeting rooms. This method facilitates a more detailed recording of work events, such as employees booking rooms or vehicles.
When choosing, consider whether you need an easy-to-use calendar or if you want to record data tags and plan the schedule in detail.
Conclusion
Planfix is a multifunctional and flexible tool that can address the same task in different ways. Ultimately, the best resource management tool is the one that meets all your requirements.
To learn how to use workspaces effectively, minimize scheduling conflicts, and increase the productivity of your employees, read about the company’s resource management in this article:
