
This case study is relevant to print shops, textile companies, and other production businesses. It explores modern technologies for optimizing processes, enhancing product quality, and reducing costs. We will focus on a key element of automation — the “Objects” — and demonstrate their practical application through examples. This article will be valuable for anyone looking to optimize their processes with Planfix.
Tasks Solved by Planfix
Planfix offers a wide range of features to improve the management and organization of work processes. To improve the efficiency and quality of your company’s services, Planfix helps solve the following tasks:
- Automation of workflows and tasks
- Project management and deadline tracking
- Document management and data storage
- Monitoring and analysis of production metrics
- Communication within the team and with customers
Planfix helps companies stay competitive by improving coordination and interaction between different departments. Implementing this system will help you achieve new heights in organizing and managing your business.
How to Set Up Plotter Order Management: Step-by-step Instructions
These instructions will help you configure Planfix to store and process all orders in one window. Planfix also helps you with automatic calculations to control the plotter’s utilization and limit its operation based on cutting length, thereby extending its service life.
Let’s take a look at the setup steps.
Step 1: Transferring Business Processes to Planfix
Before setting up, consider which elements of the print production planning can be transferred to Planfix.
We have:
– A plotter with daily cutting length limits.
– An order specifying the cutting length, which someone has accepted and completed.
– The process of receiving and processing orders.
In essence, everything revolves around the order. So, in Planfix, we’ll transfer the real-world “Plotter order” object with its name, deadlines, cutting length, lifecycle, and the supervisors at different stages (manager, operator, courier).
Step 2: Configuring the Object in Planfix
We’ll create a virtual copy of the order in Planfix — the “Plotter order” object. Like the actual order, it will have the following properties:
– Name
– Deadlines
– Cutting length
– Lifecycle statuses
– Supervisors
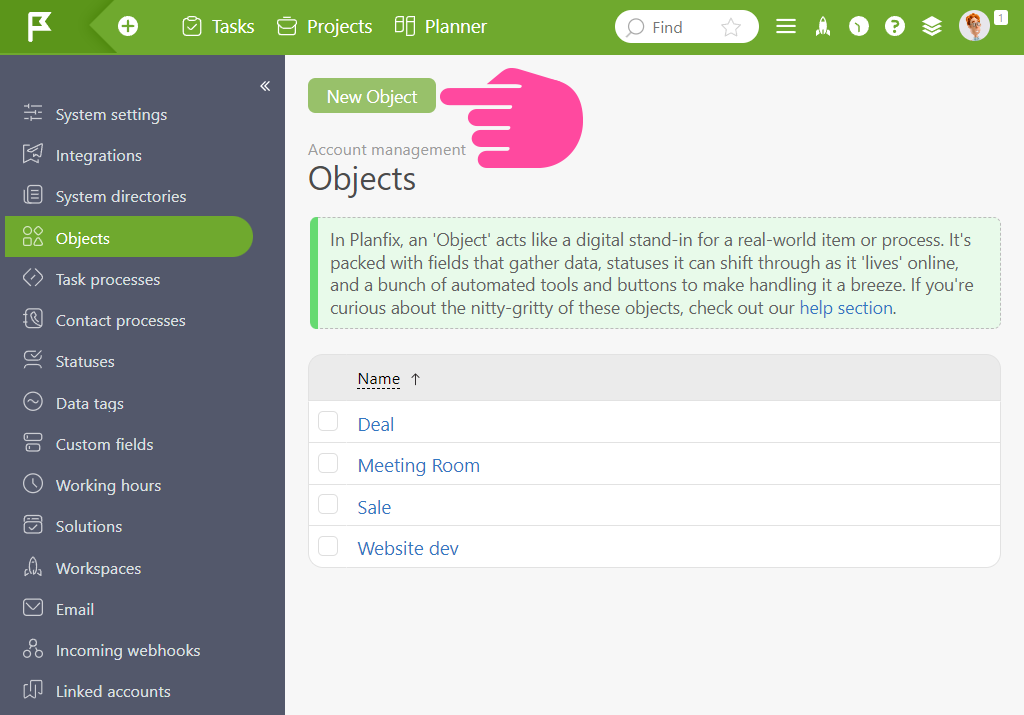
Go to Account Management — Objects — New Object and create a copy of the real-world order:
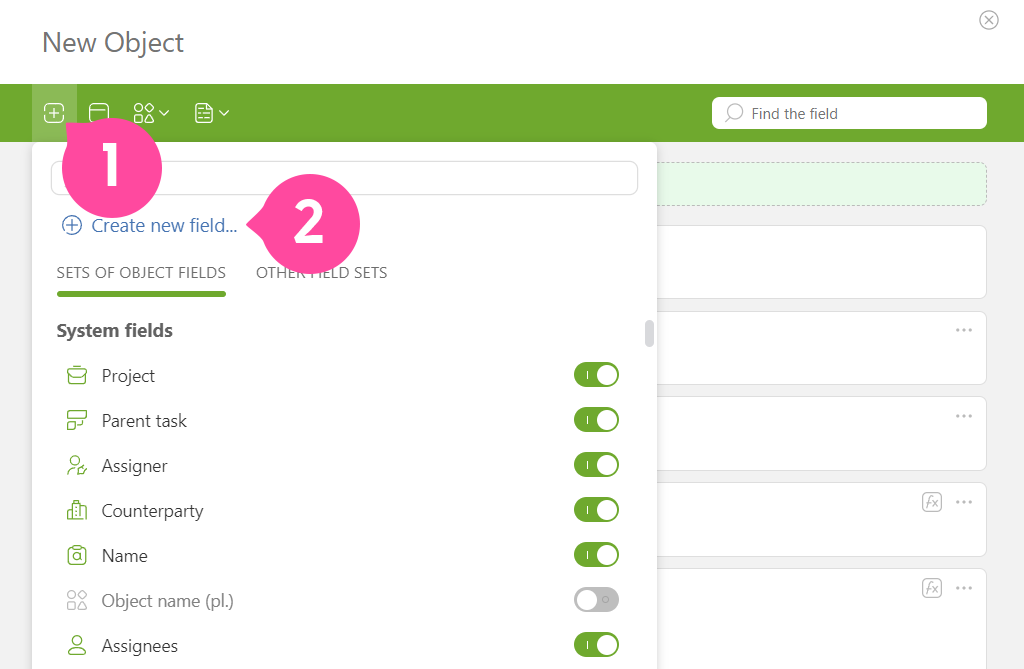
The object card that opens will describe the main properties of the order. The object already has fields for the name, order deadlines, and supervisors. We just need to add the cutting length field. To do this, create the “Cutting length” field and add it to the object:
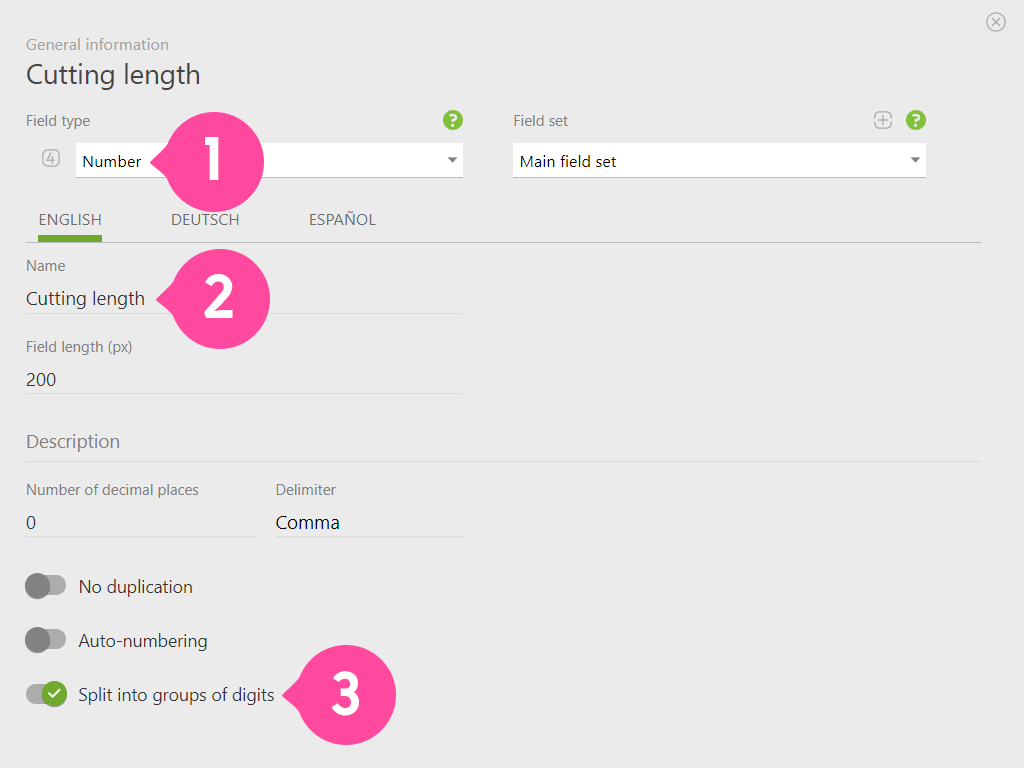
In the settings, specify:
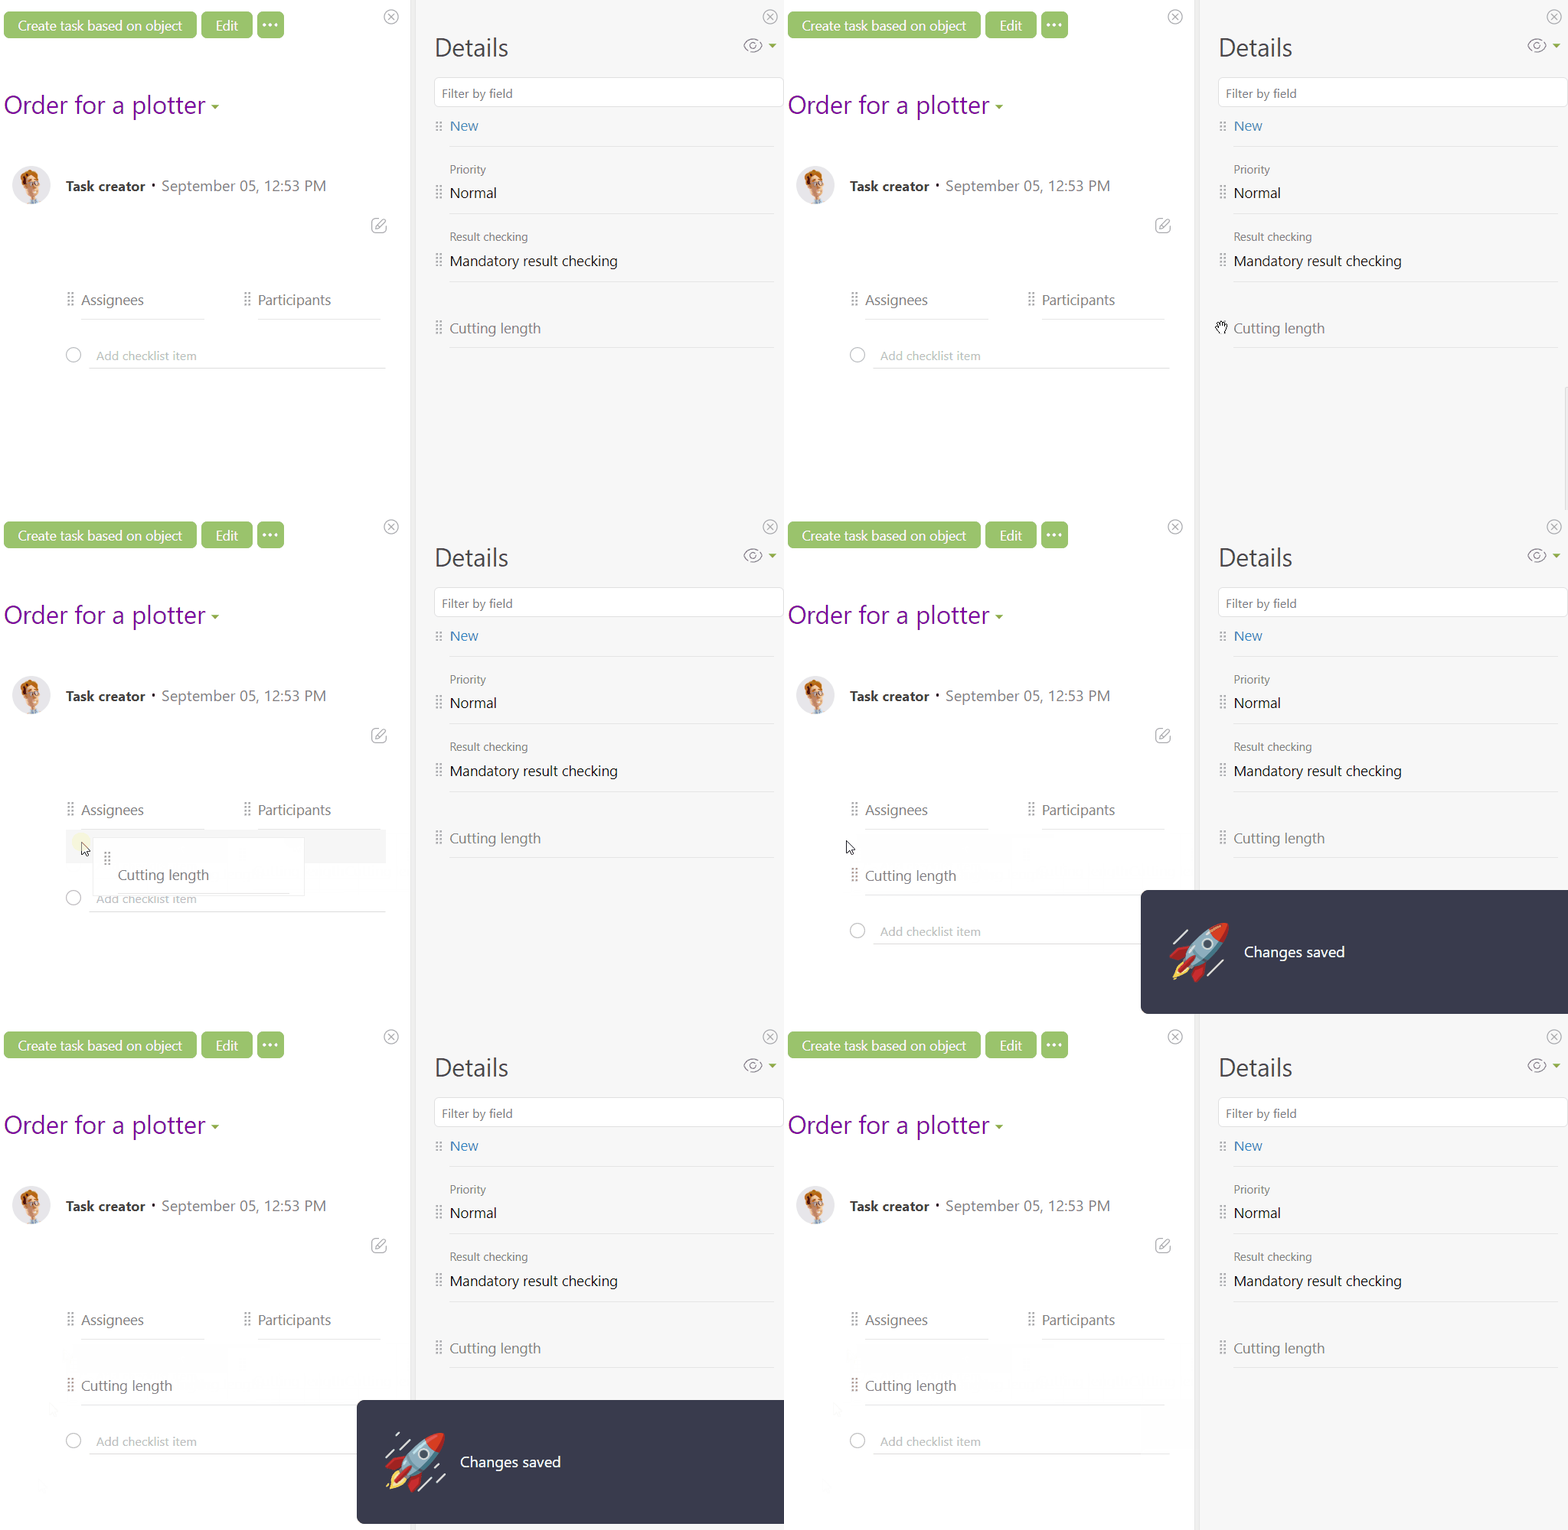
Save the object. Drag the “Cutting Length” field to the main panel of the card so that you can immediately see the plotter’s workload when accessing the order:
Step 3: Configure the Status of Order Processing
We have described the order’s main properties; now, let’s move on to its status — its life cycle. Go to the Status Set section. Planfix’s standard statuses already describe the main stages of the lifecycle. Let’s create new custom statuses for each unique state of the plotter’s print queue management.
For example, add a status for orders that are being processed now:
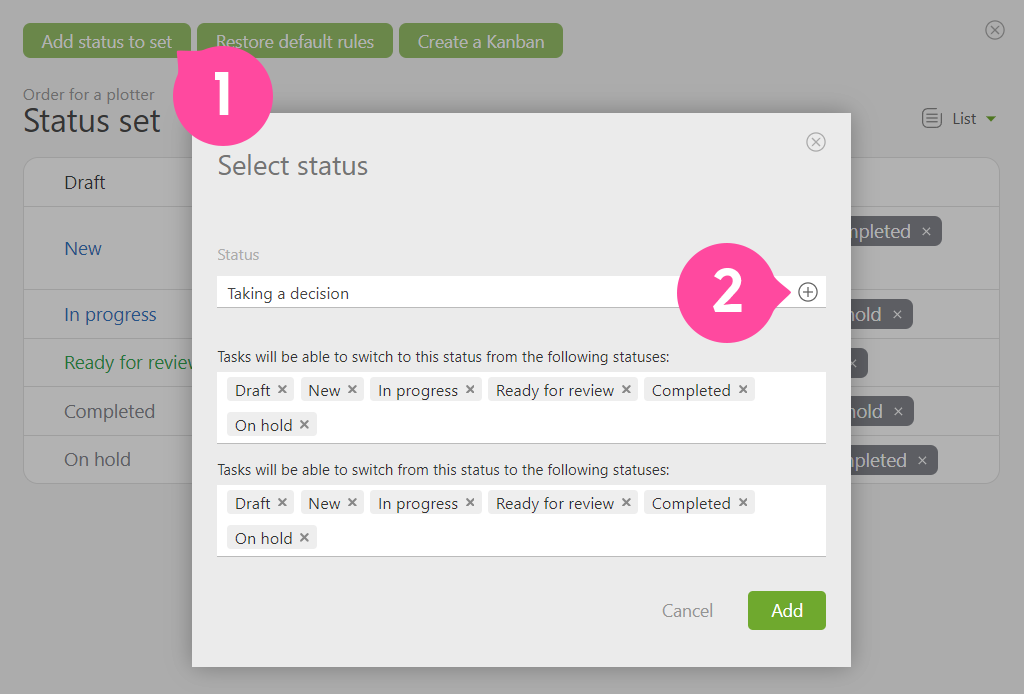
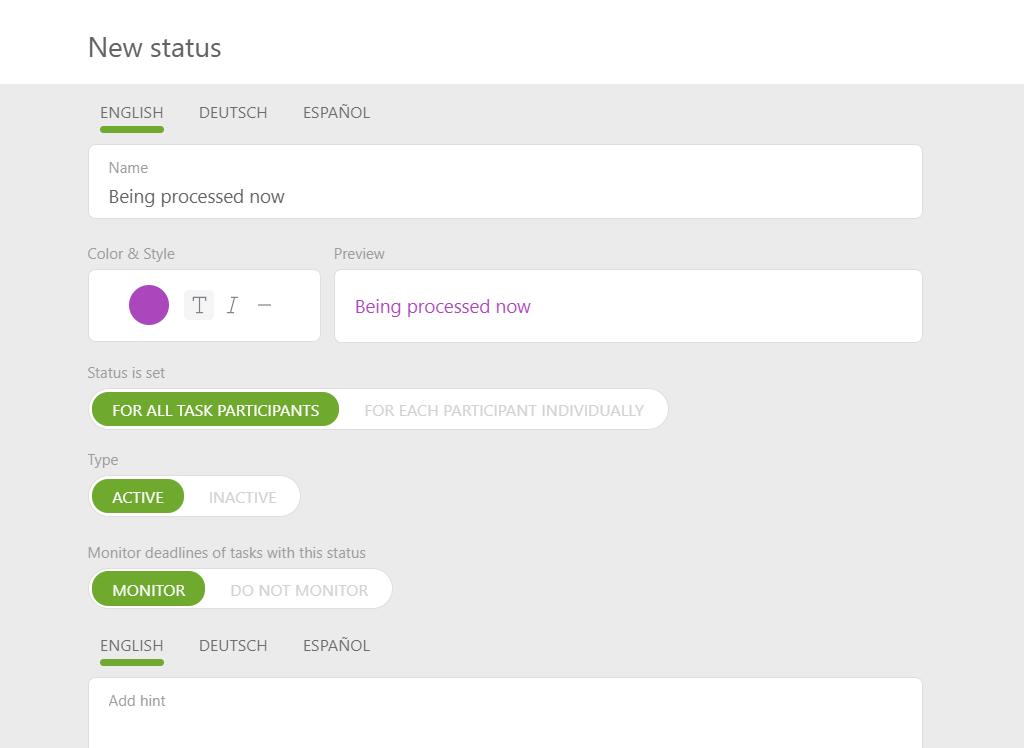
Add the status “Ready for production” similarly.
Step 4: Setting Up Order Management and Processing in Planfix
Finally, we configure order print job management and processing. Create a new Planner that displays a list of orders for the plotter that have already been processed by the manager and are ready for production. Add a table showing the plotter’s overall usage for the day.
I recommend immediately giving the necessary employees access to the Planner:
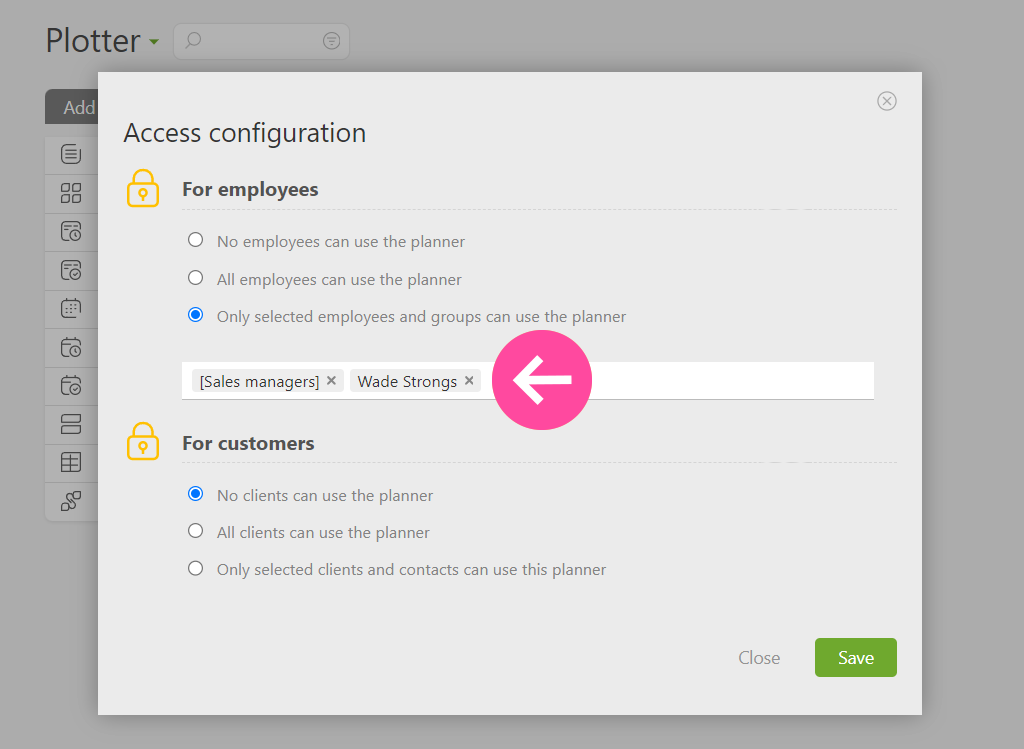
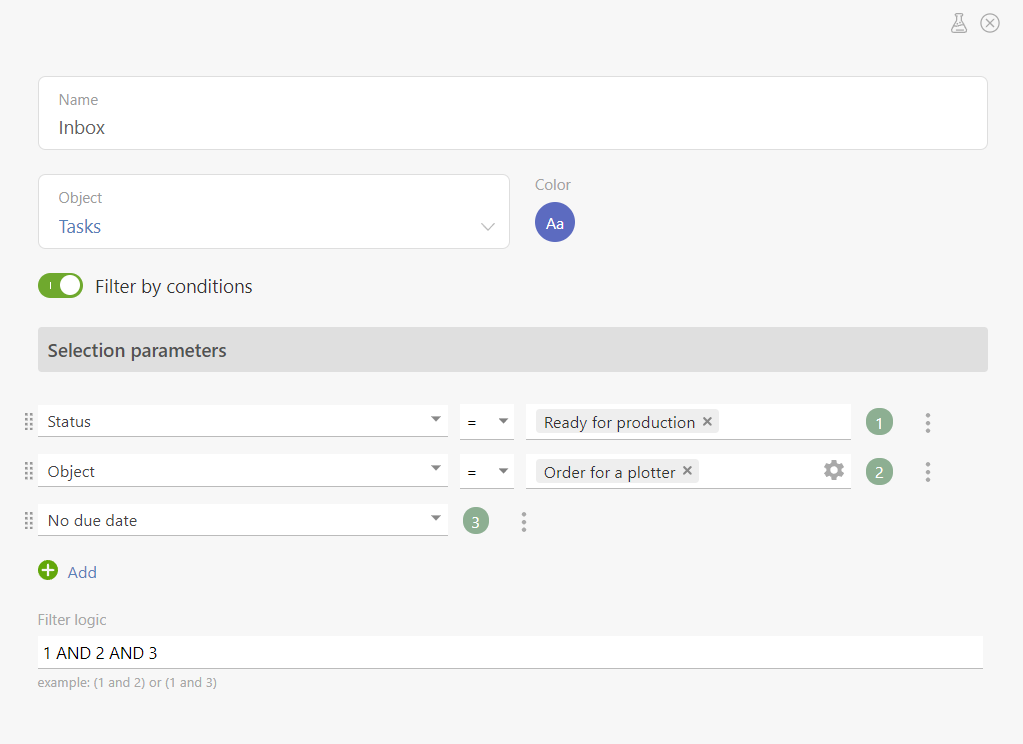
Add the required lists now. The first one will be the Inbox, where we’ll collect the orders ready for production. This list type is the Cards List, in which we’ll filter the tasks according to the following selection parameters:
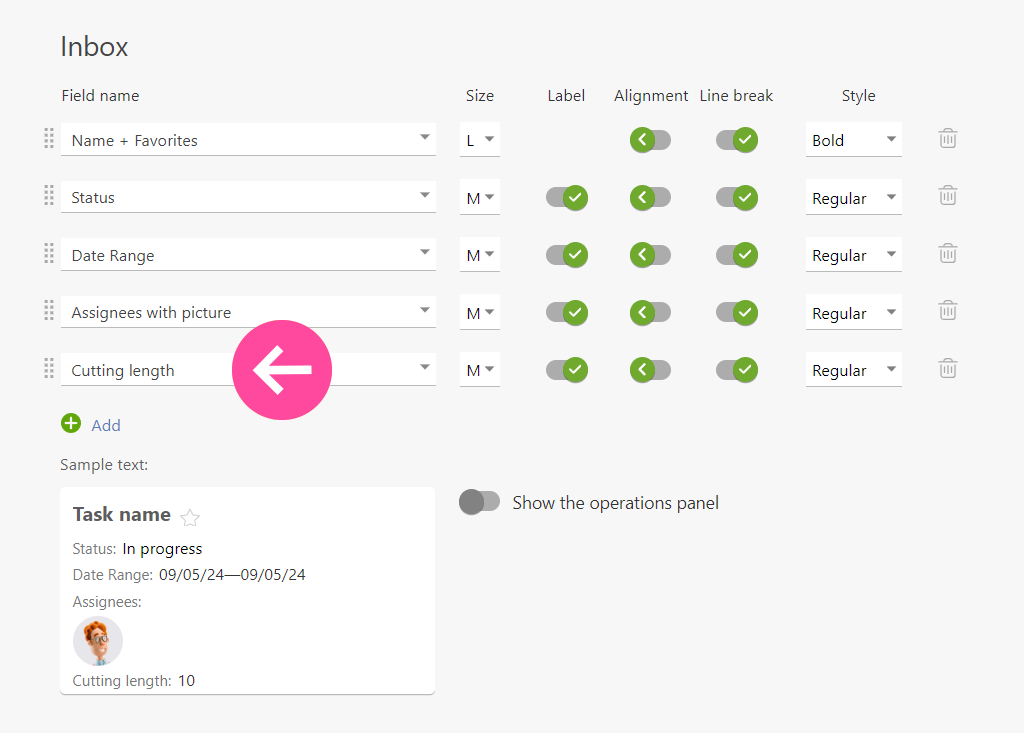
Configure the view of the task cards. Remove everything unnecessary and add the “Cutting length” field to see the order volume directly in the planner without opening the task:
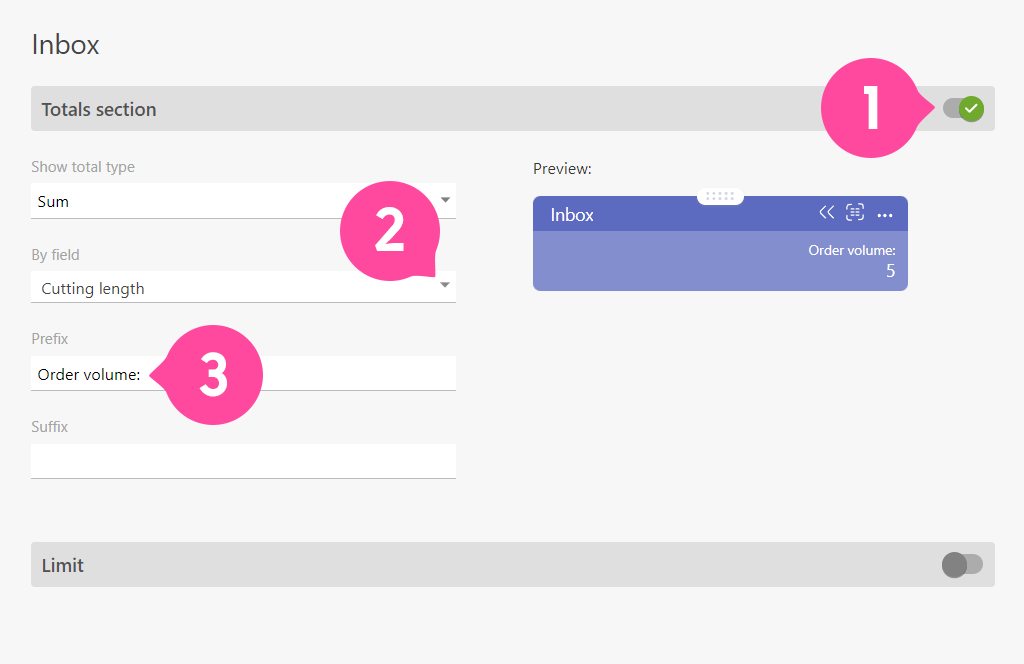
Activate the totals section, which calculates the order volume based on the “Cutting length” field, allowing you to see the total utilization of the plotter for the day, taking into account all orders ready for production:
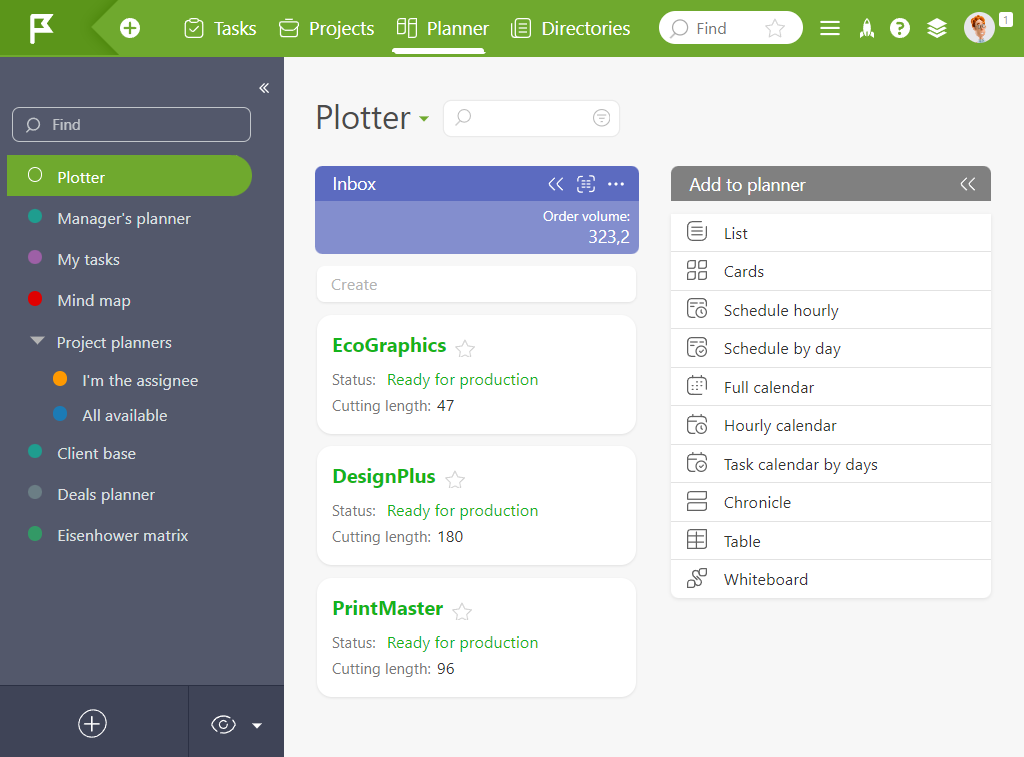
Save the list. When the first orders arrive, it’ll look like this:
Now, insert a table with today’s orders into the planner. The table consists of three columns containing tasks with the corresponding status: “In progress,” “Being processed now,” and “Ready for production.”
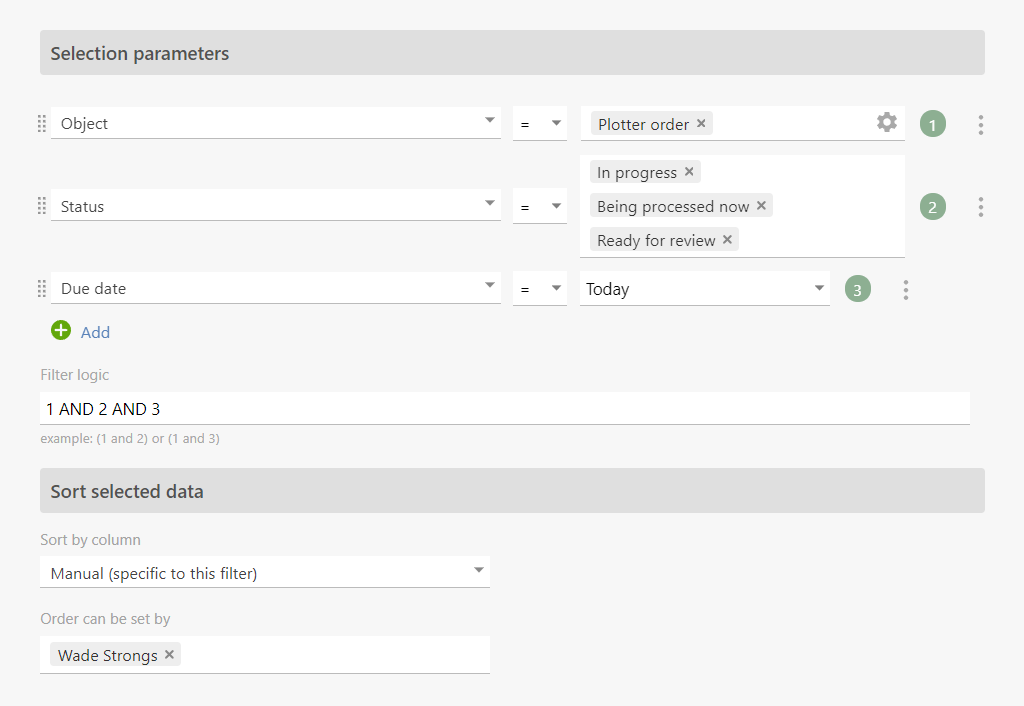
Define the selection parameters and the sorting of the selected data for the “Table”:
In the “Data to display” section, specify which fields are to be displayed in the columns and rows of the table:
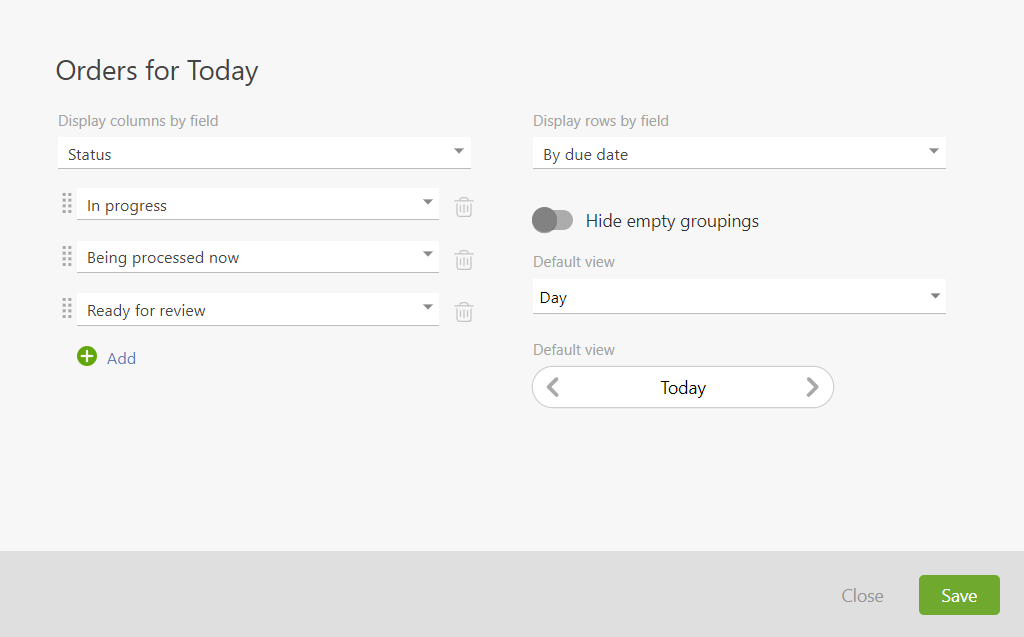
Leave the “Behavior and appearance” and “Operations” panel block settings as their defaults. You can duplicate the card display from the Inbox list.
Set up the totals section for the table. The calculation is also done via the “Cutting length” field but for a different purpose. Set a limit of 250,000 millimeters for the plotter usage to prevent it from overheating. Configure the block as follows:
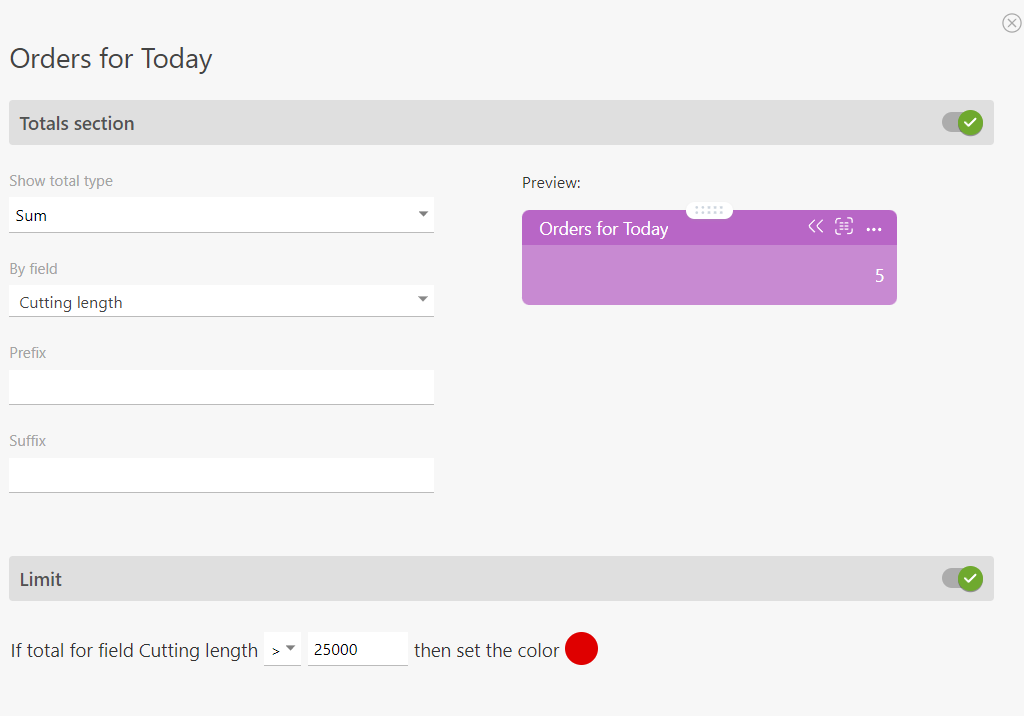
If the plotter exceeds the set limit, the system will turn the header red, signaling the plotter operator and the managers processing orders. This is what the table will look like:
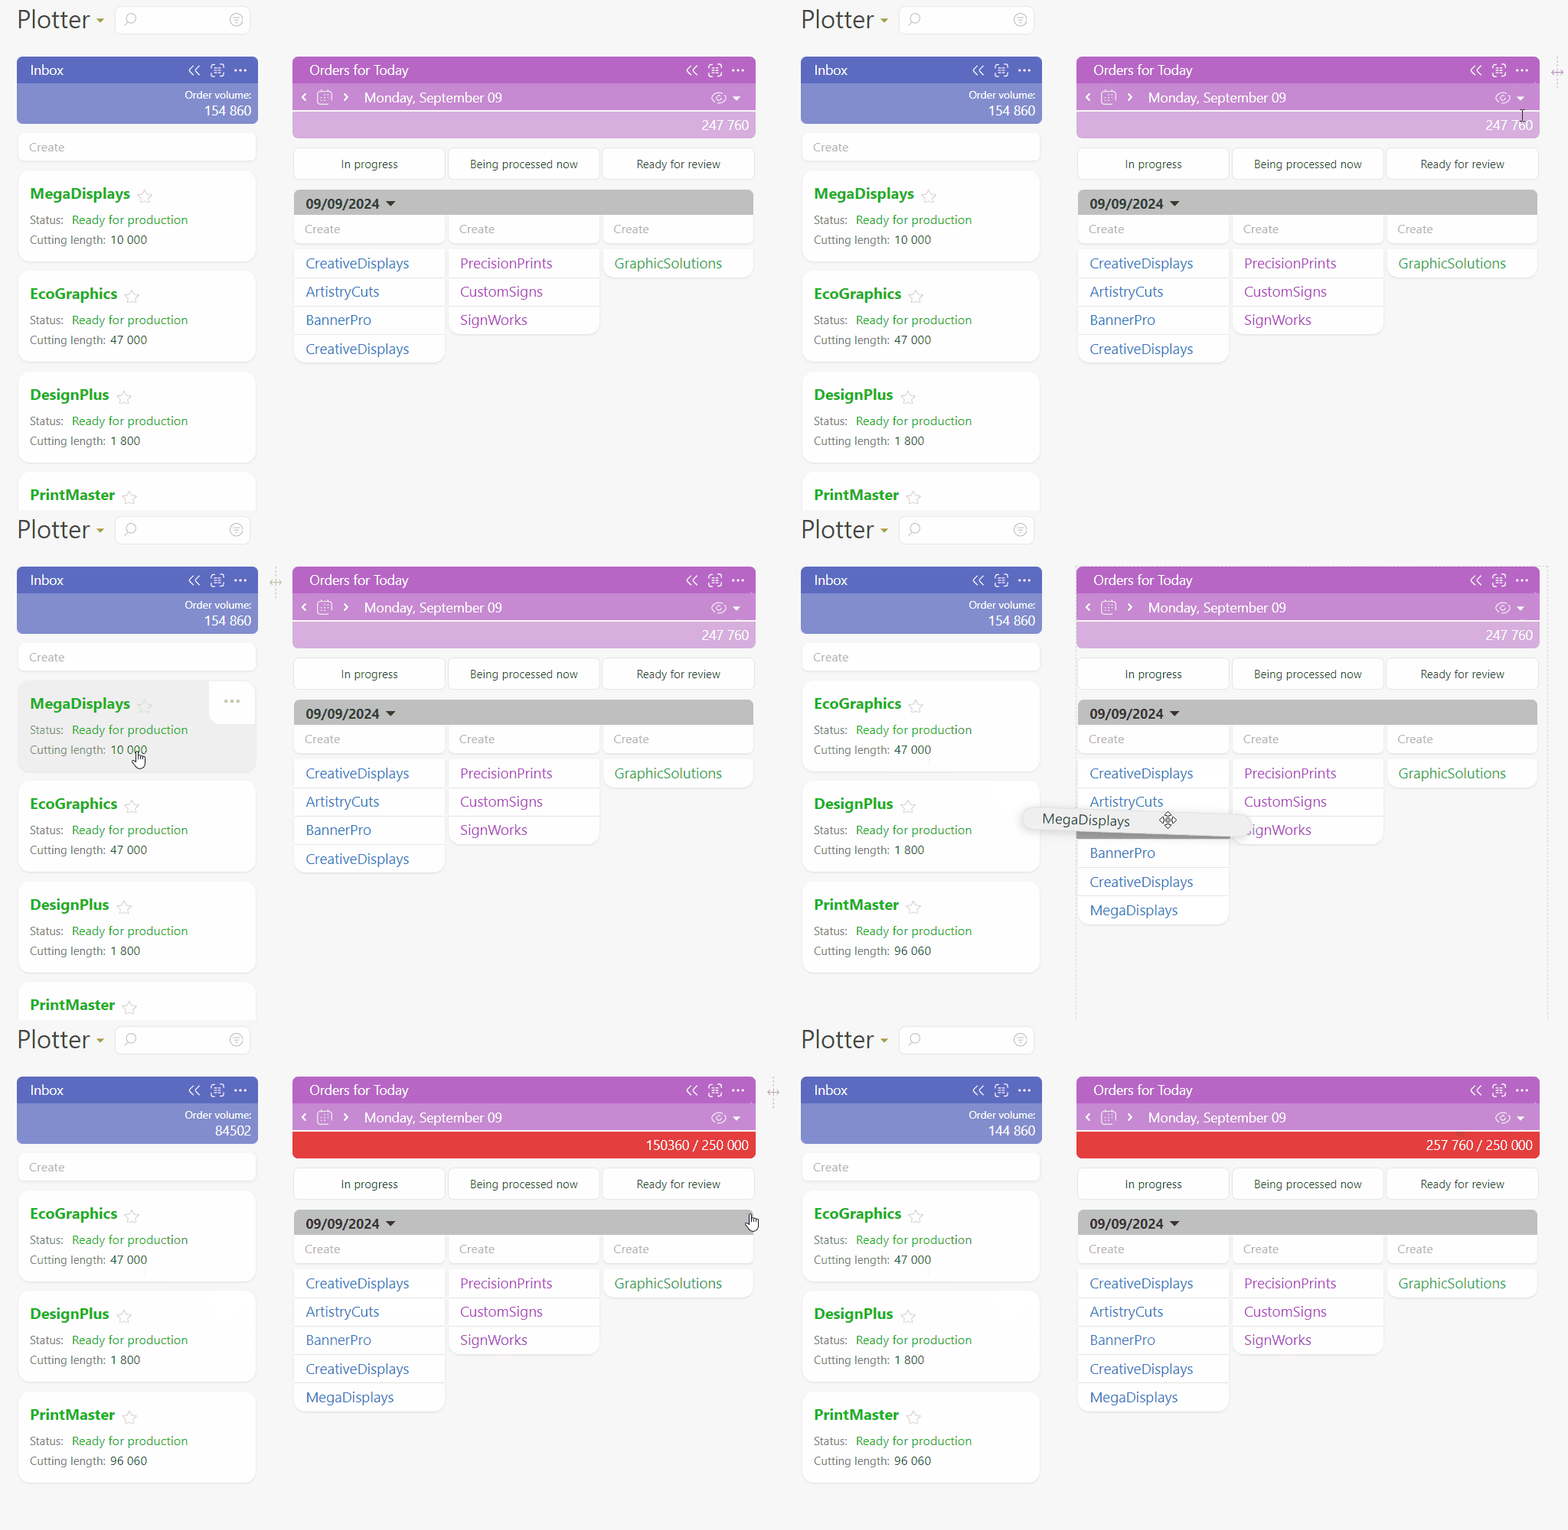
Once the setup is complete, you can start working.
How does It work?
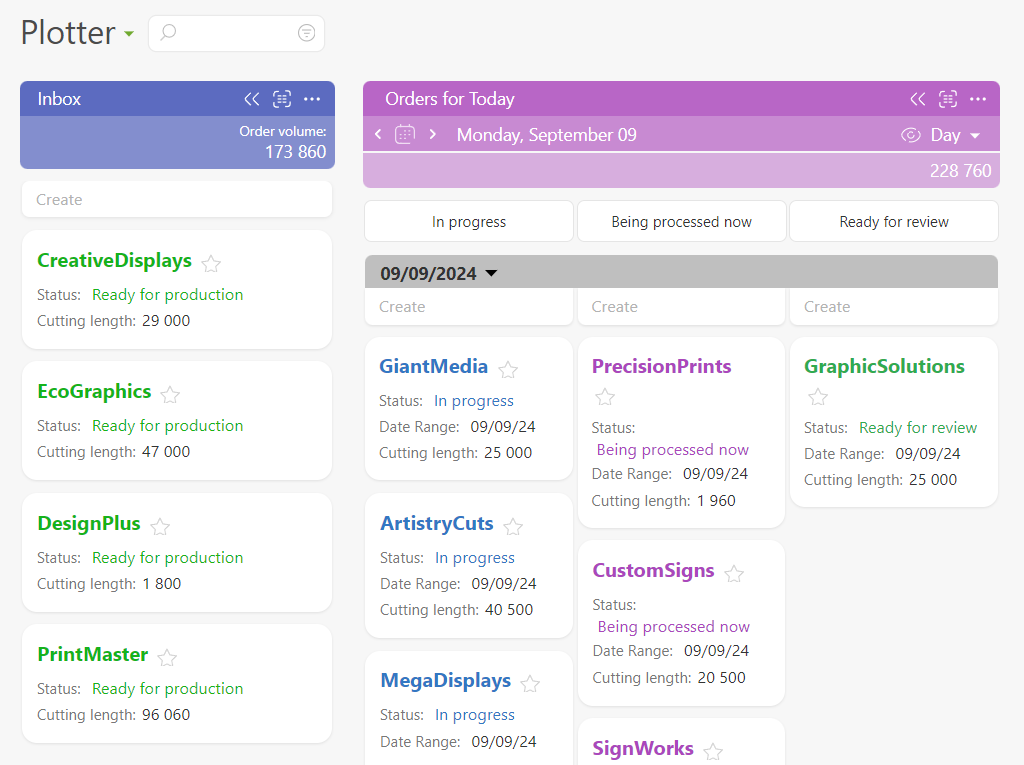
The system collects customer orders awaiting processing in the Inbox list. The managers process each order and determine its cutting length by entering the data in the corresponding field.
The plotter operator then moves the order from the Inbox to the first column of the Today’s Orders table and creates a queue.
The operator works through the orders in sequence, moving them to the “Being Processed Now” column when they start an order and to the “Ready for production” column when they finish it, before moving to the next order. The total order volume is limited to 250,000mm.
This process effectively manages plotter operations. With correctly calculated limits, the operator should complete all scheduled orders by the end of the shift.
Objects — A Powerful Tool for Business Process Automation
Objects in Planfix allow you to digitize actual orders and process them in a single window. You can customize objects to meet specific enterprise needs. Since they store all order information, you can easily set up automated processes, such as reminders and status updates.
Conclusion
This case applies to furniture, textile, printing, and other companies where work stages require a certain amount of time and workload control. Additional Planfix solutions and features help track employee time on orders and manage supply chains. Work more efficiently and stay competitive with Planfix.

