Task filters
Planfix offers a flexible mechanism for filtering tasks based on complex conditions. You can share created filters with other employees and customers, use them for bulk actions on tasks, and apply them to the Planner.
Creating a filter
You can create a filter in the Tasks section. To do this:
- On the left panel, click Add.
- Choose how the future task filter should be displayed.
- In the window that appears:
- You can give your filter a name
- And add Selection parameters to which the filtered tasks should match. Each parameter is numbered automatically. These numbers are used in the Filter logic block to define the overall rule for selecting tasks:
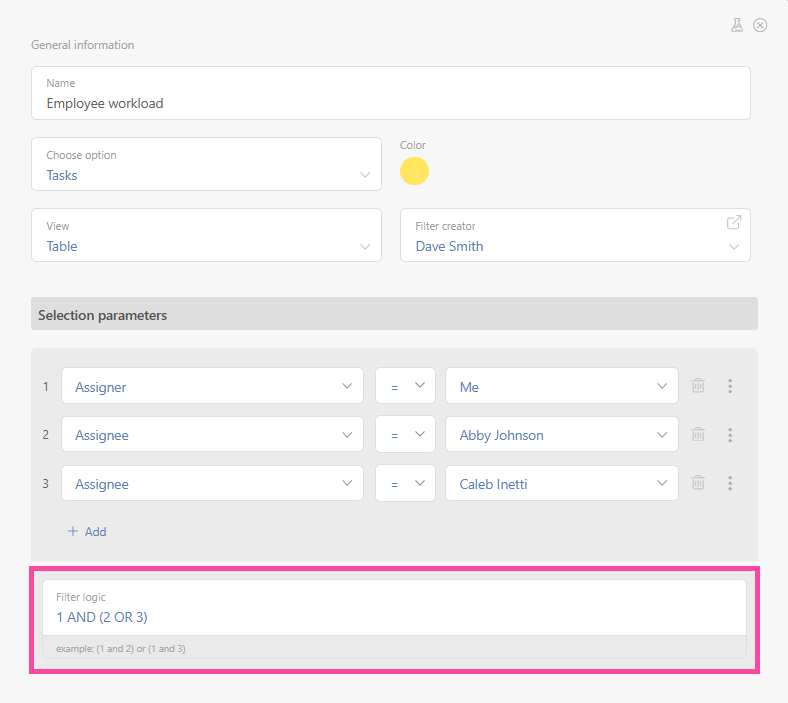
Example: The filter in this screenshot will filter tasks where I am the assigner and the assignees are Abby and Caleb.
In the filter settings on the left panel, select the Behavior and appearance tab — here you can immediately choose where to display the filter:
- Add to Group;
- Don't show this filter in the Side panel — where standard filters are located (All / Incoming / Outgoing, etc.):
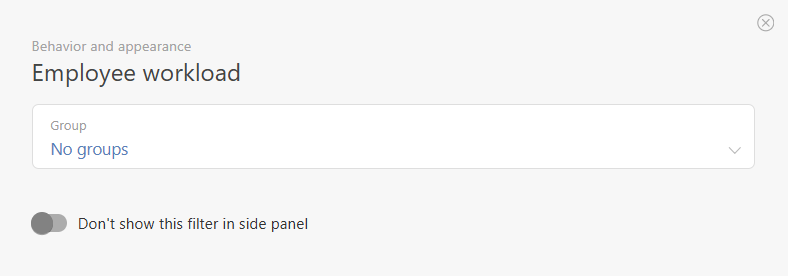
This function is useful if you plan to frequently use this filter.
A completed filter can be:
- Used once — click Filter.
- Saved in the filter list for future use — click Filter and save.
Settings for displaying columns
With Planfix, you can customize the list of task details displayed in the task list. The settings are saved for each filter.
- To add a field, click the plus icon:

- You can show not only standard task details, but also values from custom fields you’ve added to the system.:
- Clicking a column name opens an additional menu where you can remove or pin the column, sort it, or filter values.
- You can reorder columns. To do this, click and hold the left mouse button on the column header, then drag the column to the desired position.
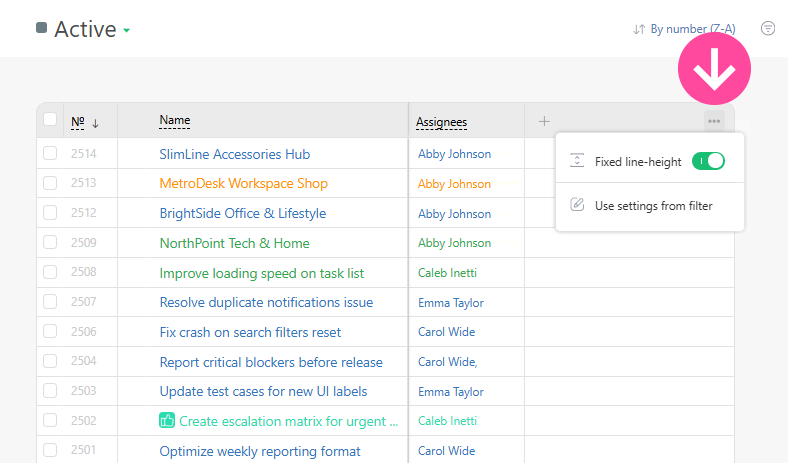
- In a filter, you can set a fixed row height or apply settings from another filter:
Filter management
To manage a filter:
- Click the filter's name in the header.
- On the left panel, click the three horizontal dots icon.
In the filter management menu, you can:
- Edit the current filter.
- Grant certain employees or customers access to the filter.
- Create a copy of the current filter.
- Set it as the default (it opens when you enter the Tasks section).
- Move the filter to the desired filter group.
- Delete the filter.
- Manage its display in the sidebar.
You can change the order of filters on the sidebar by simply dragging them:
Important
- If there are no custom fields in a task, or if the fields are not available to the employee using a filter, the selection parameters for that field will not apply.
- If you use a filter and create a task using the quick creation field or clicking the Create button, the task details will be auto-filled based on the filter's selection parameters.
Useful information and links
- How to use task selection parameters in a filter.
- You can use tasks selected by a filter to perform bulk actions.
- You can test the functionality of filters in test mode.
- It is also possible to create task template filters.