Creating a workspace: Difference between revisions
No edit summary |
No edit summary |
||
| Line 13: | Line 13: | ||
==Next steps == | ==Next steps == | ||
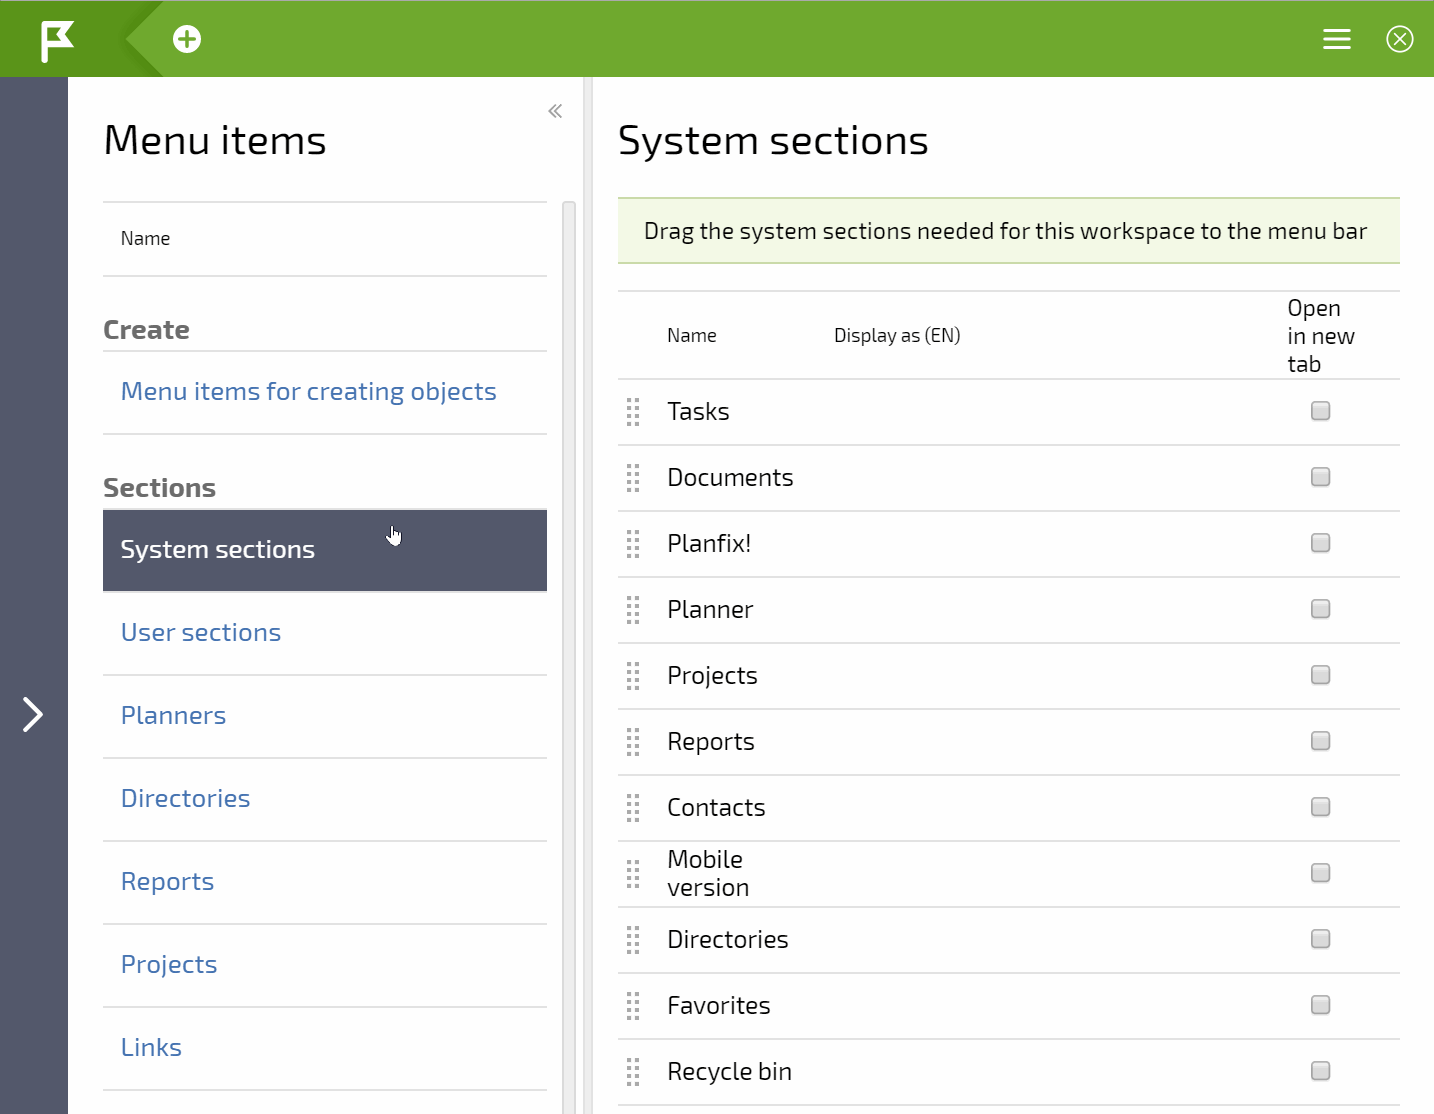
The process of creating a workspace consists of dragging objects to the main menu, the create menu (the plus sign), or the additional menu (the "hamburger"). These objects can be: | |||
Any system section usually found in the main menu | |||
User sections, which can also be created here | |||
Planners | The process of creating a workspace consists of dragging objects to the main menu, the create menu (the plus sign), or the additional menu (the "hamburger"). | ||
Directories | |||
Reports | These objects can be: | ||
Projects | |||
Links | *Any system section usually found in the main menu | ||
Filters (for tasks, contacts, projects, or directories) | *User sections, which can also be created here | ||
Procedure for creating a new object based on an arbitrary template (usually used in the "plus" menu) | *Planners | ||
*Directories | |||
*Reports | |||
*Projects | |||
*Links | |||
*Filters (for tasks, contacts, projects, or directories) | |||
*Procedure for creating a new object based on an arbitrary template (usually used in the "plus" menu) | |||
https://pic.planfix.ru/pf/FA/JwGwpn.gif | |||
Demonstration of the process of creating a workspace | Demonstration of the process of creating a workspace | ||
Revision as of 05:10, 22 March 2020
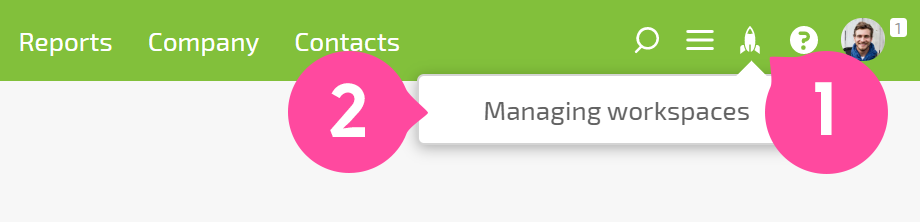
Users with the role of Account administrator or Technical administrator can create workspaces in Planfix. People with these roles will have an item in their main menu called Workspaces, as well as item Managing workspaces within it:
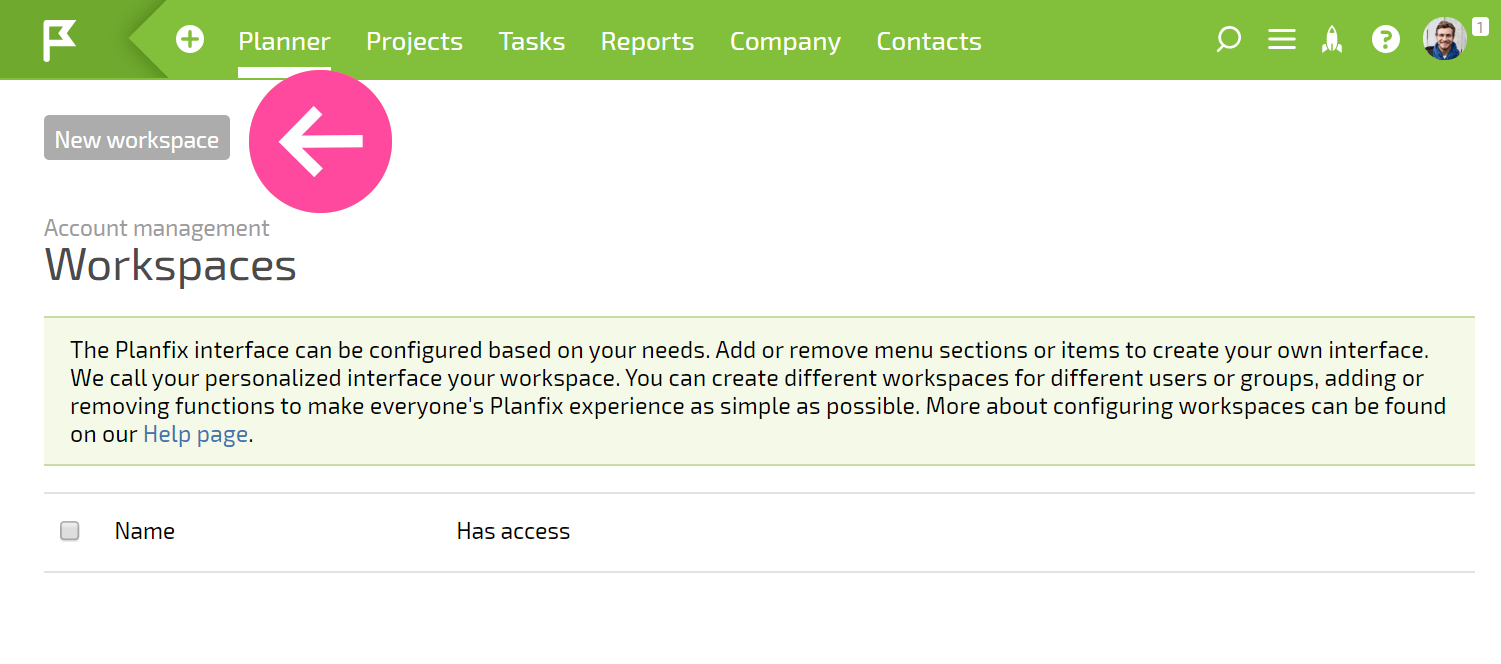
To create a new workspace, click the New workspace button:
Next steps
The process of creating a workspace consists of dragging objects to the main menu, the create menu (the plus sign), or the additional menu (the "hamburger").
These objects can be:
- Any system section usually found in the main menu
- User sections, which can also be created here
- Planners
- Directories
- Reports
- Projects
- Links
- Filters (for tasks, contacts, projects, or directories)
- Procedure for creating a new object based on an arbitrary template (usually used in the "plus" menu)
Demonstration of the process of creating a workspace
An error has occurred. Try watching this video on YouTube, or enable JavaScript if it's disabled in your browser.
Workspace settings Once you have completed the basic configuration steps for your workspace, you need to enter some key settings:
<screenshot 3>
The name of the workspace will be displayed in the workspace menu, so it should be simple and clear to users.
The default section lets you choose which section of the workspace users will be taken to when they switch to it.
The color lets you change the color of the main menu panel.
Access to workspace defines access to your workspace for employees and contacts
Important A new workspace can be saved with a minimum of two fields set: Workspace name Default section In order to set a default section for a workspace, there must be at least one menu item that isn't from the section Menu items for creating objects or Links. This item is the section that will load when a user switches to the workspace.