WhatsApp Cloud API
From Planfix
In Planfix, you can use the official integration with WhatsApp.
Content:
- Create an application
- Set up a webhook and subscribe to all events
- Создание системного пользователя
- Creating a system user that grants the system user access to the phone number
- Work in test mode
- Work in live mode
Go to the [Meta for Developers page] and create an application
Set up a webhook and subscribe to all events
- Log in to your created app and add WhatsApp by clicking the "Configure" button.
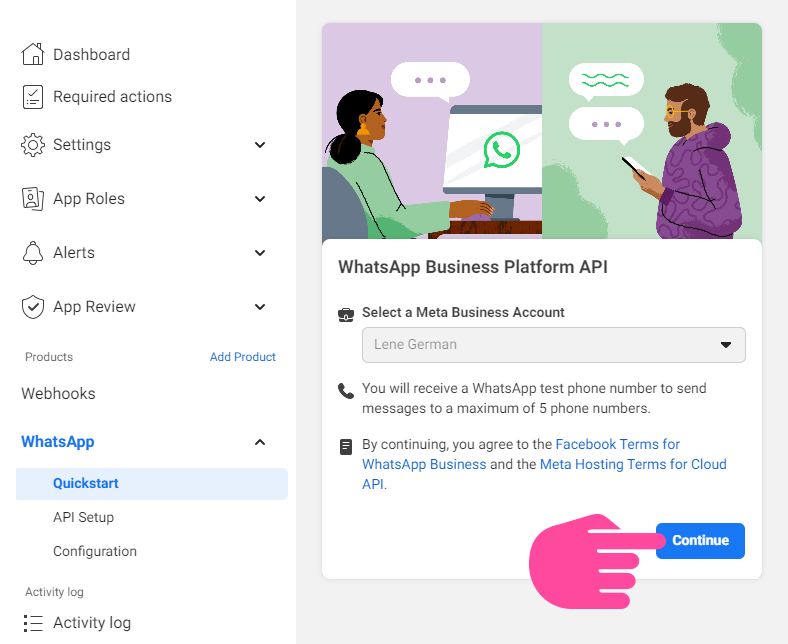
- On the left panel, select "WhatsApp" — "Quick Start." Choose your Meta business account and click "Next":
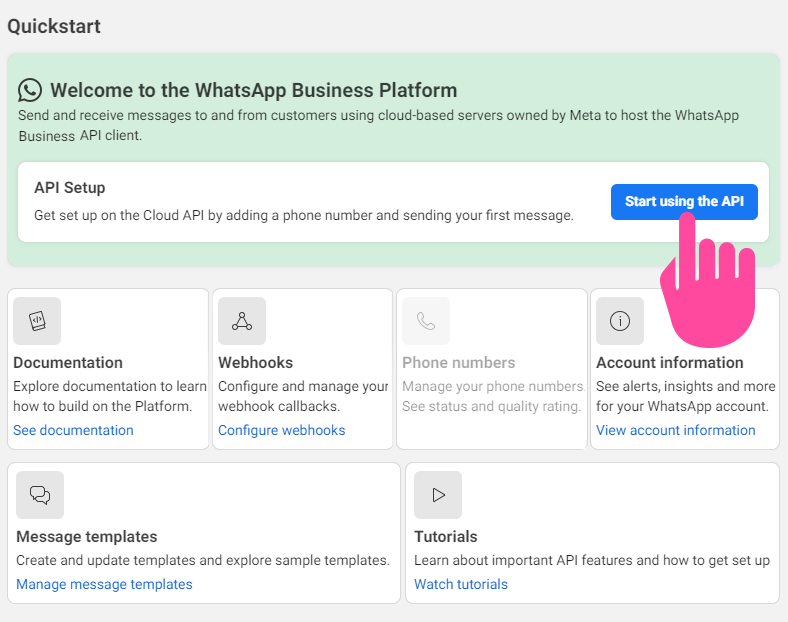
- In the window that appears, click "Start using API":
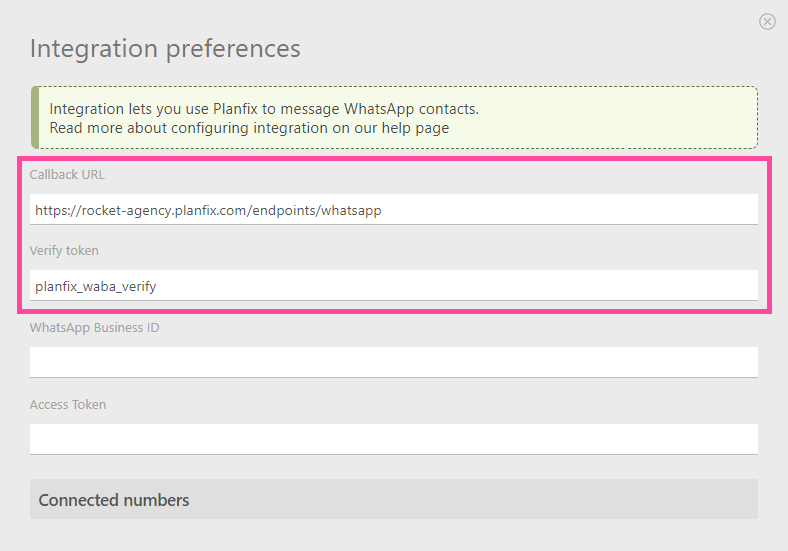
- Go to the menu on the left and select "WhatsApp" — "Settings." Add a Callback URL and Verify the token, copying them from the Planfix integration:
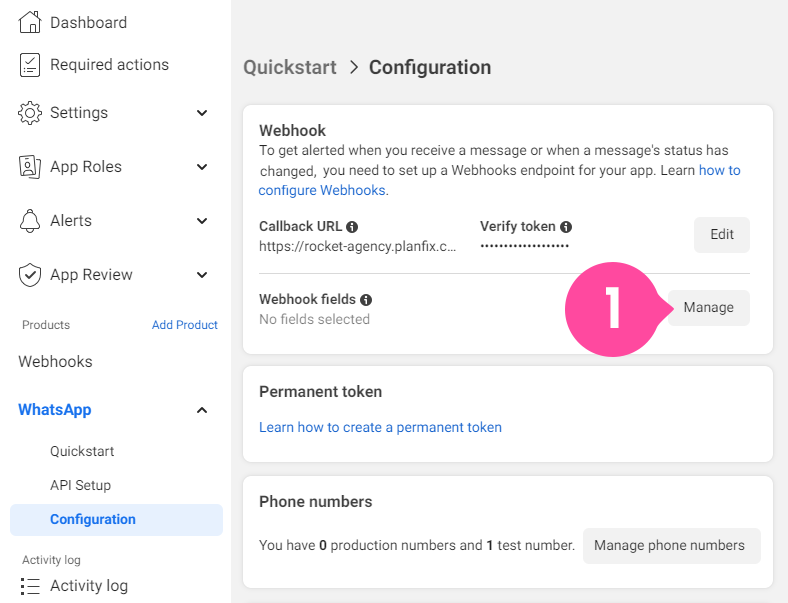
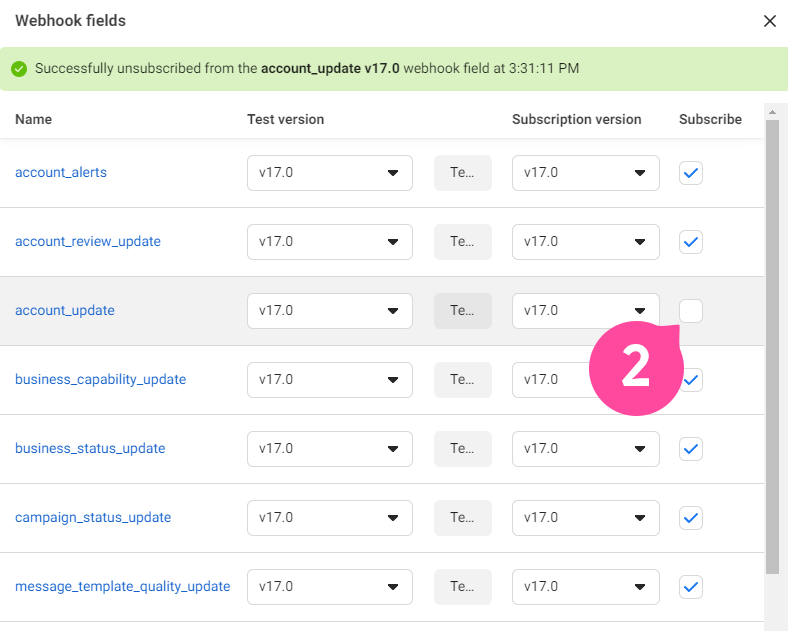
- Then set up "Webhook Fields," subscribing to all fields:
Creating a system user
A system user is needed to generate an Access Token. It is used when connecting the integration in Planfix. To create a system user, follow these steps:
- Log in to the [Meta Business Suite].
- Find your business account, and in the dropdown menu in the top left corner, click the gear icon "Settings."
- Choose "Company Settings."
- Go to the "Users" — "System Users" section.
- Click "Add" and create a system user:
- Add the system user's name.
- Specify the role as "Administrator" and save.
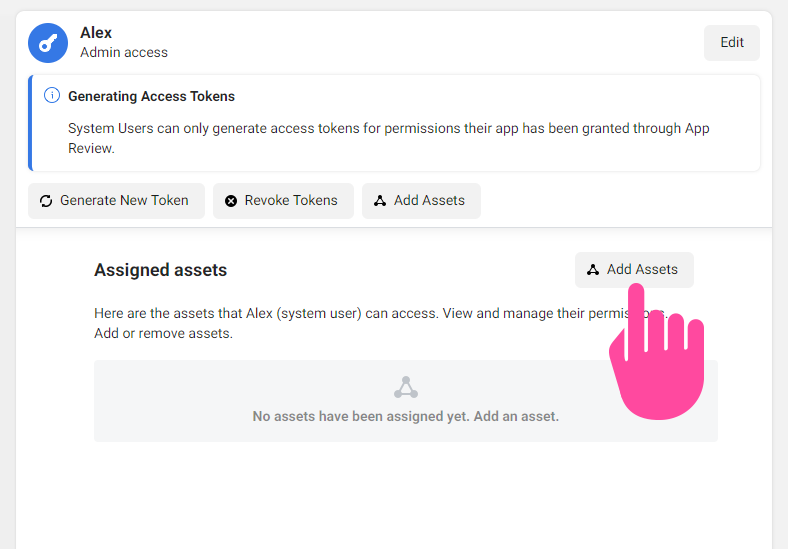
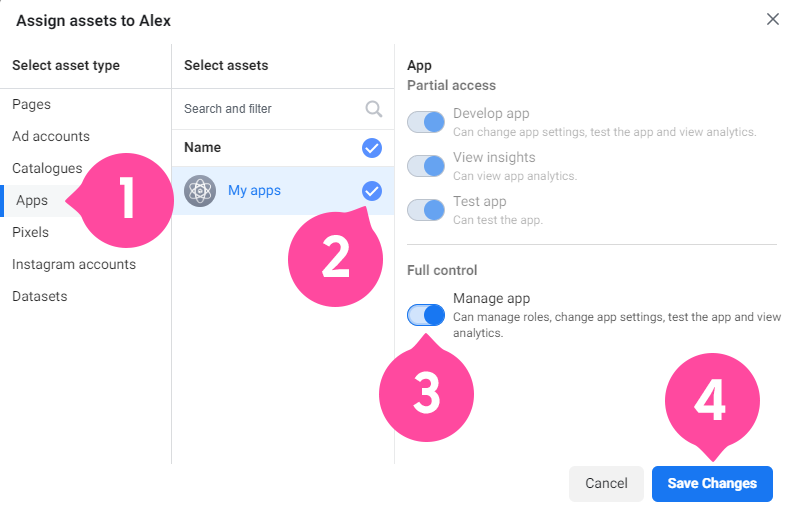
- You need to provide access to your application that was created at the beginning. To do this, click the *"Add Objects" button:
- Now click the "Create new token" (Access Token) button:
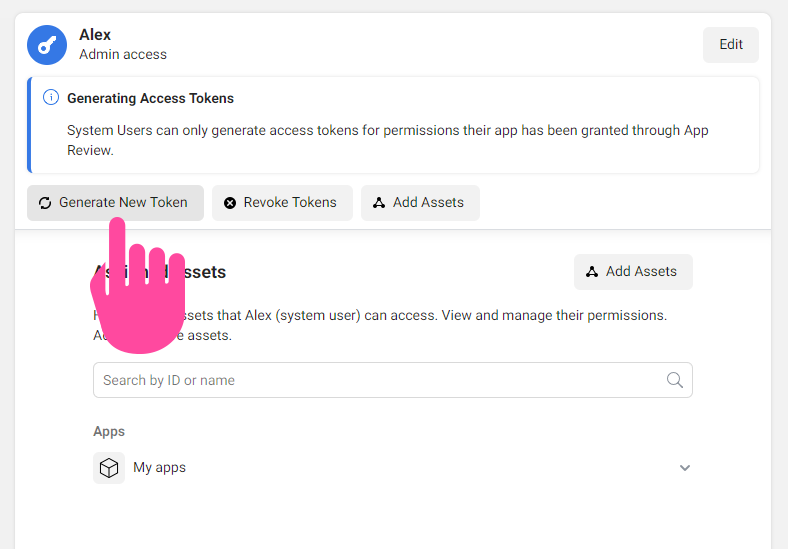
- Specify your application. Choose permissions: whatsapp_business_messaging and whatsapp_business_management.
- Generate the token (Access Token), copy it, and save it.
Granting the system user access to the phone number
- Log in to [Meta Business Suite].
- Select the business account to which the application was added (1).
- Then on the left in the "Accounts" section, choose "WhatsApp Accounts" (2) and select your WhatsApp business account (3).
- Click the "Add People" button (4):
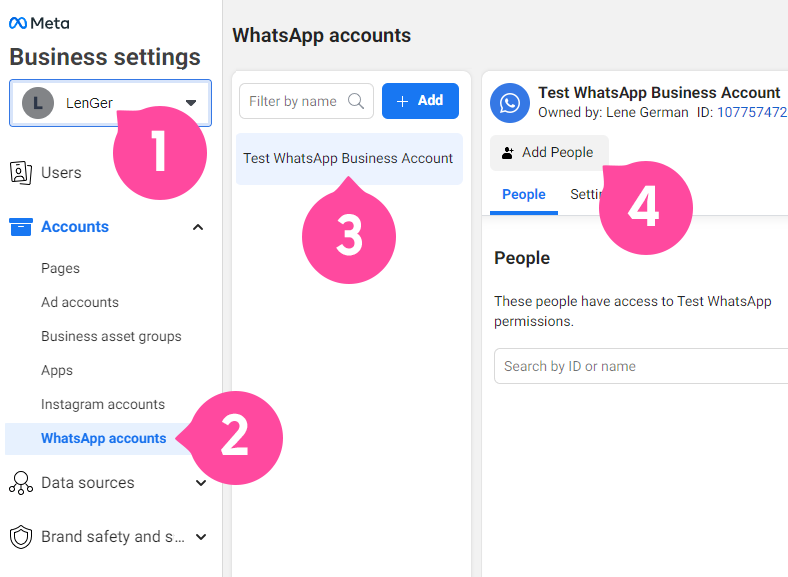
Choose the system user created earlier, give them full access rights, and save the settings.
Work in test mode
- Open your application in [Meta for Developers].
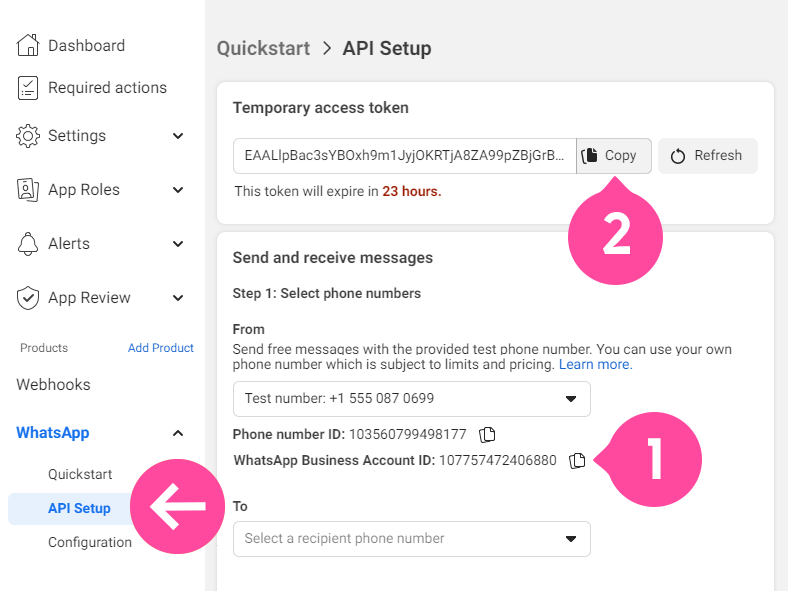
- Copy the WhatsApp Business Account ID (1) and the temporary token (2), then in the Planfix integration, add them to the corresponding fields.
- Click the "Update" link to add a test number automatically:
Work in live mode
- Open your application in [Meta for Developers].
- Copy the WhatsApp Business Account ID.
- Add the "Add Phone Number" button if the number is not there. It is located below on the same page.
Important
After completing the integration setup, click the "Update" link. The corresponding numbers should be automatically added with the correct WhatsApp Business Account ID and Access Token.
