WhatsApp Cloud API
From Planfix
Integration is no longer supported. Use official direct integration with WhatsApp.
In Planfix, you can use the official integration with WhatsApp.
Content:
- Create an application
- Set up a webhook and subscribe to all events
- Creating a system user
- Creating a system user that grants the system user access to the phone number
- Work in test mode
- Work in live mode
Create an application
Go to the Meta for Developers page and create an application
Set up a webhook and subscribe to all events
- Log in to your created app and add WhatsApp by clicking the "Configure" button.
- On the left panel, select "WhatsApp" — "Quick Start." Choose your Meta business account and click "Next":
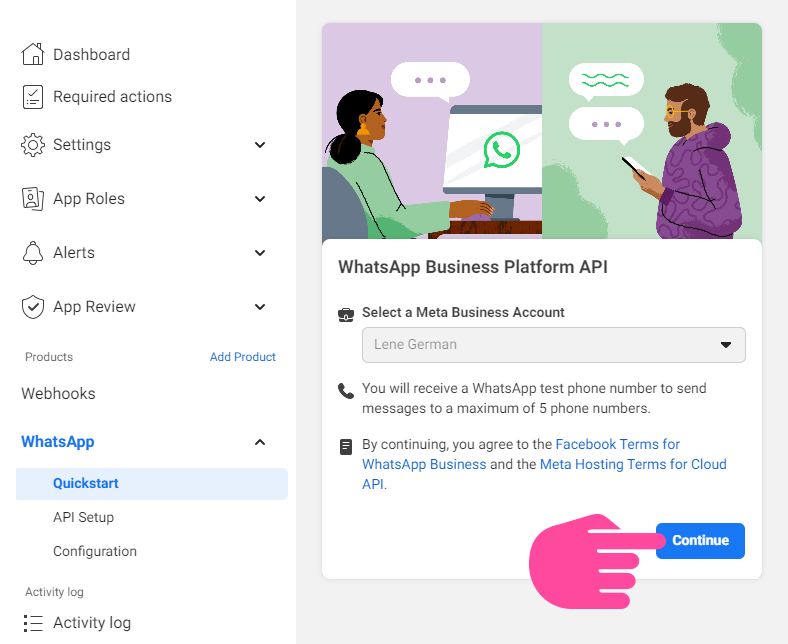
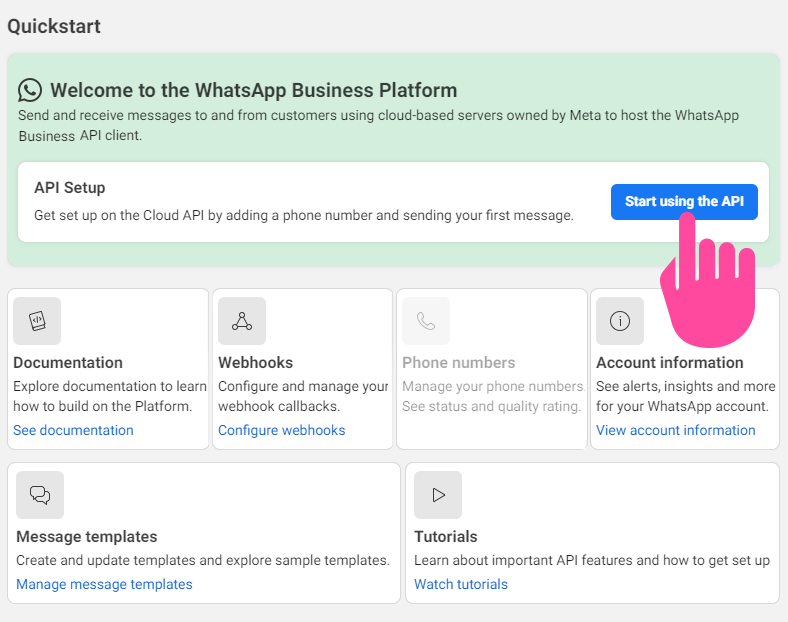
- In the window that appears, click "Start using API":
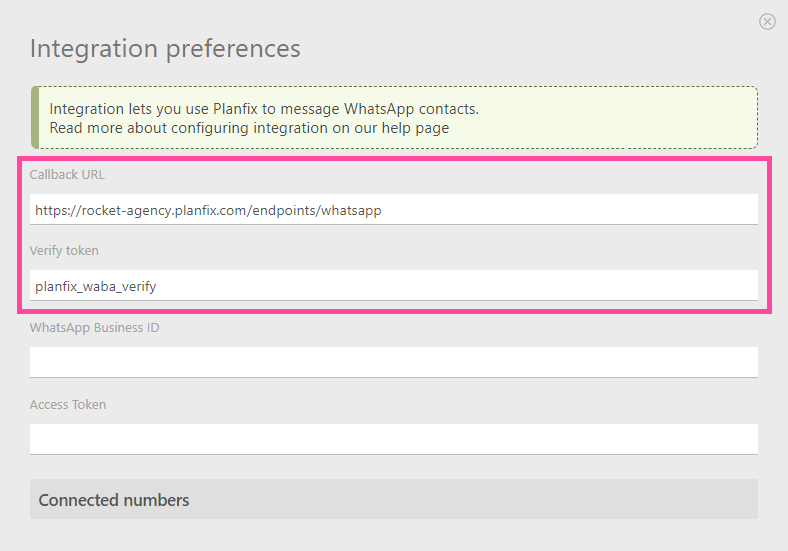
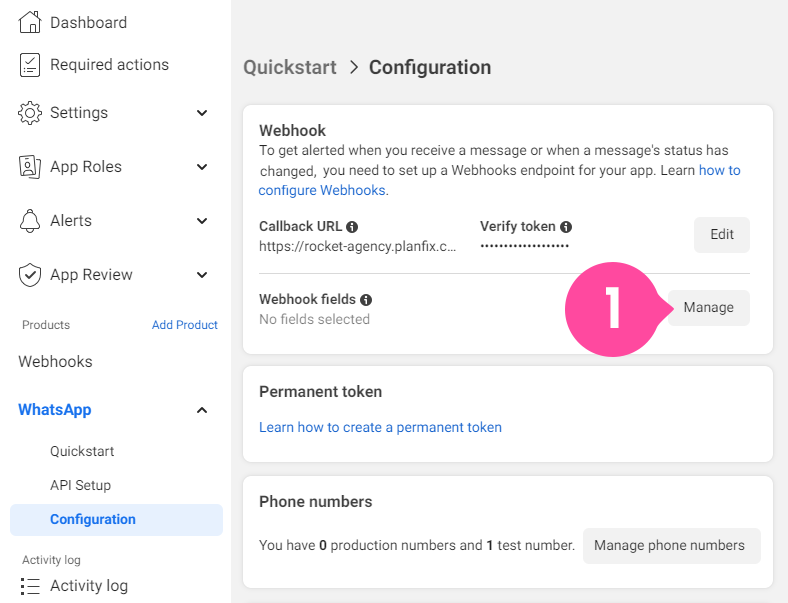
- Go to the menu on the left and select "WhatsApp" — "Settings." Add a Callback URL and Verify the token, copying them from the Planfix integration:
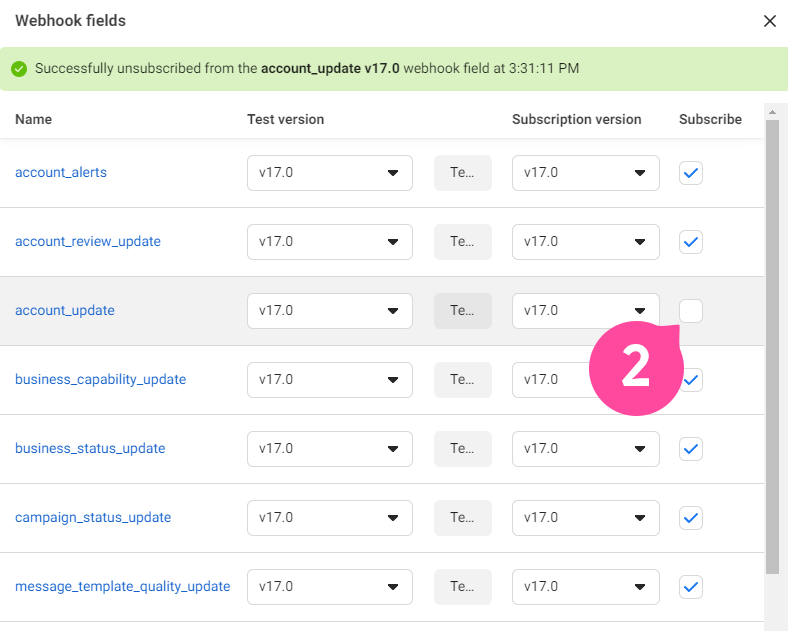
- Then set up "Webhook Fields," subscribing to all fields:
Creating a system user
A system user is needed to generate an Access Token. It is used when connecting the integration in Planfix. To create a system user, follow these steps:
- Log in to the Meta Business Suite.
- Find your business account, and in the dropdown menu in the top left corner, click the gear icon "Settings."
- Choose "Company Settings."
- Go to the "Users" — "System Users" section.
- Click "Add" and create a system user:
- Add the system user's name.
- Specify the role as "Administrator" and save.
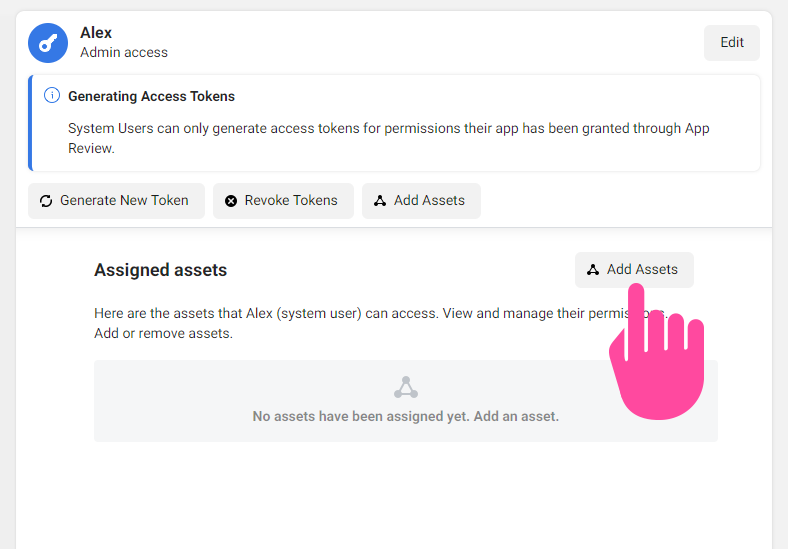
- You need to provide access to your application that was created at the beginning. To do this, click the *"Add Objects" button:
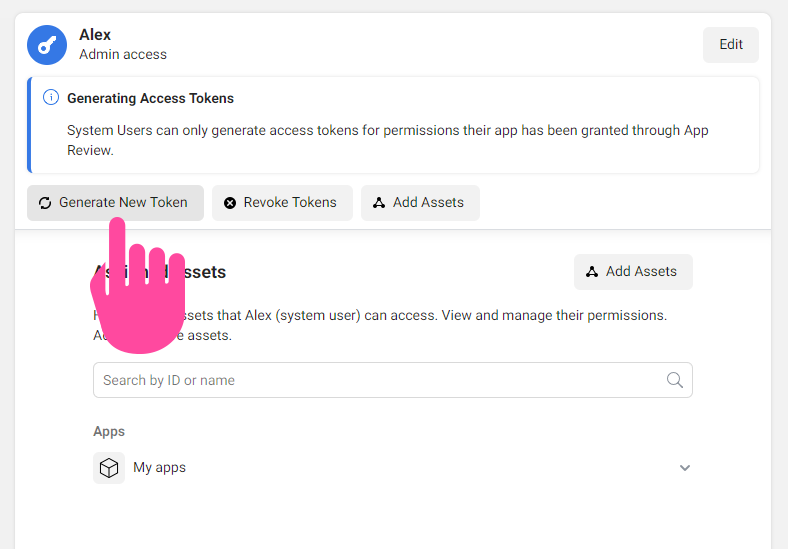
- Now click the "Create new token" (Access Token) button:
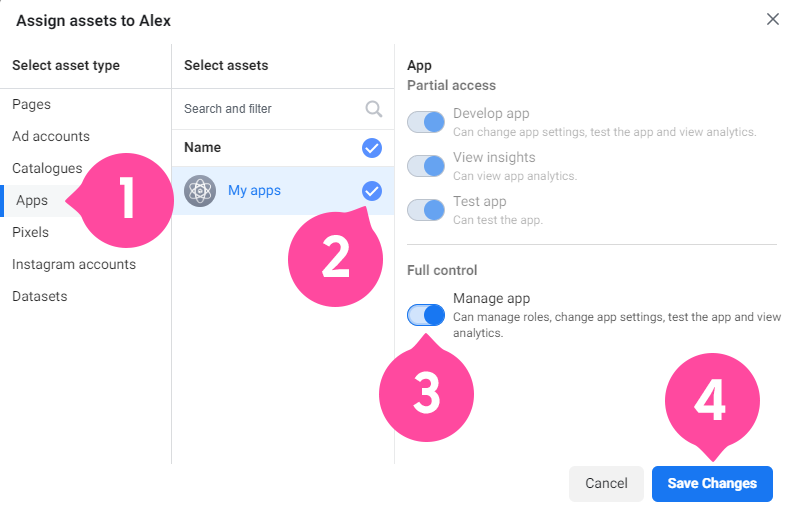
- Specify your application. Choose permissions: whatsapp_business_messaging and whatsapp_business_management.
- Generate the token (Access Token), copy it, and save it.
Granting the system user access to the phone number
- Log in to Meta Business Suite.
- Select the business account to which the application was added (1).
- Then on the left in the "Accounts" section, choose "WhatsApp Accounts" (2) and select your WhatsApp business account (3).
- Click the "Add People" button (4):
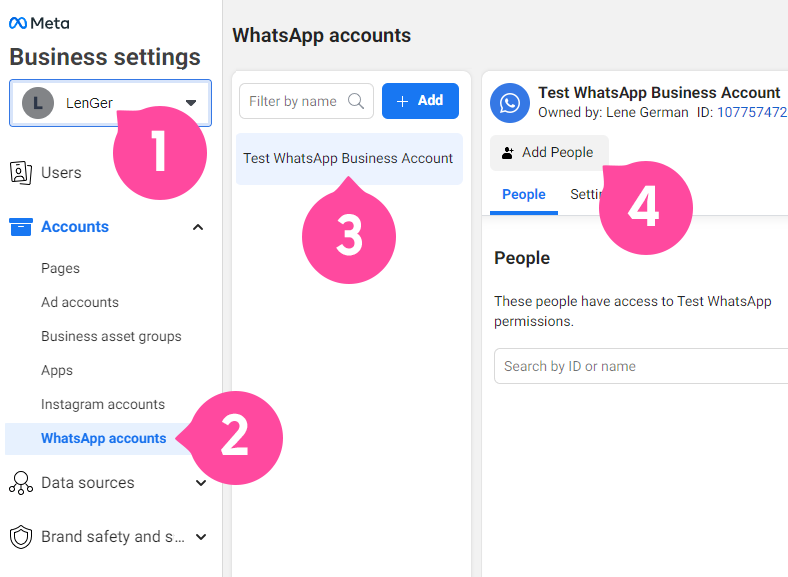
Choose the system user created earlier, give them full access rights, and save the settings.
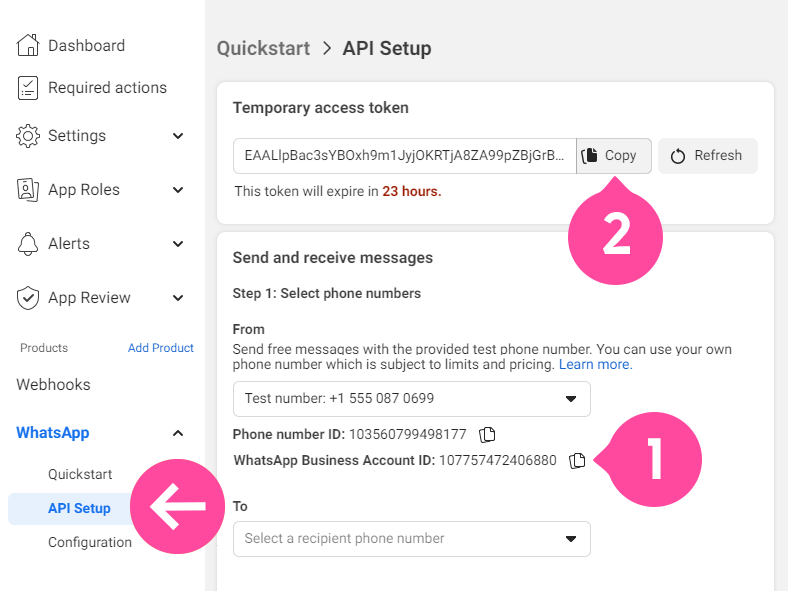
Work in test mode
- Open your application in Meta for Developers.
- Copy the WhatsApp Business Account ID (1) and the temporary token (2), then in the Planfix integration, add them to the corresponding fields.
- Click the "Update" link to add a test number automatically:
Work in live mode
- Open your application in Meta for Developers.
- Copy the WhatsApp Business Account ID.
- Add the "Add Phone Number" button if the number is not there. It is located below on the same page.
- After completing the integration setup, click the "Update" link. The corresponding numbers should be automatically added with the correct WhatsApp Business Account ID and Access Token.
Important
- Contacting someone through the official WhatsApp Cloud API is not allowed. This is a rule set by WhatsApp itself.
- With Planfix, you can use buttons or scripts to send pre-written messages approved by WhatsApp.