Task and contact script testing mode
Testing mode for task and contact scripts lets you test if a specific task or contact meets the script triggering conditions and also to run the script actions on the selected object.
How to activate
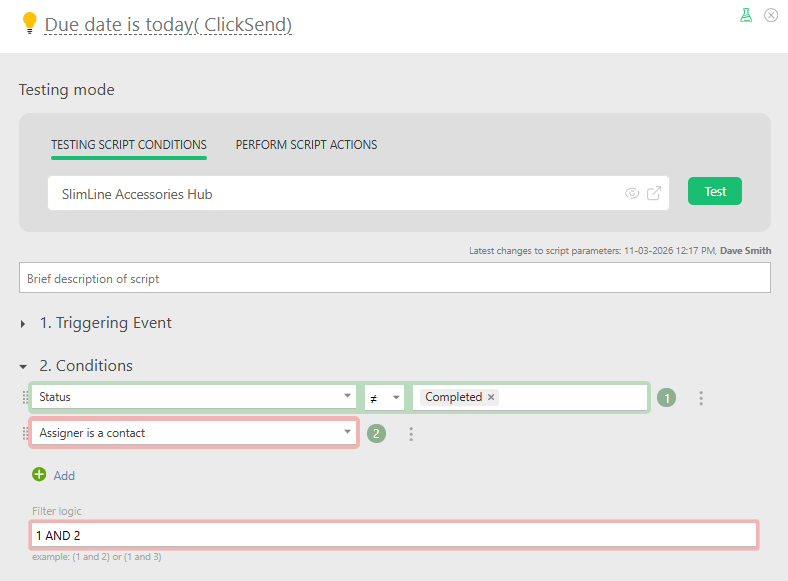
The testing mode is activated by clicking the flask icon. After activating testing mode, the top of the script window shows the option to choose one of the testing modes and an object to test:

Testing script conditions
Allows you to check whether the script conditions are met for the selected object. After selecting an object, a colored frame appears around each condition in the selection parameters:
- Green frame — the condition is met for the selected object.
- Red frame — the condition is not met.
A frame also appears around the row containing the logical expression that links the conditions. A red frame means the object does not match the selection parameters or the logical expression, so the script will not trigger for it:
How to use
- Sequentially review each condition outlined in red.
- Adjust the condition or the values of the tested object (task, contact) so that the condition is met.
- Repeat the test.
- Continue these processes until only the conditions outlined in green are still present in the testing mode.
- If a task of another object is selected for testing, and the script does not apply to that object, a special informational message is shown.
Perform script actions
Allows you to run the script actions on the selected object. This is useful when you have changed the script conditions or actions and want to verify its behavior, without having to return the task to a state where the script would run automatically.
After selecting an object and confirming, all script actions will be applied to it sequentially.
Important to note:
- All script actions are executed in full.
- When operations are executed this way, the script conditions are not checked.