Tables in document templates
From Planfix
Data tags are usually used to insert a table section with any number of objects (goods, services, etc.) into a document created from a template. This is done as follows:
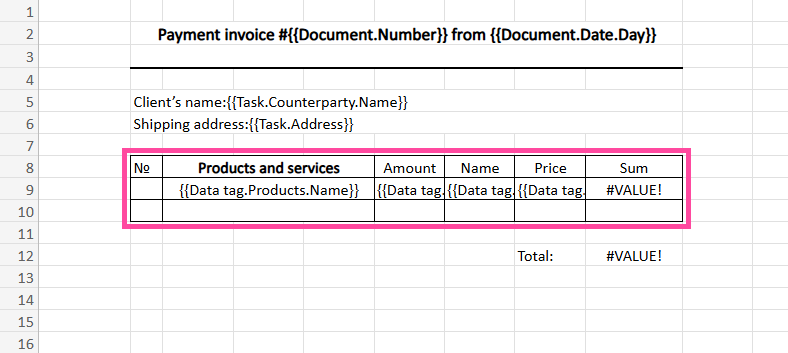
- A table is added to the template with the desired title and one row
- Variable names corresponding to the fields of the data tag storing the data are entered in the cells of this row
Sample: a table in an invoice template:

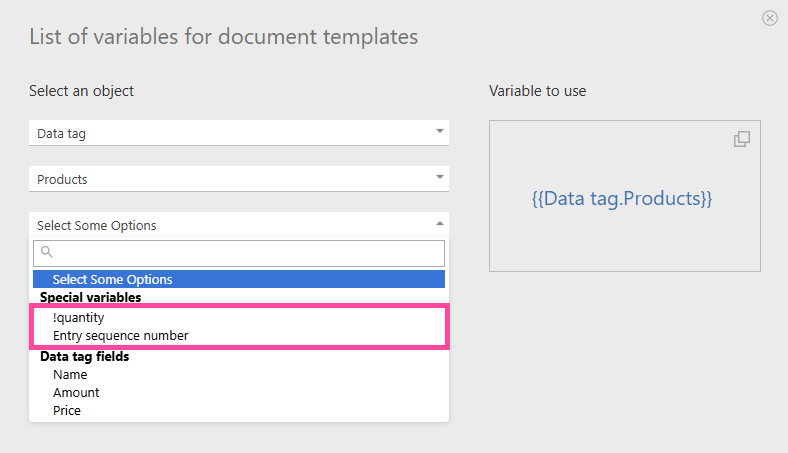
Variables for filling in tables are listed in the Documents — Document templates section:
In addition to the list of fields available for each data tag, there are also two universal variables: Entry sequence number and !quantity:

- Entry sequence number the row number of the table. It can be helpful to put this variable in the first cell of the table and use it to number items in the table.
- !quantity outputs the total number of data tag rows that will be included in the document.
Important
There's a difference in how documents are created from MS Word templates versus MS Excel templates:
- when creating a document using an MS Word template, new rows will only be added if a variable is inserted into the table;
- when creating a document using an MS Excel template, rows will be added regardless of where the variable is inserted.
Additional information
- Using a variable linked to a data tag, as well as a range of other variables, will automatically add rows when creating a document from a template. This means that you can create a document with a table having a size determined by the number of data tag rows in the task or comment used to create the document.
- Since the size of a document changes depending on the number of rows in the table, there is a special mechanism for inserting seals, signatures, and other images. This mechanism ensures that those images are placed correctly in the final document.
- In order for the height of a cell to automatically adjust based on the text in the variable in an Excel template, several conditions must be met. Keep in mind that when converting a document to PDF format, cell height will not be automatically adjusted:
- in Excel, enable Wrap tex for the cell.
- add the text {{autoheight}} in any column in the row.
- You can use conditional formatting to display alternating background colors in a table
- You can output all files attached to a task in a document
