FreePBX
FreePBX is a free software telephone system that lets you manage calls in a company.
Features
- Internet phone calls: uses VoIP technology, allowing calls over the internet instead of the regular phone network.
- Automatic call distribution: helps automatically route incoming calls to the correct numbers or departments within the company.
- Interactive voice menus (IVR): you can set up interactive voice menus so the caller can choose the appropriate department by pressing keys.
- Voicemail: if no one can answer a call, FreePBX can record a voicemail message that can be later reviewed.
- Conference calls: you can organize conference calls so multiple people can participate simultaneously.
- Call recording: you can record phone conversations for later listening or analysis.
- Integration with other systems: FreePBX can be integrated with various CRMs, including Planfix.
Connection
You can connect FreePBX to Planfix in two ways:
Note that the Planfix team does not configure Asterisk on the customer's side and does not provide consultations on such matters.
Planfix API for telephony
- Using this method, you can only receive call events in Planfix, i.e., when a call occurs, a call card will appear in the active Planfix tab.
- You cannot make calls from Planfix.
- To obtain call recordings you additionally need to configure apache/nginx (step 5).
Step 1
On the server, edit /etc/asterisk/extensions_override_freepbx.conf (example file) so that it contains the following 3 contexts:
- [macro-dialout-one-predial-hook]
- [macro-dialout-trunk-predial-hook]
- [macro-hangupcall]
For [macro-hangupcall], the exact form is not mandatory as in the example.
Find the [macro-hangupcall] context in extensions_additional.conf — copy it — and add the following line at the very beginning:
exten => s,1,Macro(hangupcall-send-post)
Step 2
Copy all contexts from the example into extension_custom.conf. This can also be done via the FreePBX interface.
Step 3
Add 3 lines to globals_custom.conf and replace {…} with the appropriate values:
- PBX_URL = {…} — URL of your PBX
- PF_URL = {…} — address to receive requests
- PF_KEY = {…} — Planfix authorization token
Step 4
- In Planfix, go to Account management — Integrations — Virtual PBXs — Planfix API for telephony.
- Fill in the PBX address so Planfix knows to accept events coming from that site or address.
Step 5
To get recordings you need to make them accessible externally via a web server. To do this using the Apache included in FreePBX, add a link to the recordings folder. The folder must have the correct owner, group and permissions — 775.
- Create the link:
ln -s /var/spool/asterisk/monitor /var/www/html/monitor
- Edit permissions and owner:
chmod -R 775 /var/www/html/monitor/chown -R asterisk:asterisk /var/www/html/monitor/
If you use a build without Apache — configure a similar setup for your web server.
FreePBX Integration
(FreePBX 16+ / Asterisk 18+)
Before starting, insert the following into your custom settings file extensions_override_freepbx.conf:
[macro-dialout-trunk-predial-hook]
exten => s,1,Gosub(planfix-mark-outbound,s,1)
same => n,MacroExit()

[planfix-mark-outbound]
exten => s,1,NoOp(Outgoing call from ${CALLERID(all)} to ${EXTEN})
same => n,Set(__CRM_DIRECTION=OUTBOUND)
same => n,NoOp(Setting CRM_DIRECTION=${CRM_DIRECTION})
same => n,Return()

[macro-dialout-one-predial-hook]
exten => s,1,Gosub(planfix-mark-inbound,s,1)
same => n,MacroExit()

[macro-dial-ringall-predial-hook]
exten => s,1,Gosub(planfix-mark-inbound,s,1)
same => n,MacroExit()

[planfix-mark-inbound]
exten => s,1,NoOp(Incoming call to ${EXTEN} from ${CALLERID(all)})
same => n,Set(__CRM_DIRECTION=INBOUND)
same => n,NoOp(Setting CRM_DIRECTION=${CRM_DIRECTION})
same => n,Return()
Step 1
Open FreePBX and add a user: Settings — Asterisk REST Interface Users — Add User.
Fill in the following fields:
- REST Interface User Name: user name
- REST Interface User Password: password
- Password Type: Plain Text
- Read Only: No
Copy (needed in step 4) and save.
Step 2
Add a manager: Settings — Asterisk Manager Users — Add Manager:
- Name: name
- Secret: leave default or set your own
- It's best not to change the other settings.
Copy (needed in steps 4 and 6) and save.
Step 3
Save settings by clicking Apply Config in the upper right corner.
Step 4
Go in Planfix to Primary Account Admin — Integrations — Virtual PBXs — FreePBX.
Fill in:
- PBX address: the URL of your PBX (including protocol and port where ARI is available)
- ARI User Name: Name from step 1
- ARI User Password: Password from step 1
Copy the receiving script URL and save the integration.
Step 5
On the server:
- In /var/spool/asterisk/ create a symlink named recording to the monitor folder (in the same directory). Command:
ln –s /var/spool/asterisk/monitor /var/spool/asterisk/recording
Step 6
- Go to /etc/asterisk/
- Create a scripts folder if not already present
- In the scripts folder create a file ami_listener.py
Step 7
Fill ami_listener.py according to the example, replacing:
- Your_user_name: with the Name from step 2
- Your_user_password: with the Secret from step 2
- Your_planfix_endpoint_url: with the receiving script URL from step 4
Step 8
Make the file executable with:
chmod +x /etc/asterisk/scripts/ami_listener.py
Step 9
- Go to /lib/systemd/system/
- Create a file crm-asterisk-listener.service
- Fill crm-asterisk-listener.service according to the example
Step 10
Add the file to autostart and start the service with the following commands:
sudo systemctl enable crm-asterisk-listener
sudo systemctl start crm-asterisk-listener
Working with older versions of Asterisk
For Asterisk 13+ you need to add additional properties to configuration files.
For /etc/asterisk/cdr.conf
[general]
enable = yes
batch = no
unanswered = yes
For /etc/asterisk/cdr_manager.conf
[general]
enable = yes
unanswered = yes
Note that call recordings retrieval will only work for Asterisk 14+.
Additional methods
You can call these methods yourself from the dialplan.
Getting information about supervisors
You can send a POST request to the URL specified in the integration containing:
Content-type: application/json
You will receive in response:
OR
If for the contact:
- there are no supervisors
- short numbers are not assigned
- the supervisor is the employee whose number was called ("short_PBX_extension")
Then the response will contain:
Missed call notification
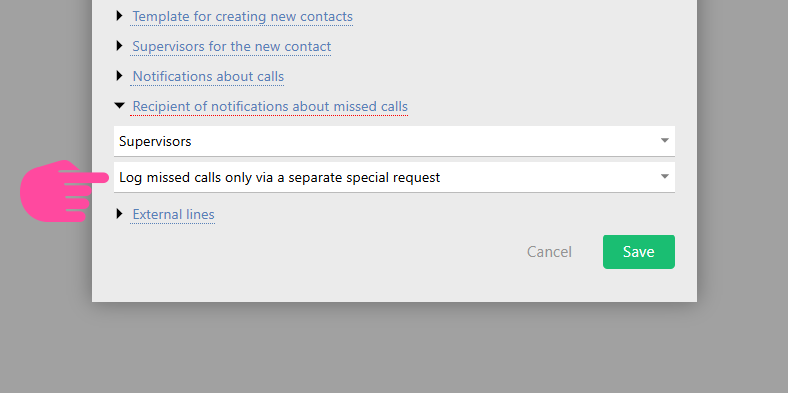
- To use this method, in the integration settings select — “Record missed calls only by a separate special request”:
You can send a POST request to the URL specified in the integration containing:
Content-type: application/json
{"event": "callMissedNotify", "uniqueId": "unique_call_id", "intNum": "short_PBX_extension_to_receive_missed_call_notification", "extNum": "external_subscriber_number"}
If an employee with that short number exists, they will receive a missed call notification.
The POST request response will be empty.
Operation notes
- Ensure the "panoramisk" library is installed for the script to work. It can be installed with 'pip install panoramisk'.
- If the script does not start immediately or you made changes to ami_listener after running commands, the following may help:
sudo systemctl daemon-reloadsudo systemctl restart crm-asterisk-listener
- To disable the integration, run:
sudo systemctl stop crm-asterisk-listenersudo systemctl disable crm-asterisk-listener
- In all connection methods you must have configured:
- internal extensions (Extensions)
- inbound and outbound routing (Inbound/Outbound Routes)