Customer Service Solution - Adding employees: Difference between revisions
From Planfix
No edit summary |
No edit summary |
||
| Line 38: | Line 38: | ||
== Go To == | == Go To == | ||
*[[Customer Service | Customer Service configuration]] | *[[Customer Service | Customer Service configuration]] | ||
*[[ | *[[Ready-made Solutions]] | ||
Revision as of 23:37, 12 April 2023
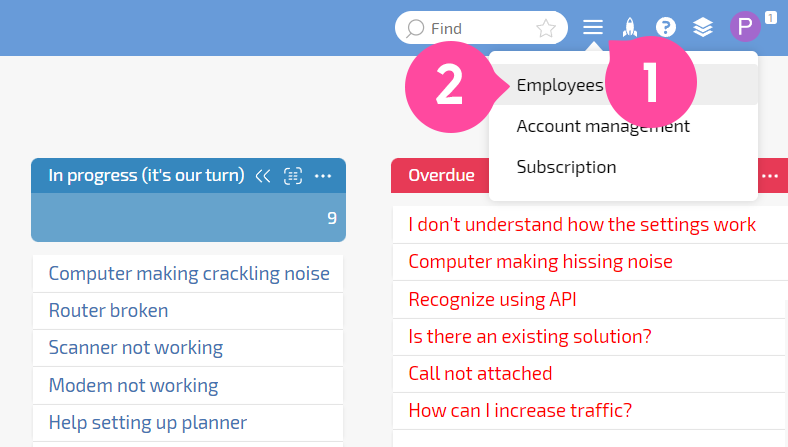
To add employees who will work with requests in the Customer Service configuration, follow these steps:
- Go to the Employees section:
- Add a new employee:
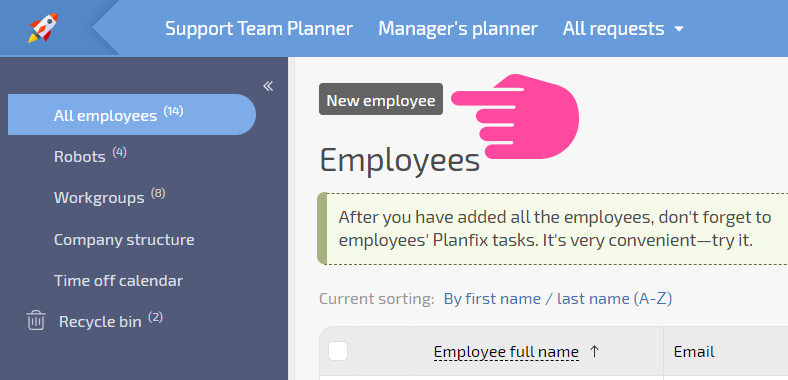
- Enter the first name, last name, and email address of the employee
- In the Groups section, add the Customer Service group:
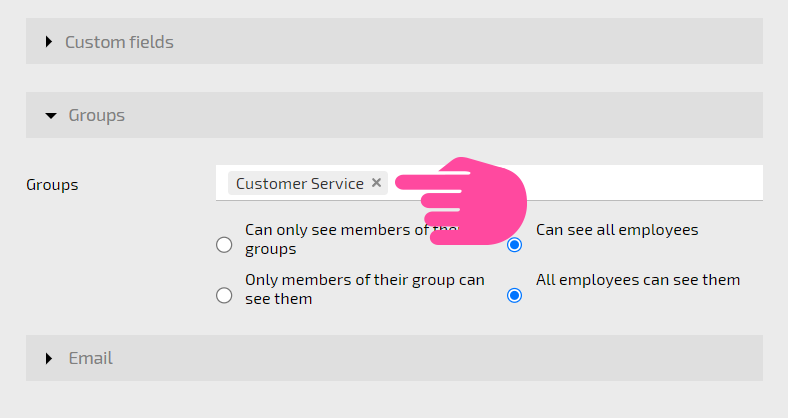
- Click Create Employee
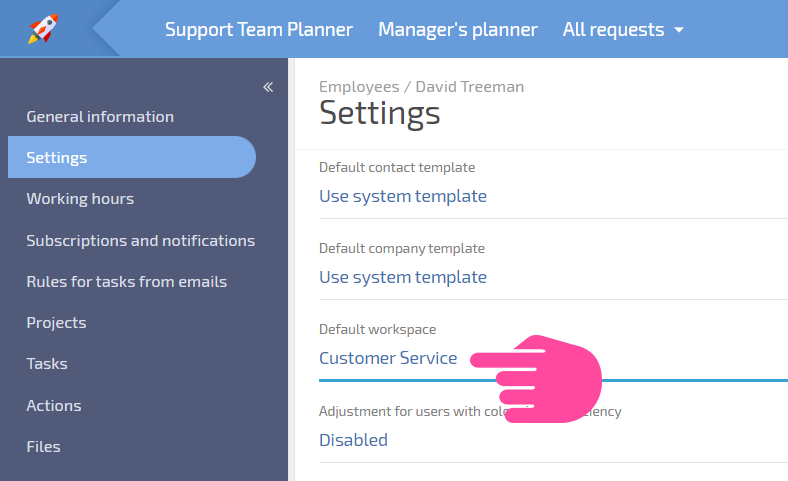
- Navigate to theSettings section in the created employee's profile:

- Set the Customer Service workspace by default:
The employee will receive an invitation with an activation link to your specified address. When he clicks on the link, he independently sets a login and a password for further work in Planfix.
After logging in, he can start working immediately in the Customer Service workspace.