Creating custom solutions: Difference between revisions
No edit summary |
No edit summary |
||
| (20 intermediate revisions by 3 users not shown) | |||
| Line 1: | Line 1: | ||
{{#seo: | {{#seo: | ||
|title=Creating custom configurations, How | |title=Creating custom configurations, How to build a new custom configuration | ||
|titlemode=append | |titlemode=append | ||
|keywords=Planfix, custom configurations, custom configuration, new custom configuration, new configuration, How | |keywords=Planfix, custom configurations, custom configuration, new custom configuration, new configuration, How to build | ||
|description=Creating custom configurations, How | |description=Creating custom configurations, How to build a new custom configuration | ||
}} | }} | ||
Custom | Custom solutions are [[Ready-made Solutions|solutions]] that any account administrator can create. They are used to transfer settings (sets of objects and links among them) between different Planfix accounts. This can help you maintain your company's best practices across various business processes. | ||
== Navigation == | |||
*[[#Creating solutions |Creating solutions]] | |||
*[[#Public links to custom solutions |Public links to custom solutions]] | |||
*[[Installing custom solutions |How to install a custom solution]] | |||
== | == Creating solutions == | ||
* | *Go to '''Account management — Solutions — Created by me:''' | ||
https://s.pfx.so/pf/7J/LrYobX.png | |||
*Click the '''Create solution button:''' | |||
https://s.pfx.so/pf/FZ/paLe9B.png | |||
https://s.pfx.so/pf/ | |||
In the window that opens: | In the window that opens: | ||
*Enter a name for the | *Enter a name for the solution. This is the name you will use to find your solution in the solutions list: | ||
https://s.pfx.so/pf/ | |||
https://s.pfx.so/pf/hu/8AZWM3.png | |||
*Enter a description for your solution so you and other users will be able to understand what it is intended for, what processes it works with, and how it helps: | |||
https://s.pfx.so/pf/ue/DqDemf.png | |||
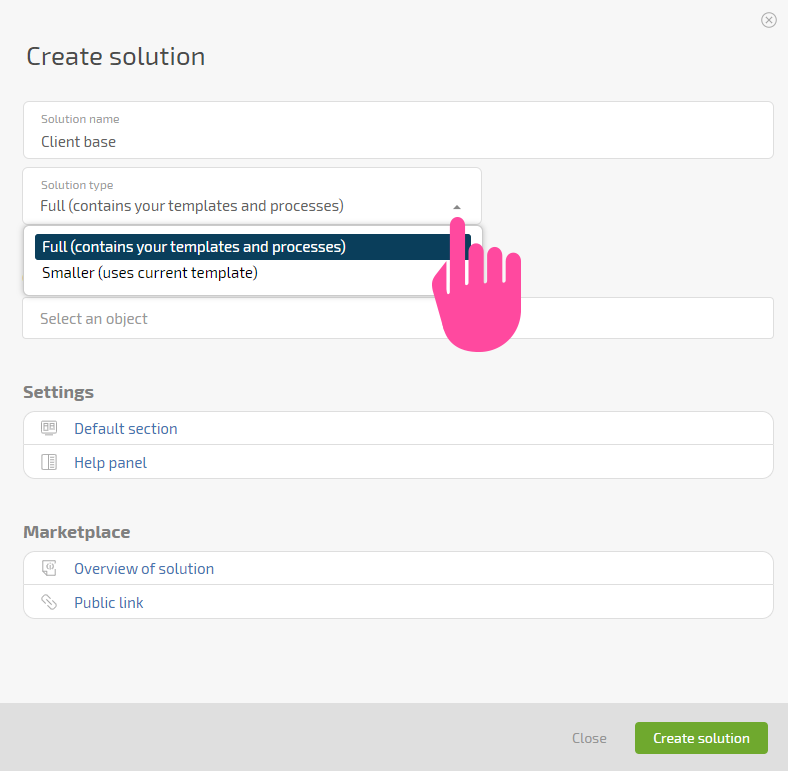
* | *Select a solution type, full or reduced: | ||
https://s.pfx.so/pf/Zp/cWmq8k.png | |||
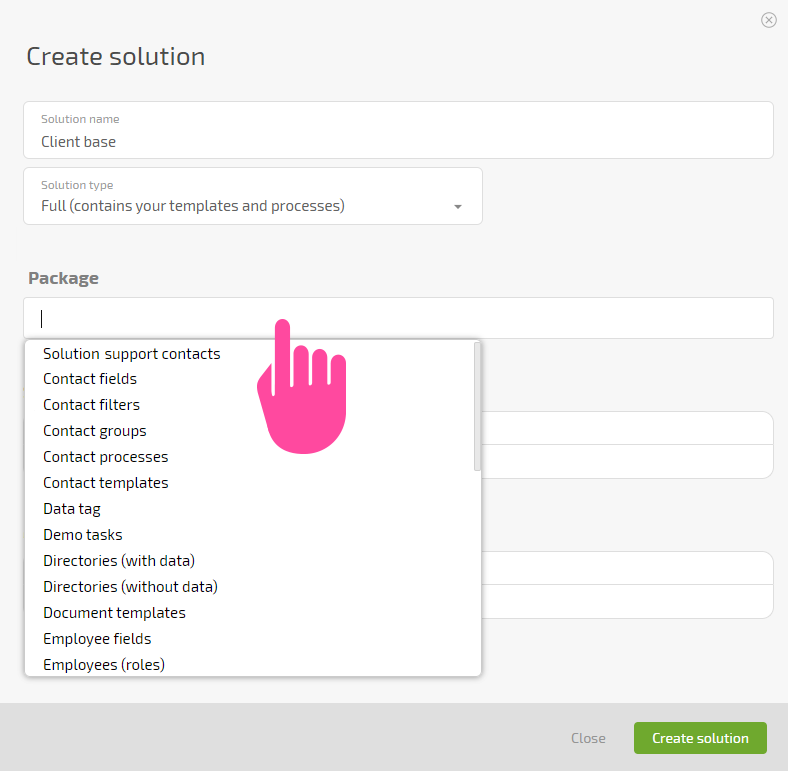
*Select the types of objects to include in the solution: | |||
https://s.pfx.so/pf/pn/9Kaltd.png | |||
https://s.pfx.so/pf/ | |||
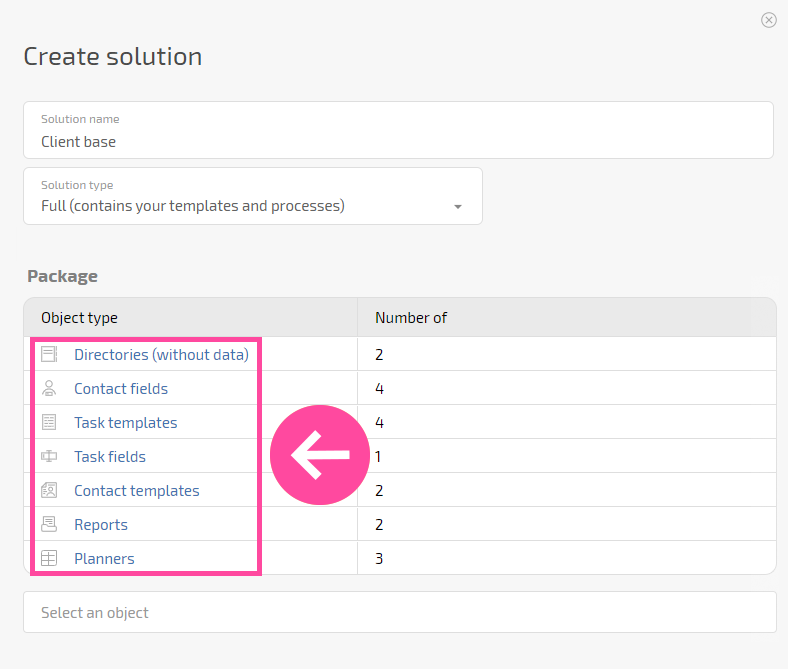
*Each type of object selected will appear as a row in the table shown below: | *Each type of object selected will appear as a row in the table shown below: | ||
https://s.pfx.so/pf/fe/cozxFr.png | |||
*Click a line to select the objects of each type that will be included in the solution: | |||
https://s.pfx.so/pf/3Q/Ra1tfa.png | |||
:'''Important:''' If you want to add a tree of task templates to the solution, you only need to select the main template. The remaining nested templates will be added automatically. | |||
*Specify the section the user should be sent to once the solution is installed: | |||
https://s.pfx.so/pf/Fx/Piw7M6.png | |||
https://s.pfx.so/pf/ | |||
| Line 57: | Line 64: | ||
'''Don't open''' — this is the default | '''Don't open''' — this is the default | ||
'''Workspace''' — displayed if there are workspaces in the | '''Workspace''' — displayed if there are workspaces in the solution | ||
'''Planners and filters''' — displayed if there are planners and filters in the | '''Planners and filters''' — displayed if there are planners and filters in the solution | ||
Specify whether or not the help panel should open with a description once the | Specify whether or not the help panel should open with a description once the solution is installed: | ||
https://s.pfx.so/pf/ | |||
https://s.pfx.so/pf/Yo/WR3YIL.png | |||
| Line 70: | Line 78: | ||
'''Don't open''' — this is the default | '''Don't open''' — this is the default | ||
''' | '''Overview of solution''' — add a description that will be displayed in the panel | ||
'''Link to site''' — enter any link that will open | '''Link to site''' — enter any link that will open | ||
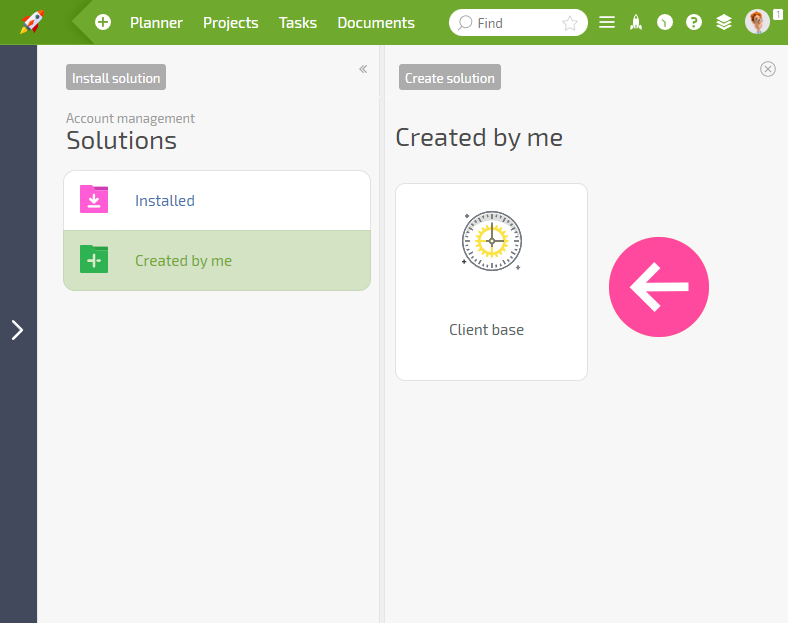
Once everything is ready, click '''Create | Once everything is ready, click '''Create solution''' (above). The solution will appear in the list, in the '''Created by me:''' | ||
https://s.pfx.so/pf/ | |||
https://s.pfx.so/pf/dH/lDtiQl.png | |||
== Public links to custom solutions == | |||
To [[Installing custom solutions | use a custom solution]] in a different account, you must generate a public link. | |||
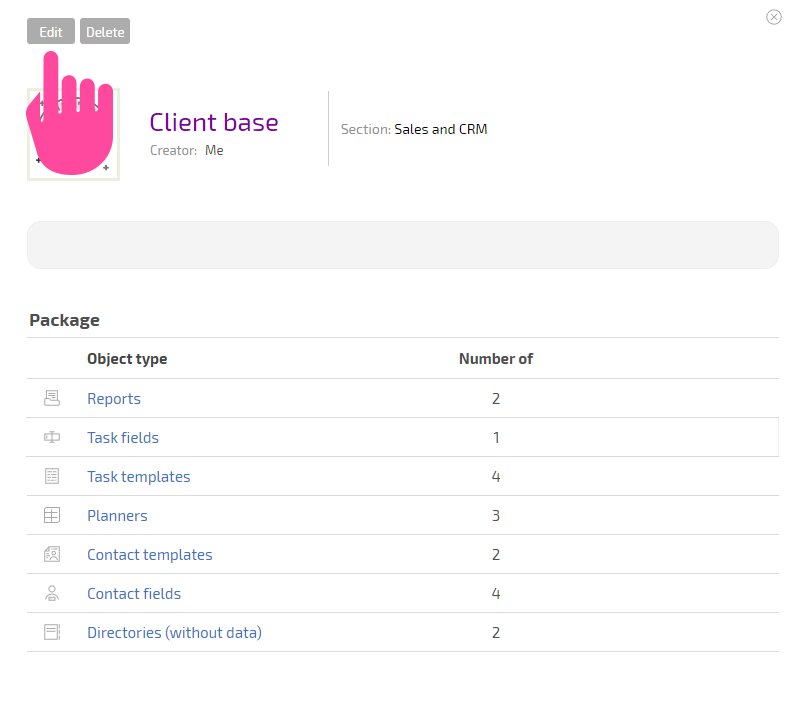
*Click the name of the custom solution in the '''Created by me — Edit button''' to generate a public link: | |||
https://s.pfx.so/pf/Cc/0vlCDe.png | |||
*Generate a public link to your solution: | |||
https://s.pfx.so/pf/dA/GBExjO.png | |||
https://s.pfx.so/pf/ | |||
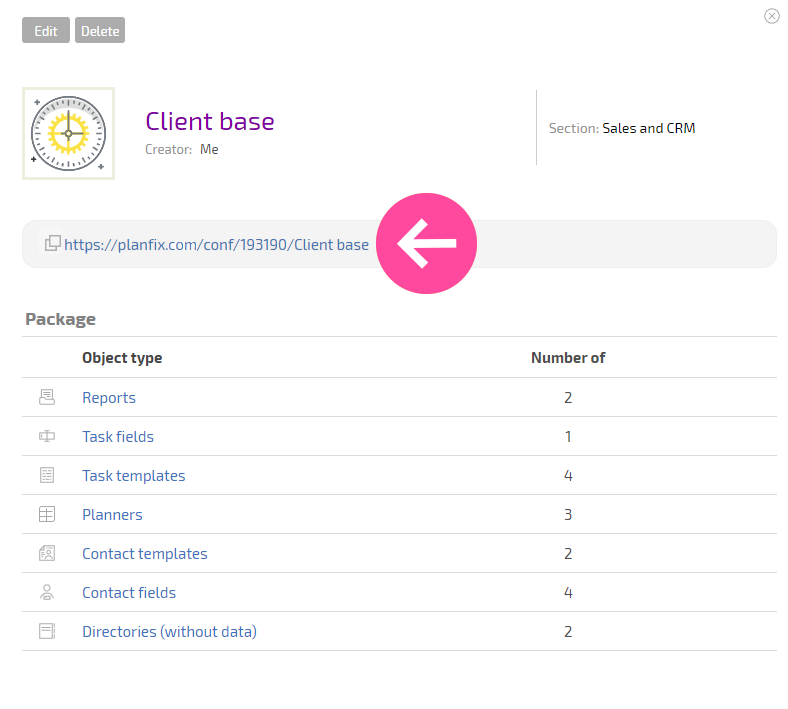
*The public link generated will be displayed in the | *The public link generated will be displayed in the solution: | ||
https://s.pfx.so/pf/VV/Dc02Mp.png | |||
Share this link with other Planfix users, or use it to transfer your settings to another account. | |||
If you no longer want your solution to be available via this link, generate a new one. Please note that this will only affect future attempts to use the old link to install your solution. Solutions that were installed using the old link before the new link was generated will still work. | |||
== Additional information == | == Additional information == | ||
* Administrators and technical administrators of all accounts can create custom | * Administrators and technical administrators of all accounts can create custom solutions. | ||
* Only the creator of a custom | * Only the creator of a custom solution can view it. The creator can also delete their solution or (re)generate a public link to it. Solutions are not available to other account users with administrator rights. | ||
* To copy protect your | * To copy protect your solution, you [[Prohibit adding objects from this configuration to other configurations|can disable duplication of the contents to other solutions]]. | ||
== Go To == | == Go To == | ||
*[[ | *[[Ready-made Solutions]] | ||
*[[Account Management]] | *[[Account Management]] | ||
*[[Feature Description]] | *[[Feature Description]] | ||
Latest revision as of 10:54, 21 April 2023
Custom solutions are solutions that any account administrator can create. They are used to transfer settings (sets of objects and links among them) between different Planfix accounts. This can help you maintain your company's best practices across various business processes.
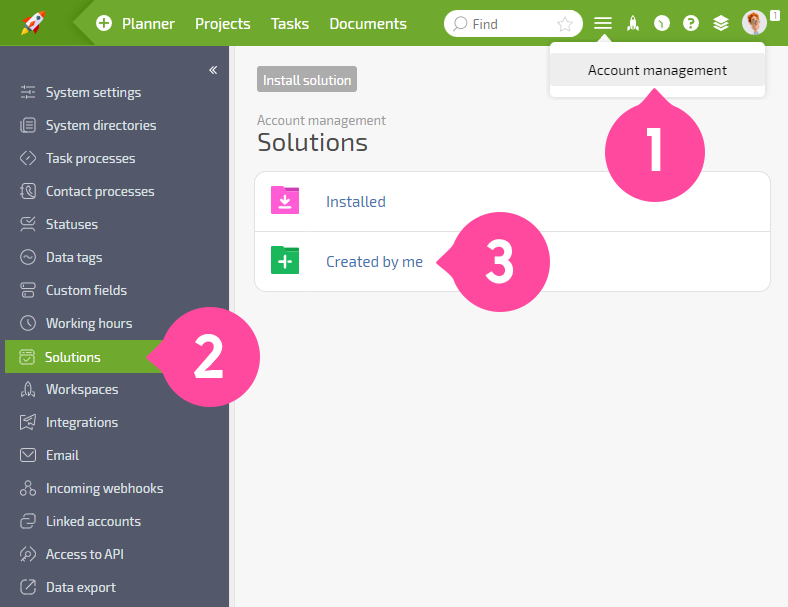
Creating solutions
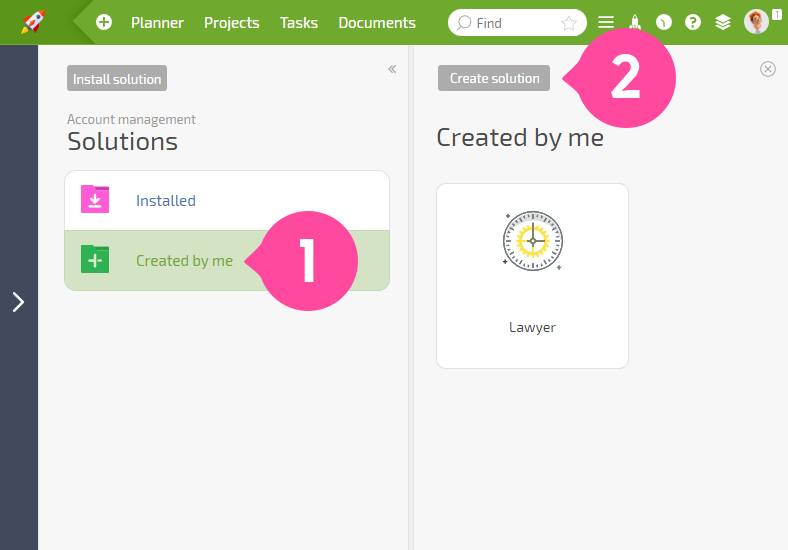
- Go to Account management — Solutions — Created by me:
- Click the Create solution button:
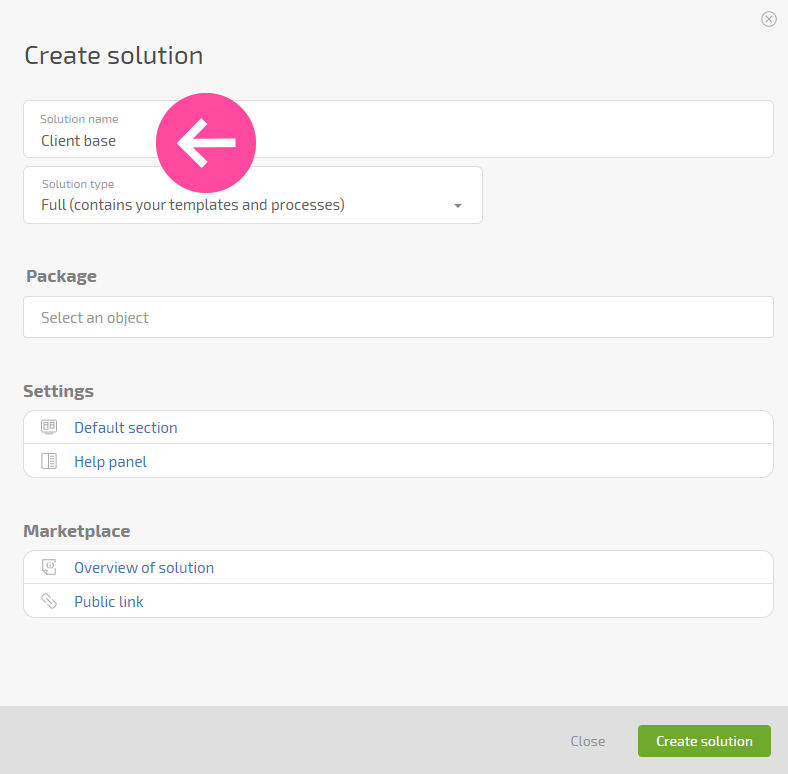
In the window that opens:
- Enter a name for the solution. This is the name you will use to find your solution in the solutions list:
- Enter a description for your solution so you and other users will be able to understand what it is intended for, what processes it works with, and how it helps:
- Select a solution type, full or reduced:
- Select the types of objects to include in the solution:
- Each type of object selected will appear as a row in the table shown below:
- Click a line to select the objects of each type that will be included in the solution:
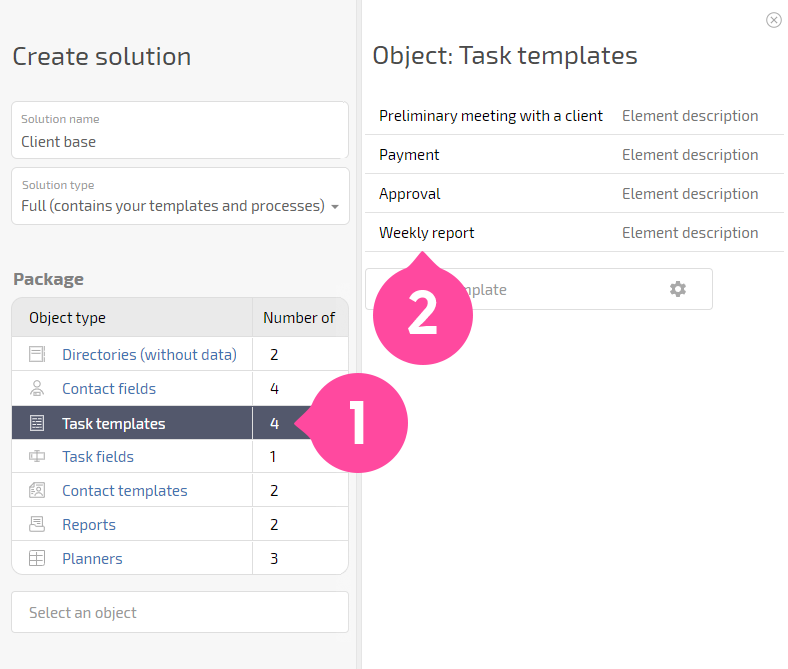
- Important: If you want to add a tree of task templates to the solution, you only need to select the main template. The remaining nested templates will be added automatically.
- Specify the section the user should be sent to once the solution is installed:
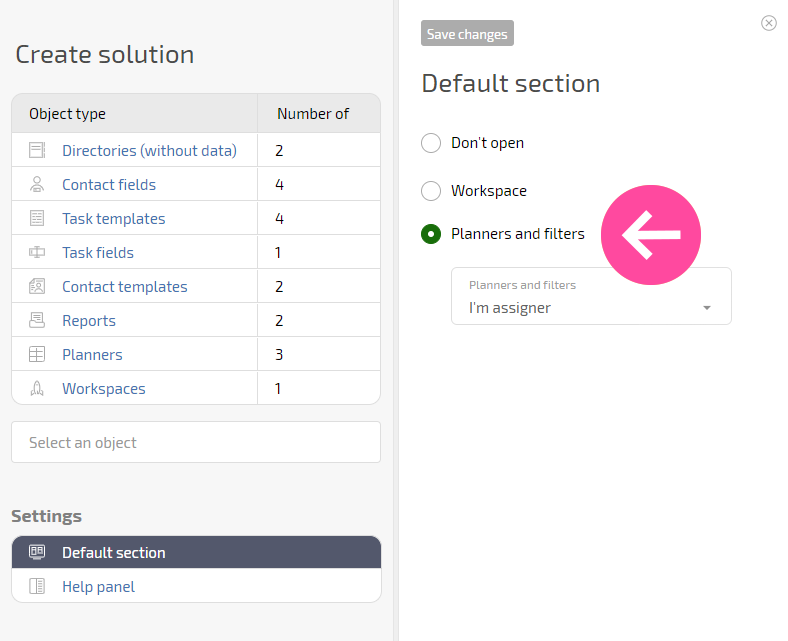
- Available default sections:
Don't open — this is the default
Workspace — displayed if there are workspaces in the solution
Planners and filters — displayed if there are planners and filters in the solution
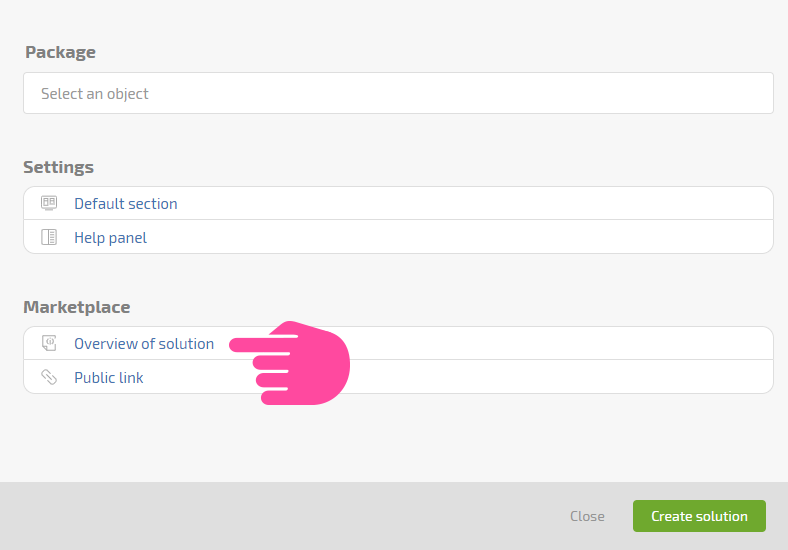
Specify whether or not the help panel should open with a description once the solution is installed:
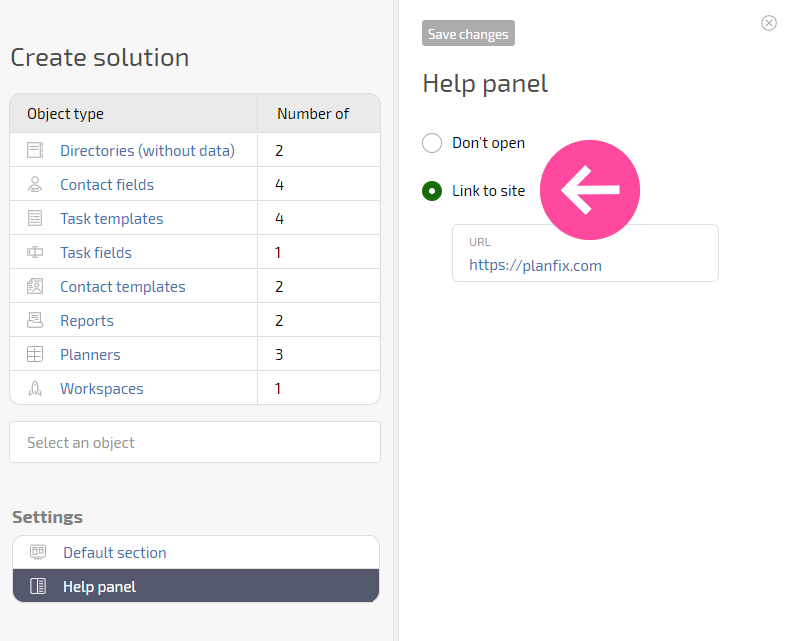
- Available options:
Don't open — this is the default
Overview of solution — add a description that will be displayed in the panel
Link to site — enter any link that will open
Once everything is ready, click Create solution (above). The solution will appear in the list, in the Created by me:
Public links to custom solutions
To use a custom solution in a different account, you must generate a public link.
- Click the name of the custom solution in the Created by me — Edit button to generate a public link:
- Generate a public link to your solution:
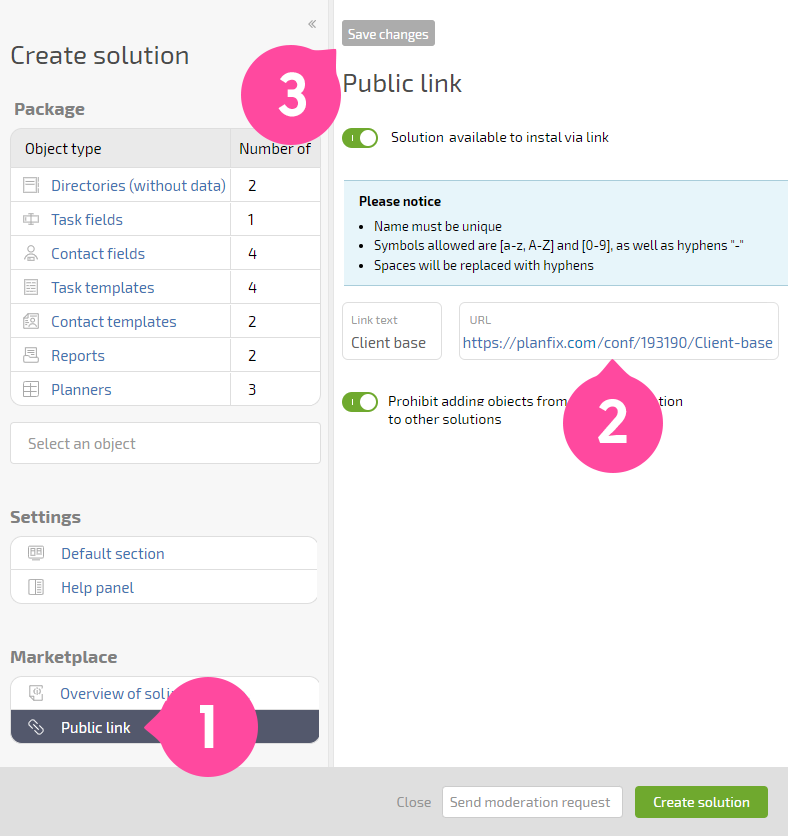
- The public link generated will be displayed in the solution:
Share this link with other Planfix users, or use it to transfer your settings to another account.
If you no longer want your solution to be available via this link, generate a new one. Please note that this will only affect future attempts to use the old link to install your solution. Solutions that were installed using the old link before the new link was generated will still work.
Additional information
- Administrators and technical administrators of all accounts can create custom solutions.
- Only the creator of a custom solution can view it. The creator can also delete their solution or (re)generate a public link to it. Solutions are not available to other account users with administrator rights.
- To copy protect your solution, you can disable duplication of the contents to other solutions.