Creating and editing rules: Difference between revisions
From Planfix
No edit summary |
No edit summary |
||
| (18 intermediate revisions by the same user not shown) | |||
| Line 1: | Line 1: | ||
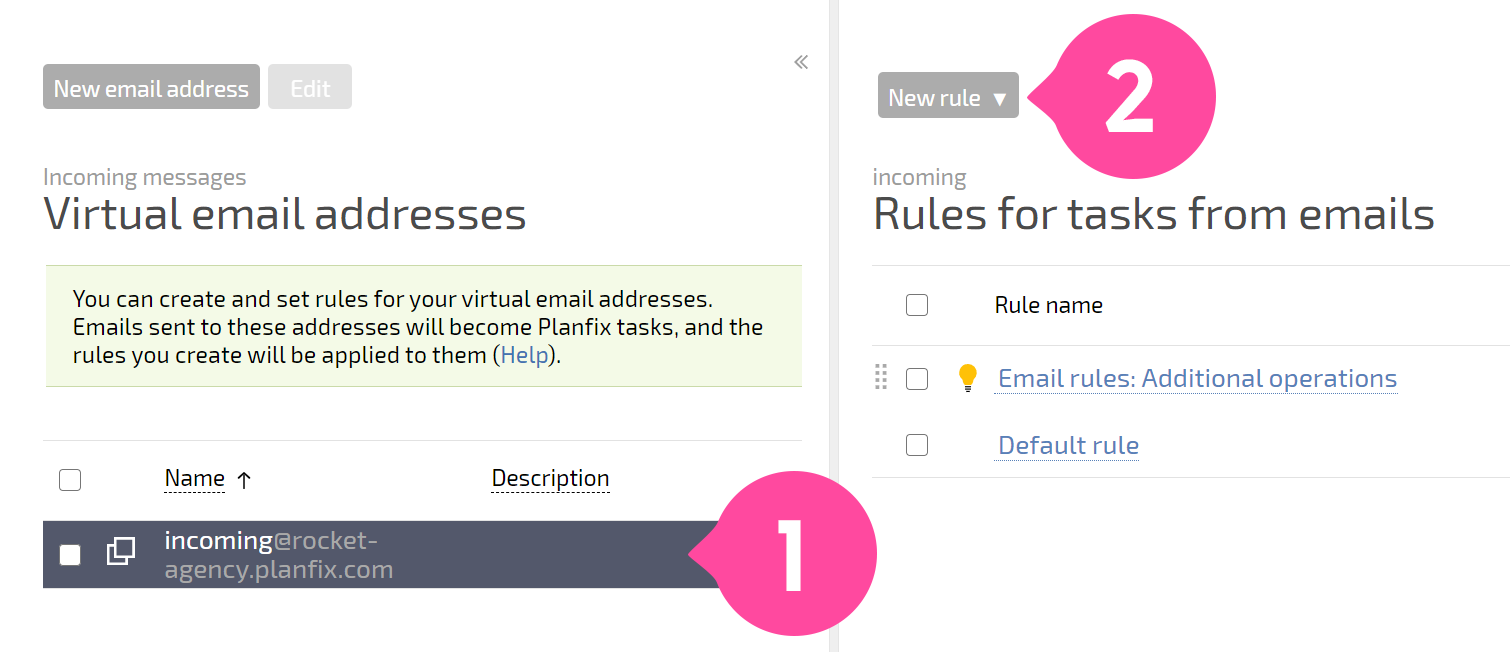
You can [[Rules for creating tasks by email | create a rule for processing emails]] using the '''New rule''' button in the tools panel in a [[Virtual email addresses | virtual email address]] (or [[Project email addresses | project email address]] or [[Assigning tasks by email | employee external email address]]): | |||
https://s.pfx.so/pf/Lx/9exc7X.png | |||
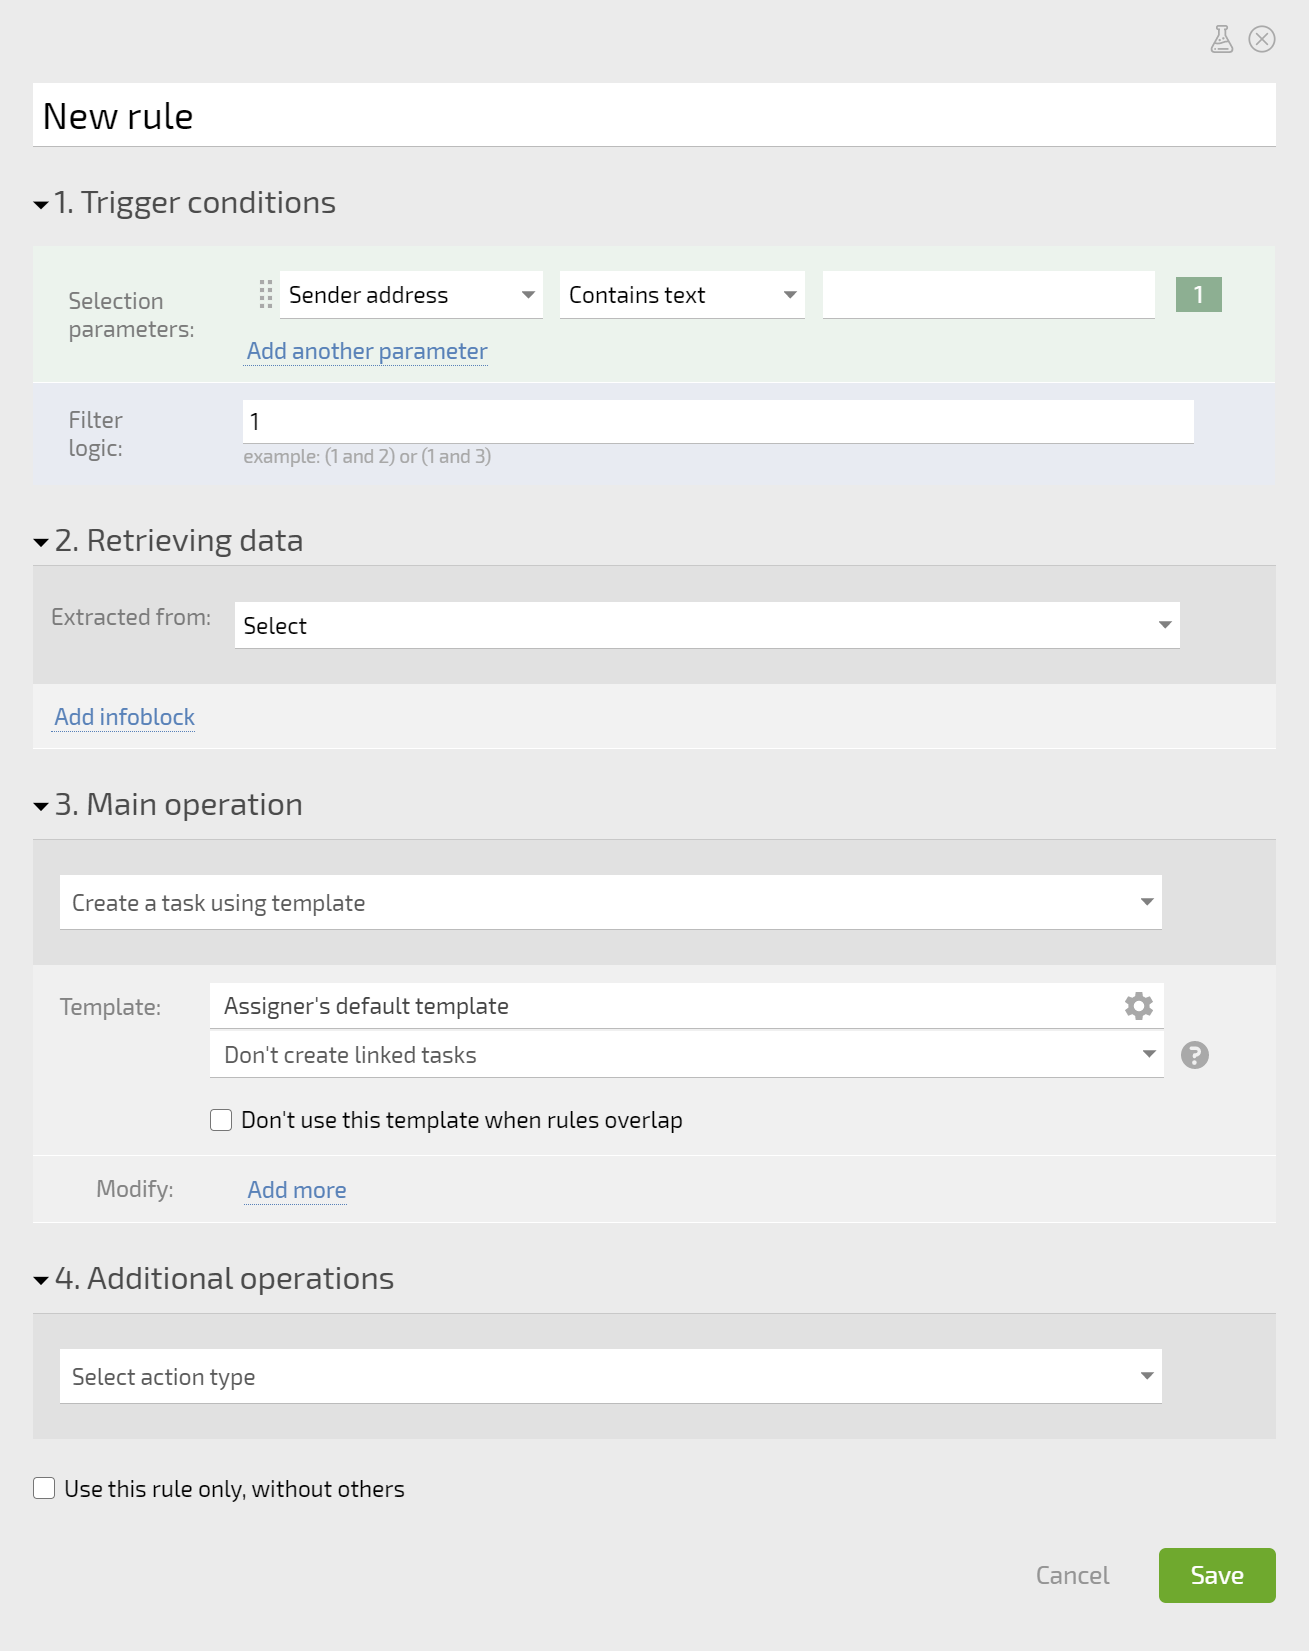
The window for creating a rule looks as follows: | |||
https://s.pfx.so/pf/Xs/RFBw5V.png | |||
* | |||
* | ==How rules work== | ||
* | The following happens when an email is received by an email address with a configured rule: | ||
*A check is done to see if the email meets all the trigger conditions specified in the rule. | |||
*If it does, data is extracted from the email to be entered into Planfix. | |||
*The main action is completed: a task or contact is created, or a comment is added to a task. | |||
*Additional actions specified in the rule are completed. The object created is populated with the data from the email. | |||
==Email processing rule window== | |||
To make rule configuration easier, the rule window is broken out into four sections, which correspond to the processing steps described above: | |||
*[[Email rules: Trigger conditions | 1. Trigger conditions]] | |||
*[[Email rules: Extracting data | 2. Data extraction]] | |||
*[[Email rules: Main operation | 3. Main operation]] | |||
*[[Email rules: Additional operations | 4. Additional operations]] | |||
*If the | ==Important== | ||
*If an email meets the conditions of multiple rules at once, it will be applied [[Overlapping rules for processing emails | according to a specific algorithm when the email is processed]]. | |||
*The interface for creating and editing email processing rules launched in November 2019. It allows you to use all the operations available in [[scripts]]. Before rules were introduced, an old system was used, which continues to be supported for reverse compatibility. In the future, access to the old system may be restricted for new users. | |||
== Go To == | |||
== Go | |||
*[[Rules for creating tasks by email]] | *[[Rules for creating tasks by email]] | ||
*[[Feature Description]] | |||
Latest revision as of 22:44, 25 March 2021
You can create a rule for processing emails using the New rule button in the tools panel in a virtual email address (or project email address or employee external email address):
The window for creating a rule looks as follows:
How rules work
The following happens when an email is received by an email address with a configured rule:
- A check is done to see if the email meets all the trigger conditions specified in the rule.
- If it does, data is extracted from the email to be entered into Planfix.
- The main action is completed: a task or contact is created, or a comment is added to a task.
- Additional actions specified in the rule are completed. The object created is populated with the data from the email.
Email processing rule window
To make rule configuration easier, the rule window is broken out into four sections, which correspond to the processing steps described above:
Important
- If an email meets the conditions of multiple rules at once, it will be applied according to a specific algorithm when the email is processed.
- The interface for creating and editing email processing rules launched in November 2019. It allows you to use all the operations available in scripts. Before rules were introduced, an old system was used, which continues to be supported for reverse compatibility. In the future, access to the old system may be restricted for new users.