POST-request: Difference between revisions
From Planfix
(→Slack) |
|||
| Line 34: | Line 34: | ||
3. Custom script or button and a custom field in your object to store the verification result | 3. Custom script or button and a custom field in your object to store the verification result | ||
</pre> | </pre> | ||
The first step is to send a POST request to MailSend containing the email of the contact. | '''The first step''' is to send a POST request to MailSend containing the email of the contact. | ||
Latest revision as of 14:29, 8 August 2025
Use case examples
Slack
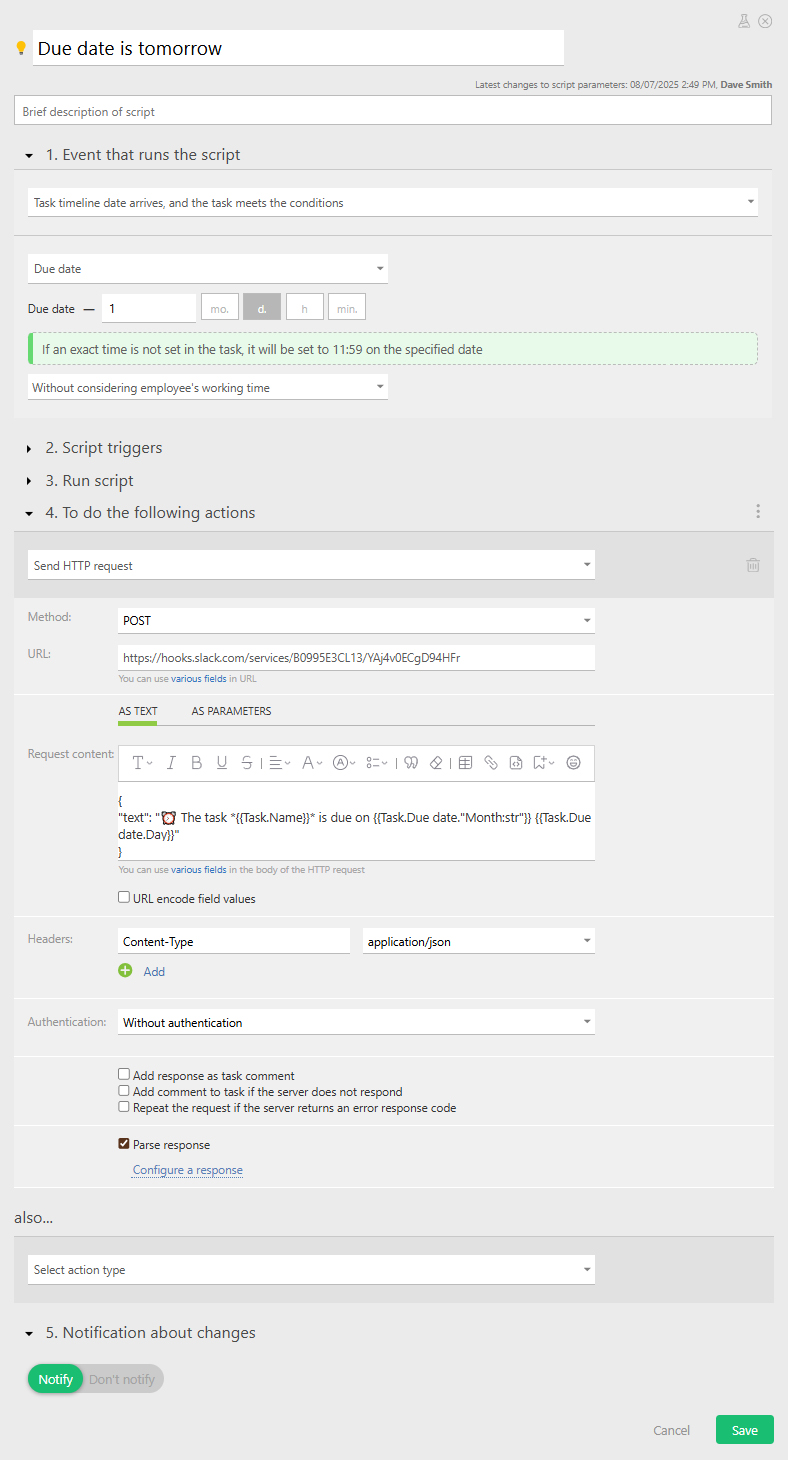
This setup is helpful when you want to send a notification in Slack that a task's due date is approaching.
What you need:
1. Slack workspace with incoming webhooks enabled
2. Webhook URL that links to the desired Slack channel
3. Custom script or button your Planfix object
- Firstly, we set up a POST request to Slack with the task’s assignee and due date when the deadline is approaching — in our case, when it's tommorow.
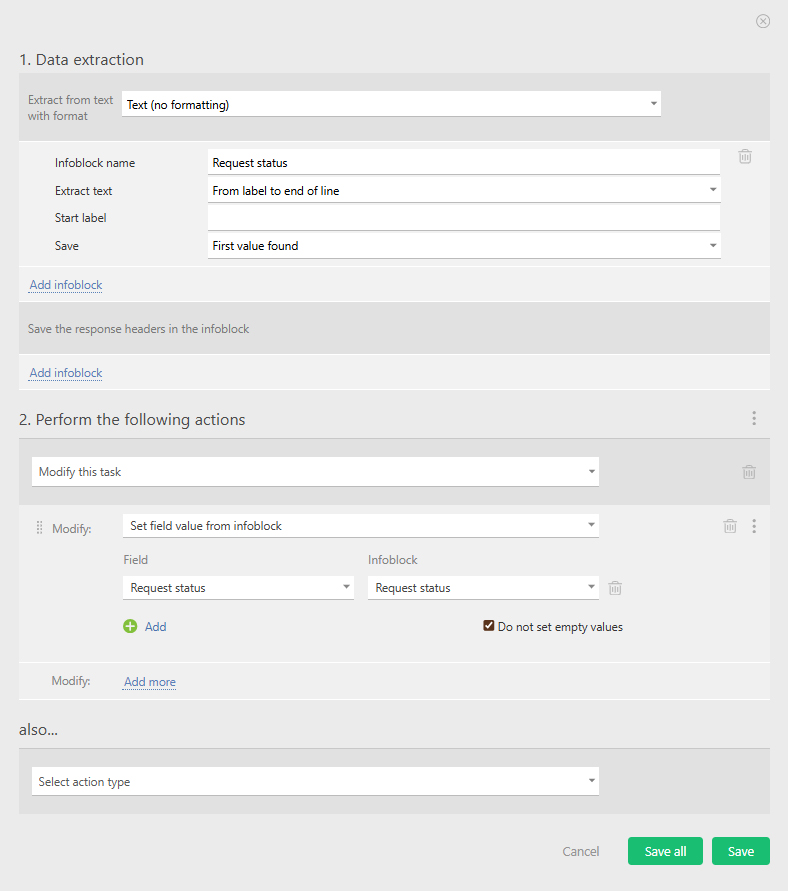
- Next, we parse Slack’s response. Since it just returns “ok,” we can use this as a simple check to confirm the request was delivered without issues.
MailerSend
You can use MailSend to verify an email. In this example, will be verifying emails of newly added contacts. What you need:
1. MailerSend account with Email Verification credits
2. API token with the Email Verification permission
3. Custom script or button and a custom field in your object to store the verification result
The first step is to send a POST request to MailSend containing the email of the contact.