Brevo: Difference between revisions
From Planfix
No edit summary |
No edit summary |
||
| Line 13: | Line 13: | ||
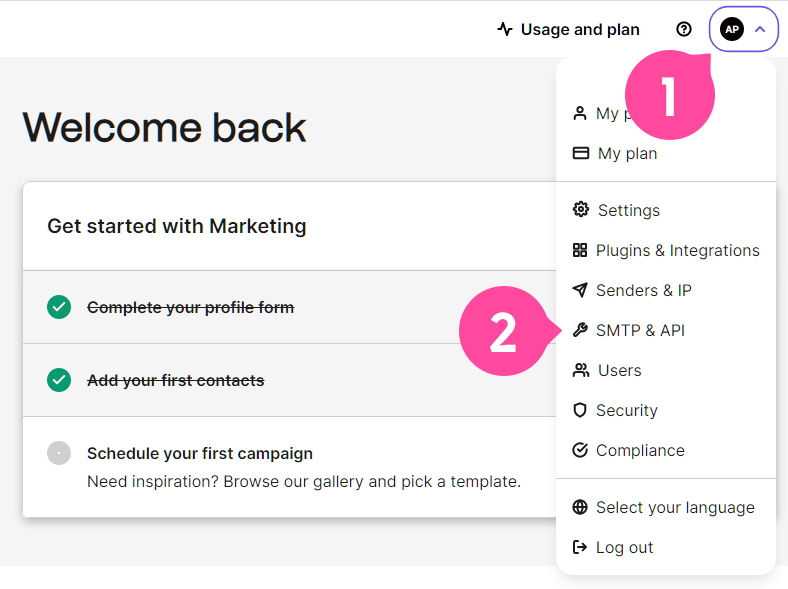
*Open [https://www.brevo.com/ Brevo] on the next tab and log in. Then in the account menu, find the SMTP & API section: | *Open [https://www.brevo.com/ Brevo] on the next tab and log in. Then in the account menu, find the SMTP & API section: | ||
https://s.pfx.so/pf/ | https://s.pfx.so/pf/BY/AeC9dd.png | ||
*Click the "Create a new API key" button: | *Click the "Create a new API key" button: | ||
https://s.pfx.so/pf/ | https://s.pfx.so/pf/e9/axyVIE.png | ||
*Come up with a name: | *Come up with a name: | ||
https://s.pfx.so/pf/ | https://s.pfx.so/pf/KV/xdmpfJ.png | ||
*Copy the generated API key: | *Copy the generated API key: | ||
https://s.pfx.so/pf/ | https://s.pfx.so/pf/Sf/vtGFjw.png | ||
Latest revision as of 09:45, 9 May 2023
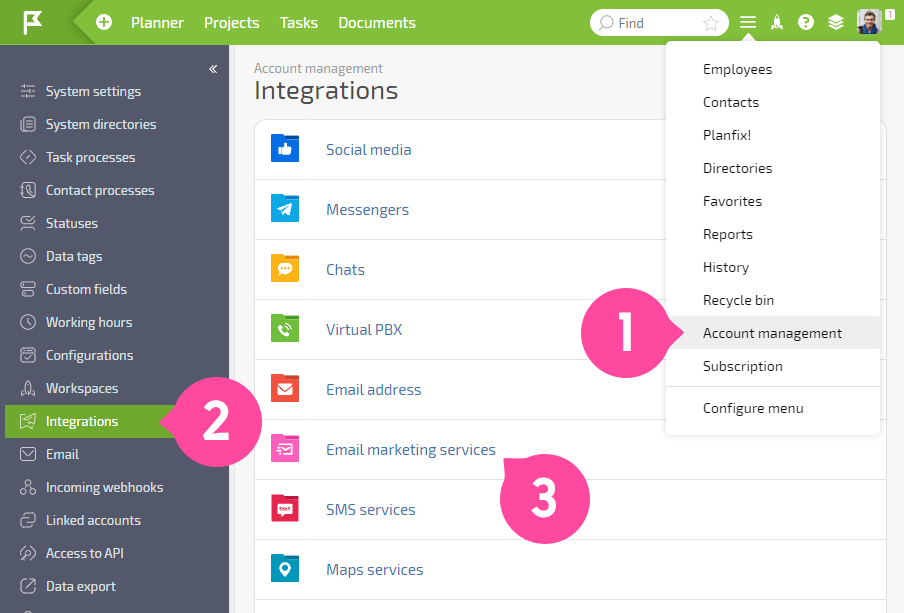
To enable integration with Brevo, go to Account Management — Integrations — Email marketing services:
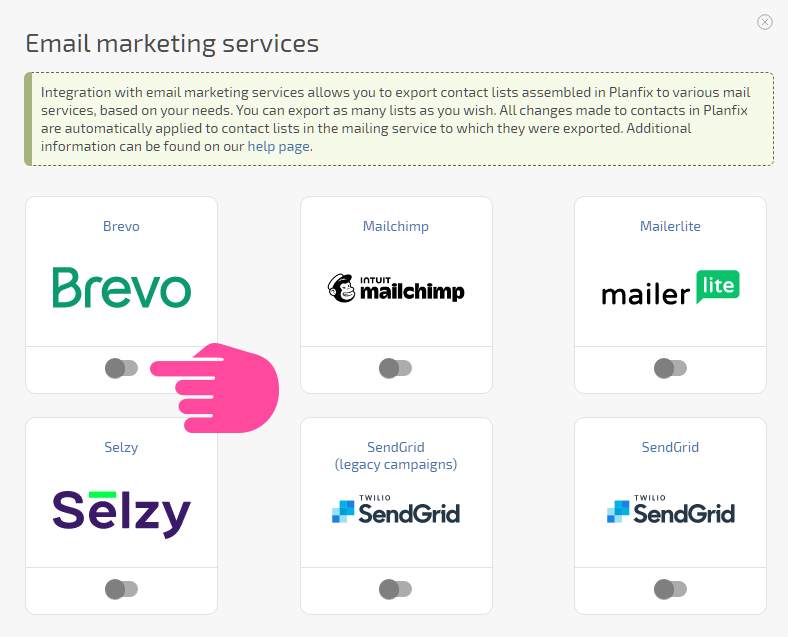
- In the list that appears, activate Brevo:
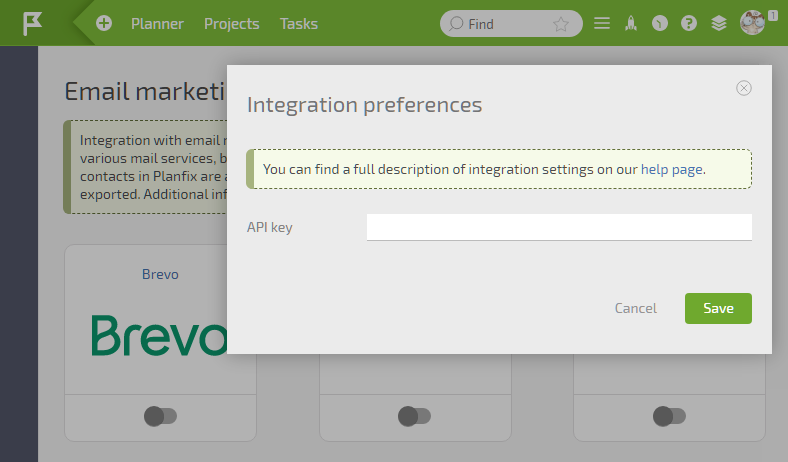
- Open Brevo on the next tab and log in. Then in the account menu, find the SMTP & API section:
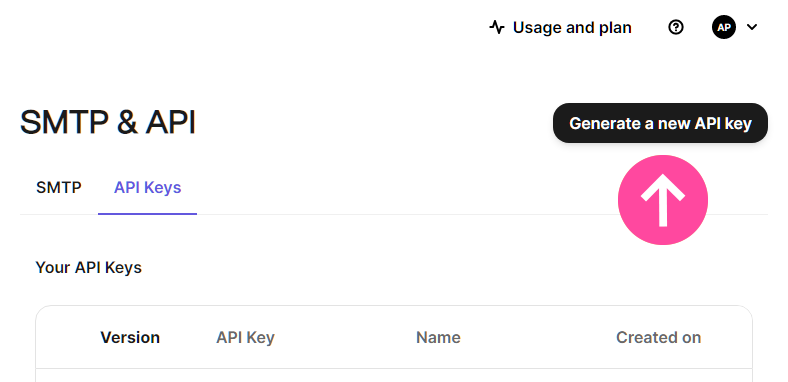
- Click the "Create a new API key" button:
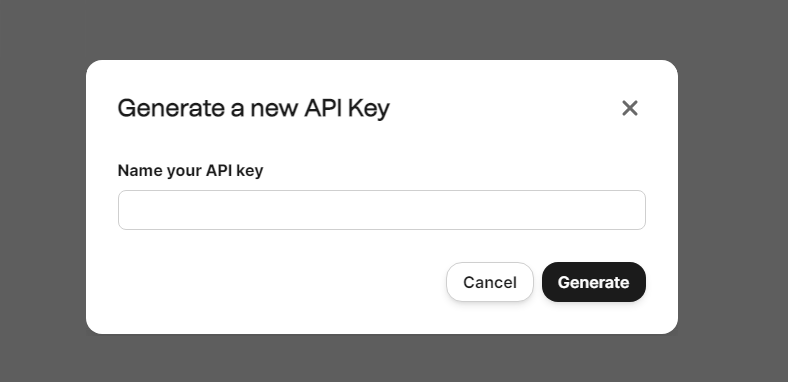
- Come up with a name:
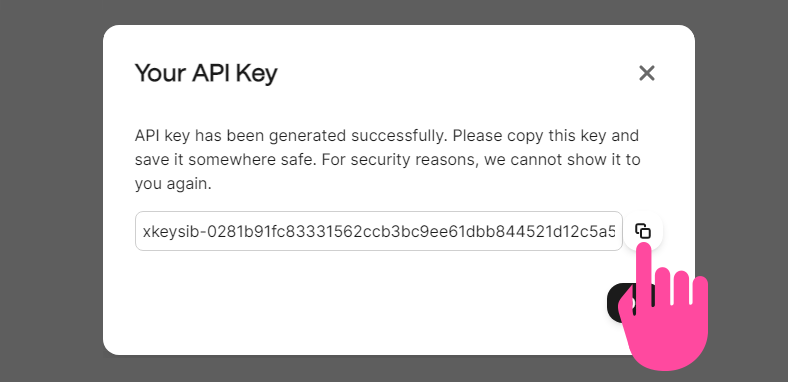
- Copy the generated API key:
- Go back to the Brevo integration page in Planfix and paste it into the appropriate field:
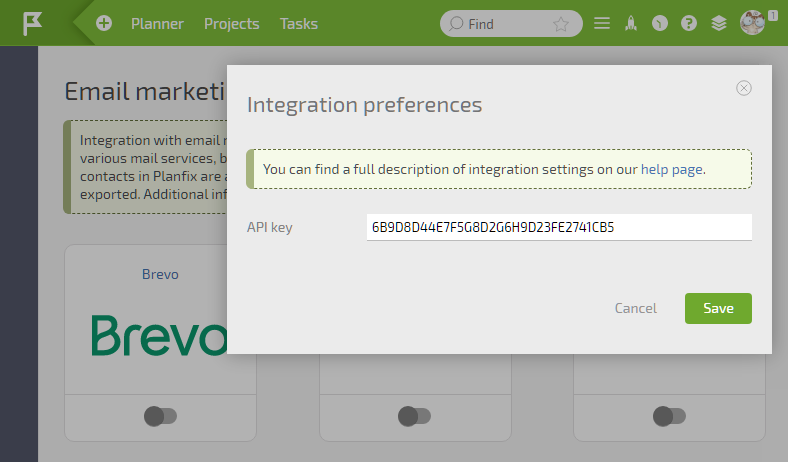
Save the changes. Afterward, you can automatically export selected contacts to Brevo in each contact filter.
