POST-request to Stripe: payment link: Difference between revisions
From Planfix
No edit summary Tag: Reverted |
No edit summary Tag: Reverted |
||
| Line 12: | Line 12: | ||
{ | { | ||
Request content: | Request content: | ||
success_url — "success" page the customer gets, after completing the payment. | |||
cancel_url — the "cancel" page the customer gets, if he doesn't complete or cancels the payment. | |||
'''Note'''— Stripe will not generate the payment link, if you don't provide these pages. | |||
success_url | |||
cancel_url | |||
payment | payment | ||
line_items[0][price_data][currency] — currency | line_items[0][price_data][currency] — currency | ||
Revision as of 12:35, 21 August 2025
To connect Planfix to Stripe, we use a button with an HTTP request. The example we configure automatically generates a payment link and sends it to the customer.
- Step 1 — Create a request with payment details for Stripe:
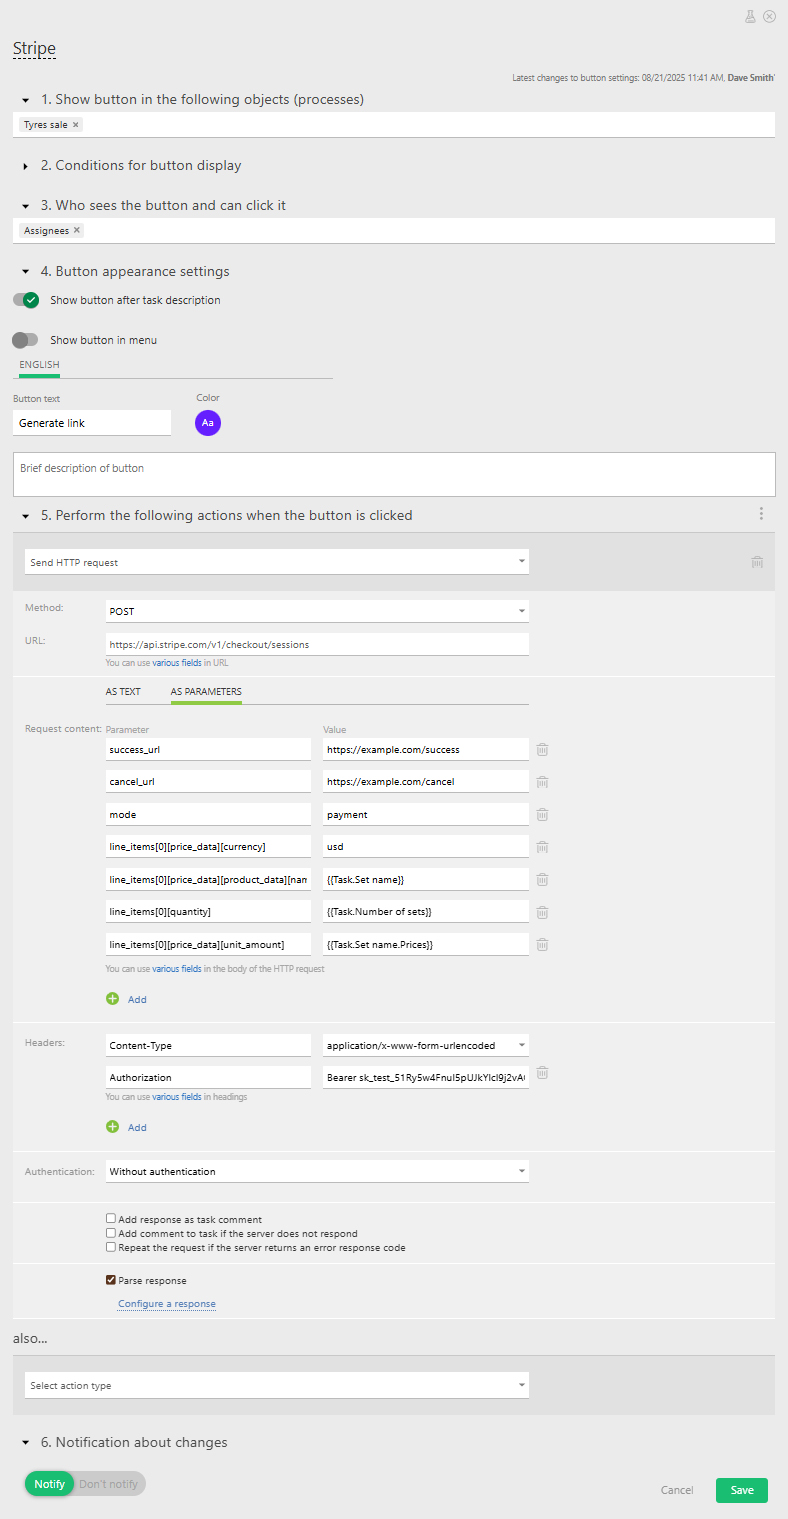
{
   Request content:
success_url — "success" page the customer gets, after completing the payment.
cancel_url — the "cancel"  page the customer gets, if he doesn't complete or cancels the payment.
'''Note'''— Stripe will not generate the payment link, if you don't provide these pages.
payment
line_items[0][price_data][currency] — currency
line_items[0][price_data][product_data][name] — product name
line_items[0][quantity] — product quantity
line_items[0][price_data][unit_amount] — product price
}
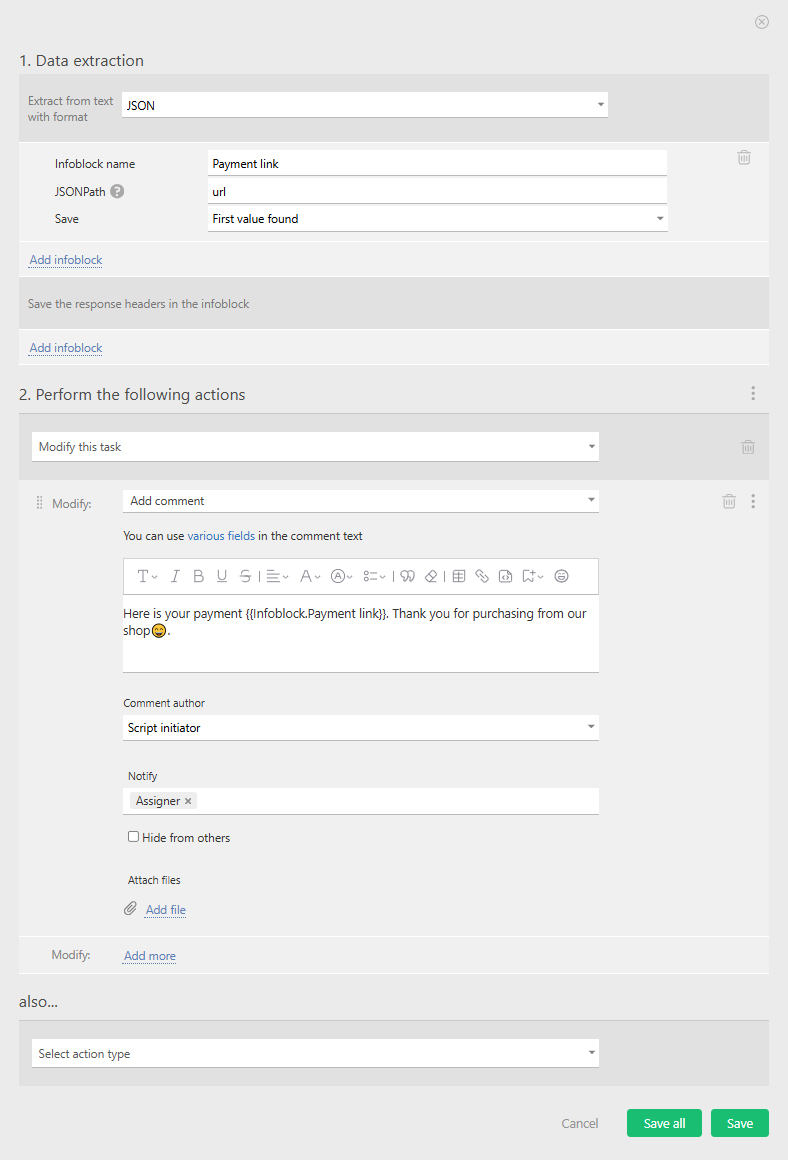
- Step 2 — Parse the response and add the payment link to the task: