Adding new fields to contact cards: Difference between revisions
No edit summary |
No edit summary |
||
| Line 3: | Line 3: | ||
https://s.pfx.so/pf/g6/HkrwfY.png | |||
| Line 10: | Line 10: | ||
https://s.pfx.so/pf/dC/fsiXli.png | |||
| Line 17: | Line 17: | ||
https://s.pfx.so/pf/Ao/PPVEvk.png | |||
| Line 24: | Line 24: | ||
https://s.pfx.so/pf/as/USQD9K.png | |||
| Line 31: | Line 31: | ||
https://s.pfx.so/pf/ni/IS0vLv.gif | |||
Revision as of 22:31, 22 October 2020
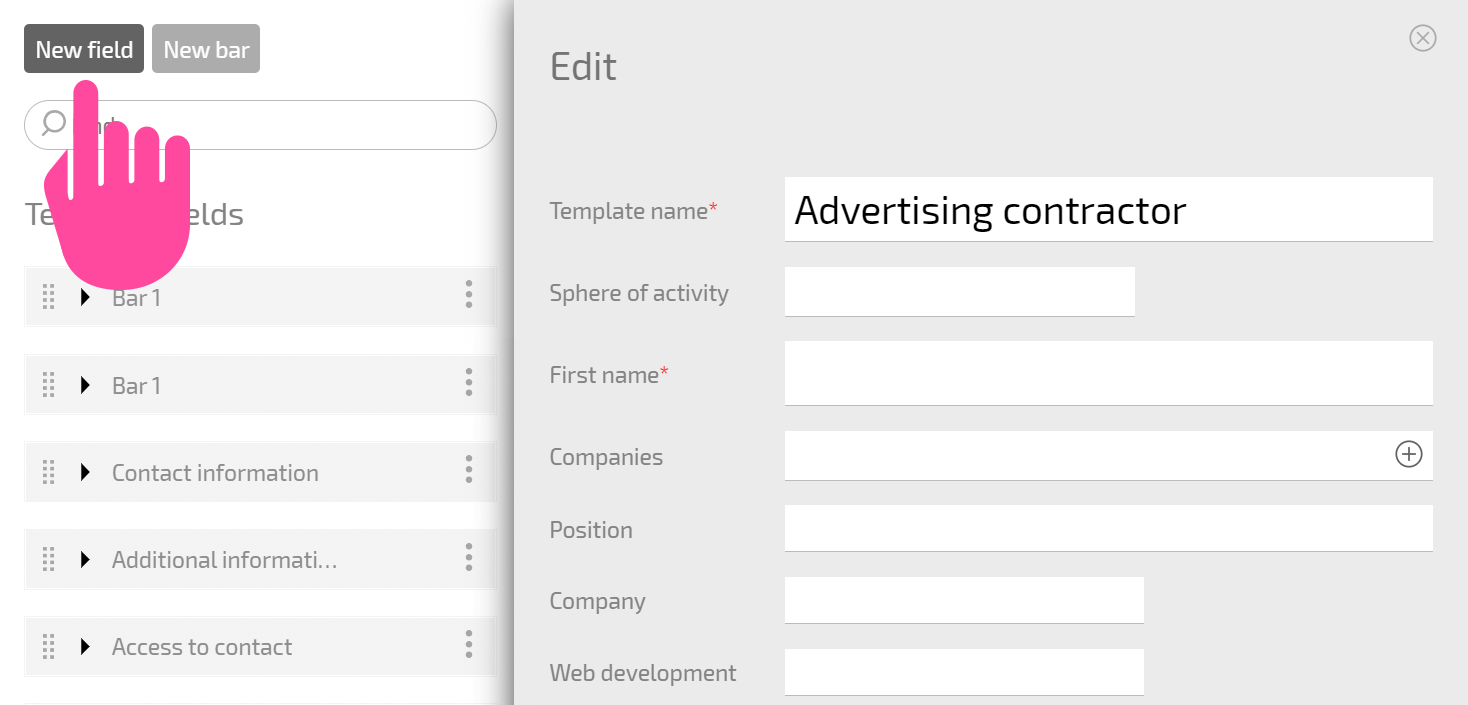
Additional user fields can be added to contact cards when editing a contact template:
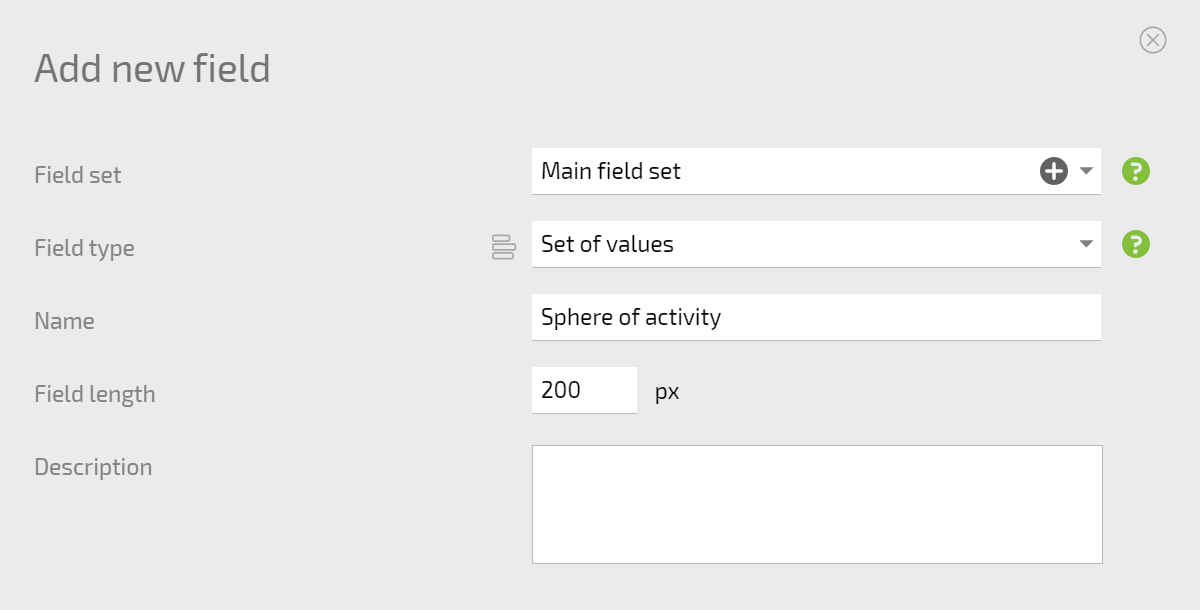
In the form that opens, select the field type, enter a name, and configure additional parameters depending on the field type:
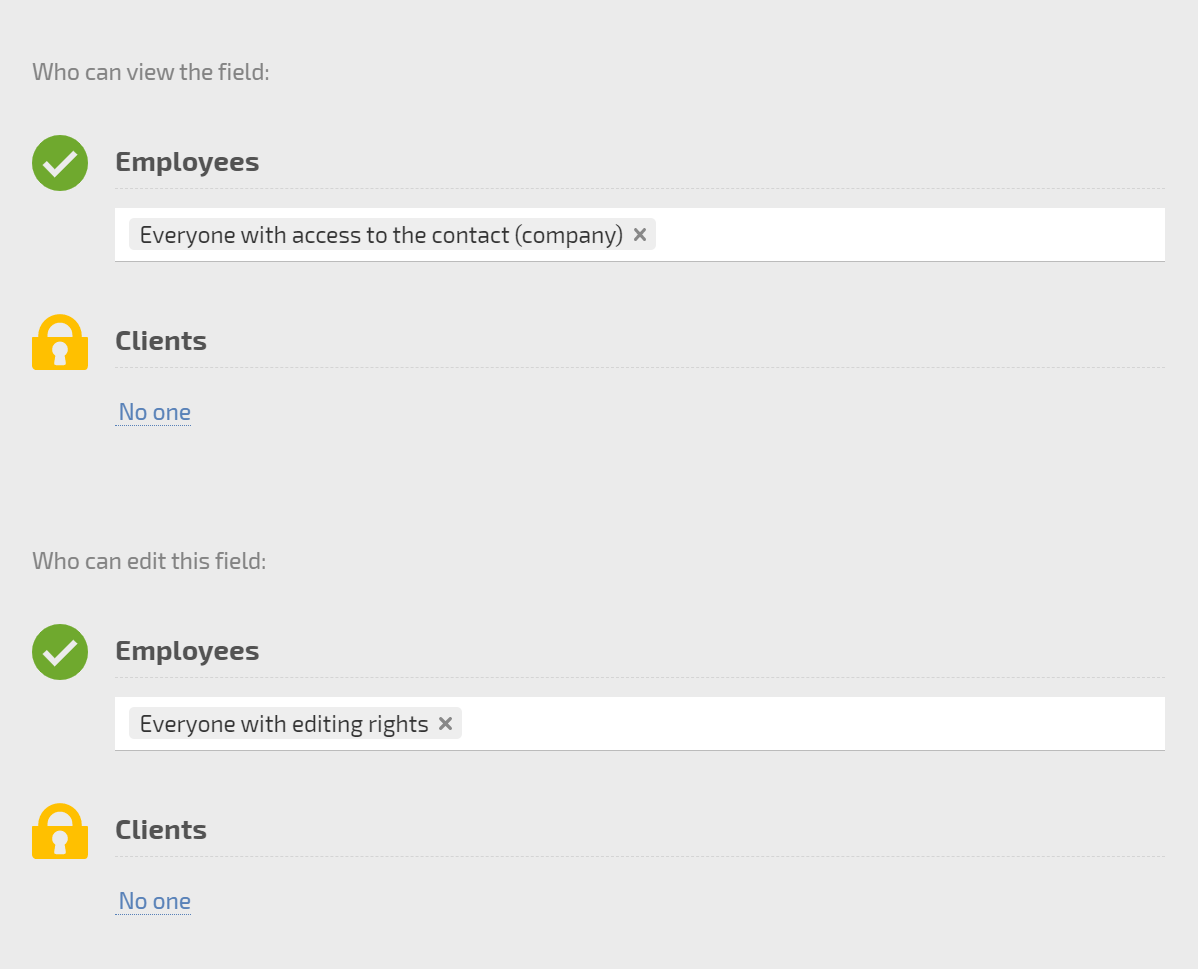
Set access to this field for employees or clients:
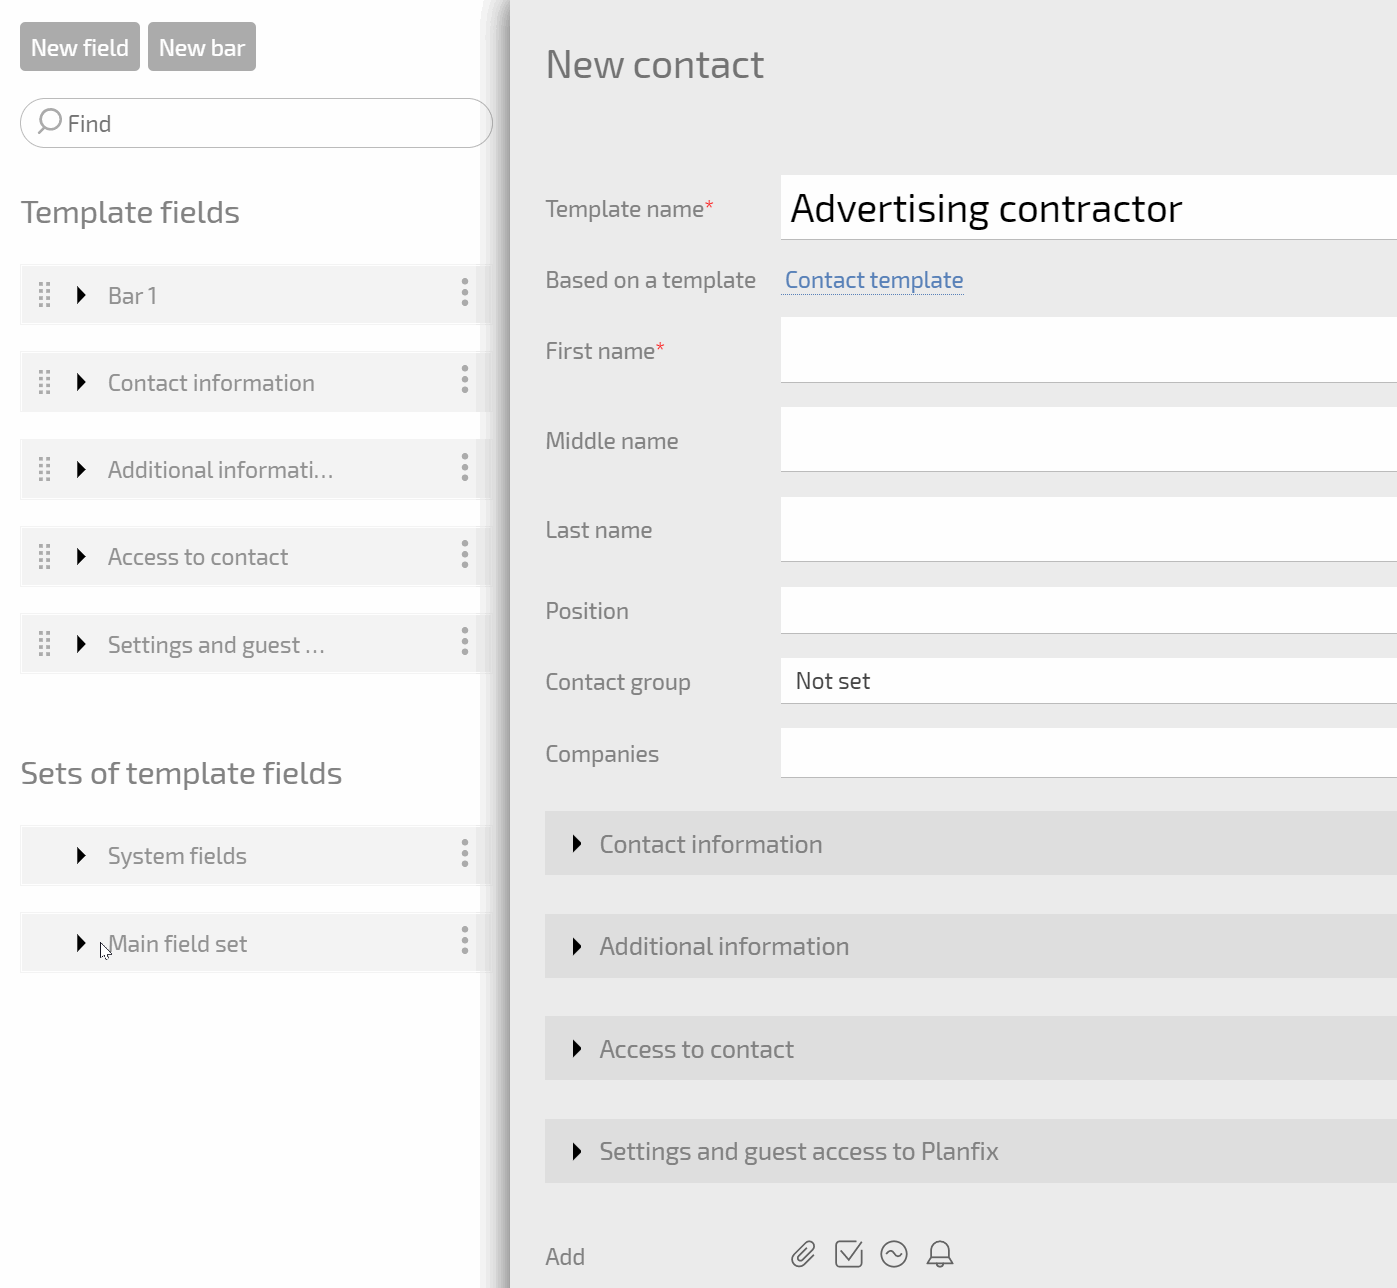
The field you create will appear in the Main field set section that can be found at the bottom of the list of panels and fields. You can add a new field to one of the panels in the contact form by clicking its name in the list:
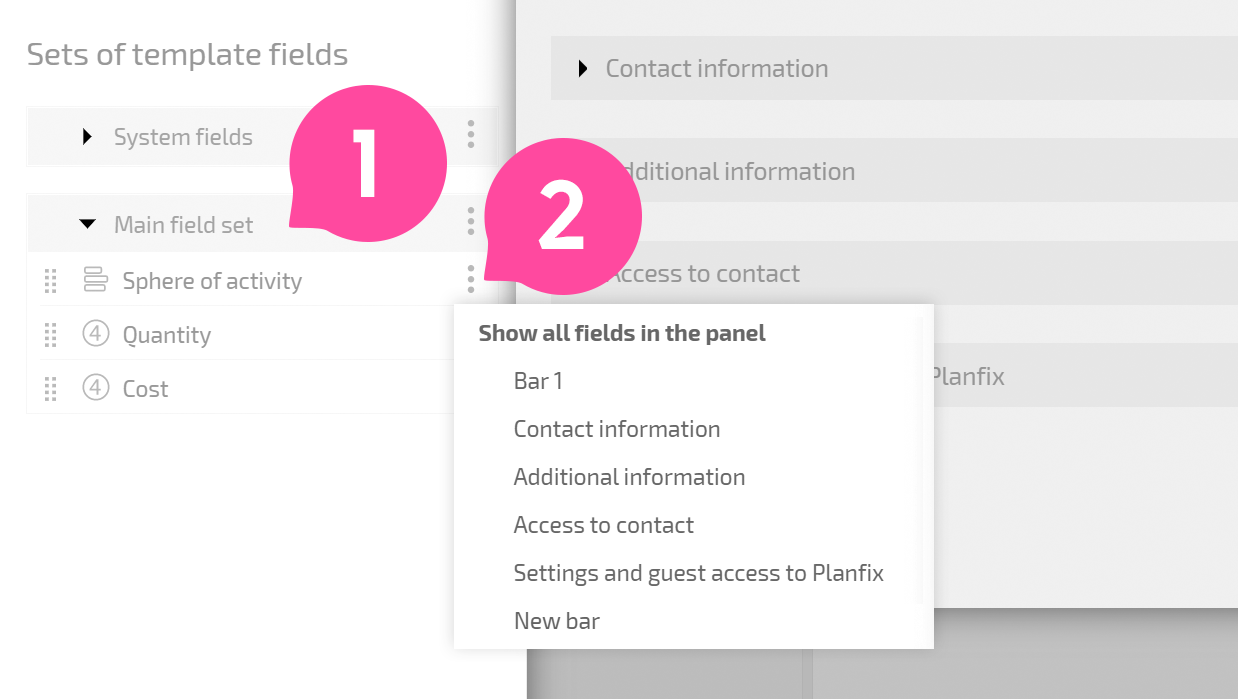
Or by dragging and dropping:
Important
If the field were created at an earlier point, it would be in the list of fields found on the form's left-hand side. You don't need to create the field again: you can create a field once and use it multiple times in any contact template where it's relevant.