HTTP requests and postal services: Difference between revisions
From Planfix
No edit summary |
|||
| (One intermediate revision by the same user not shown) | |||
| Line 23: | Line 23: | ||
*'''Step № 3''' — Parse the information received from FedEx about the shipment and use it to fill in the appropriate field: | *'''Step № 3''' — Parse the information received from FedEx about the shipment and use it to fill in the appropriate field: | ||
https://s.pfx.so/pf/nC/iN9CBb.jpg | https://s.pfx.so/pf/nC/iN9CBb.jpg | ||
== Go To == | == Go To == | ||
*[[HTTP Requests]] | *[[HTTP Requests]] | ||
*[[Buttons]] | *[[Buttons]] | ||
*[[Scripts]] | *[[Scripts]] | ||
Latest revision as of 09:44, 17 November 2025
Using HTTP Requests in Planfix, you can track shipments from transportation companies.
DHL
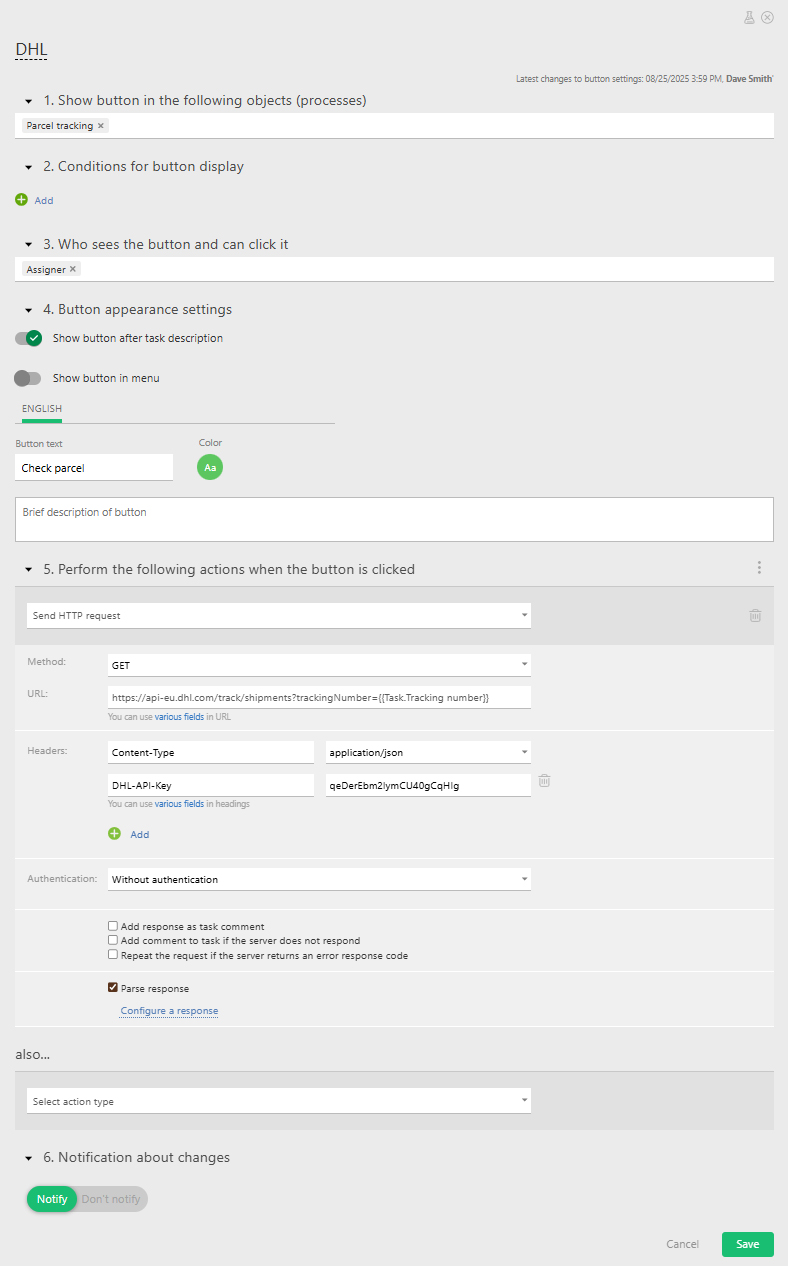
We’ll configure parcel tracking via the DHL API.
- Firstly, we send a GET request containing our tracking number and the API key of our app:
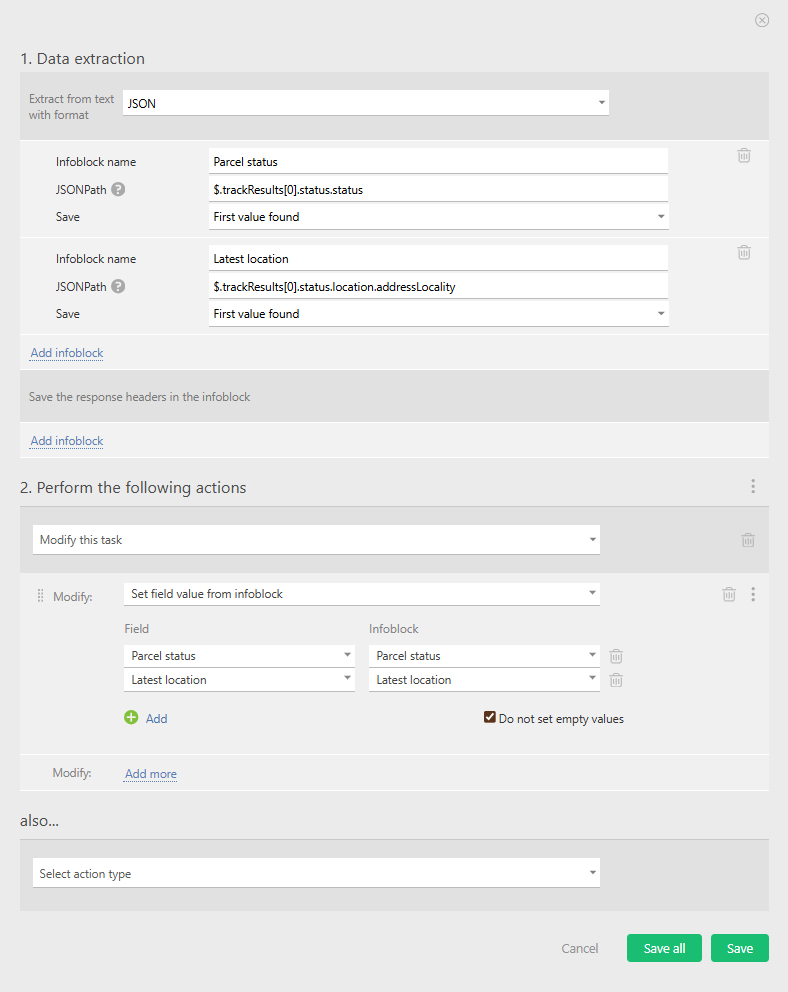
- Once we have received the response, we parse the shipping data received from DHL and add it to the appropriate fields:
FedEx
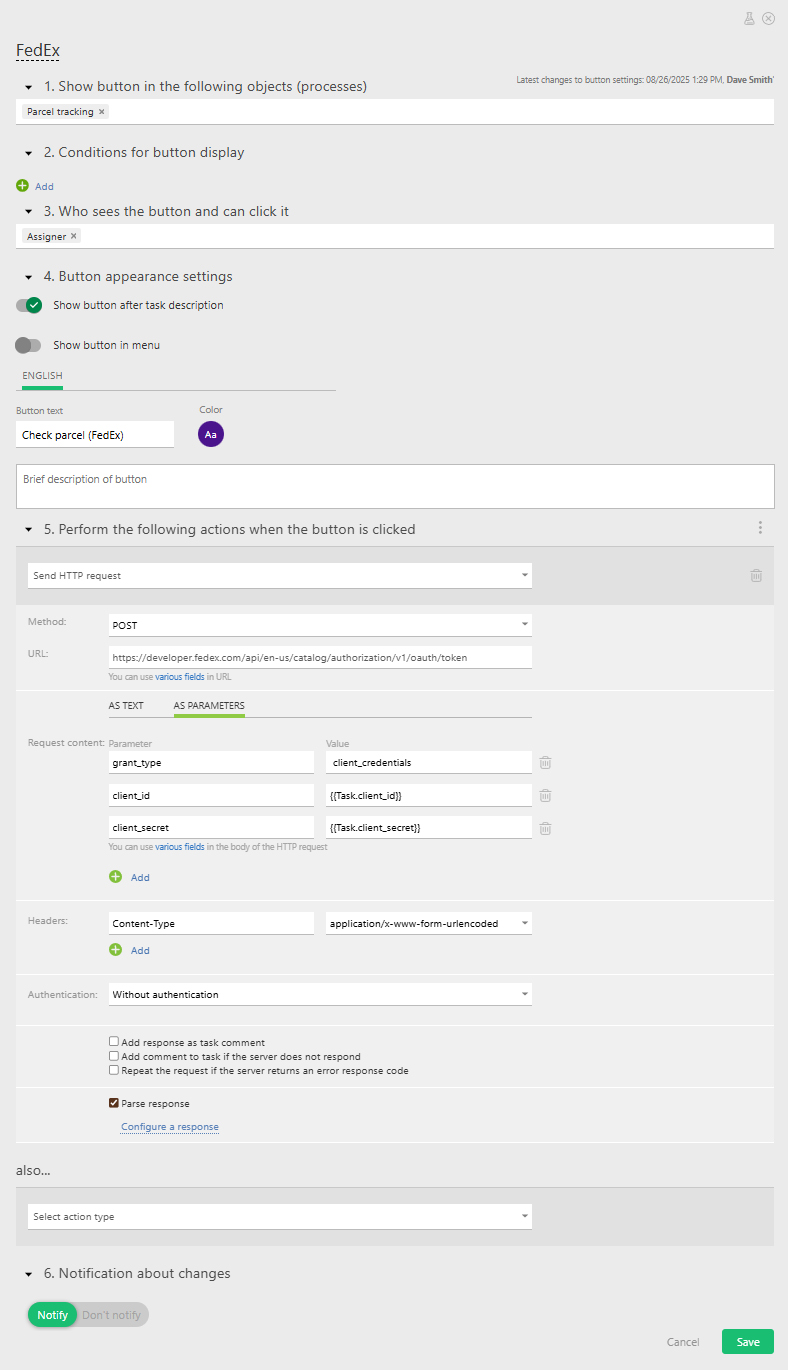
You can also track your shipment using a POST-request to the FedEx API.
- Step № 1 — Here, we’ll start by sending a POST request to obtain our authorization token:
- Step № 2 — Once we’ve parsed the response and received the token, we send a main request to FedEx to obtain our shipment information:
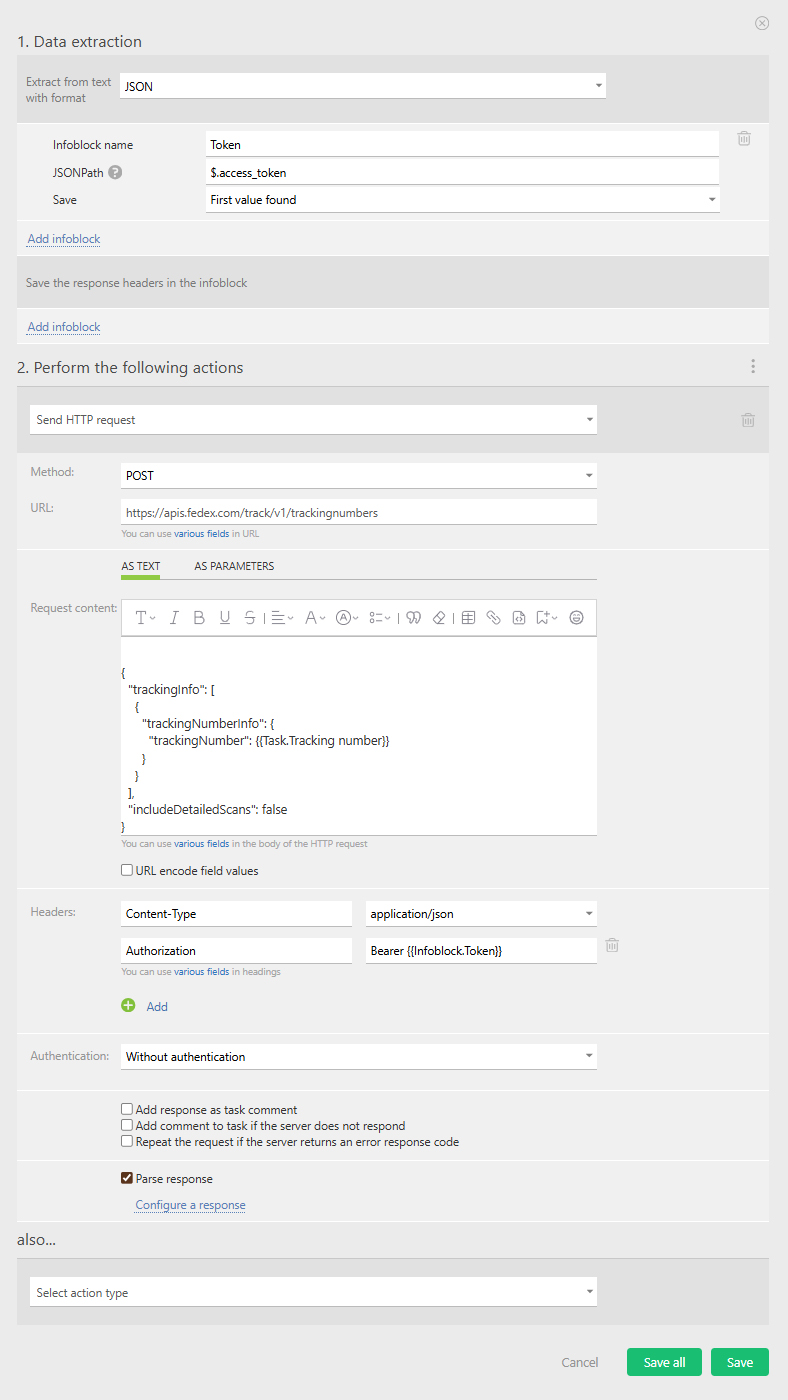
- Remember to add the token to the header of your main request.
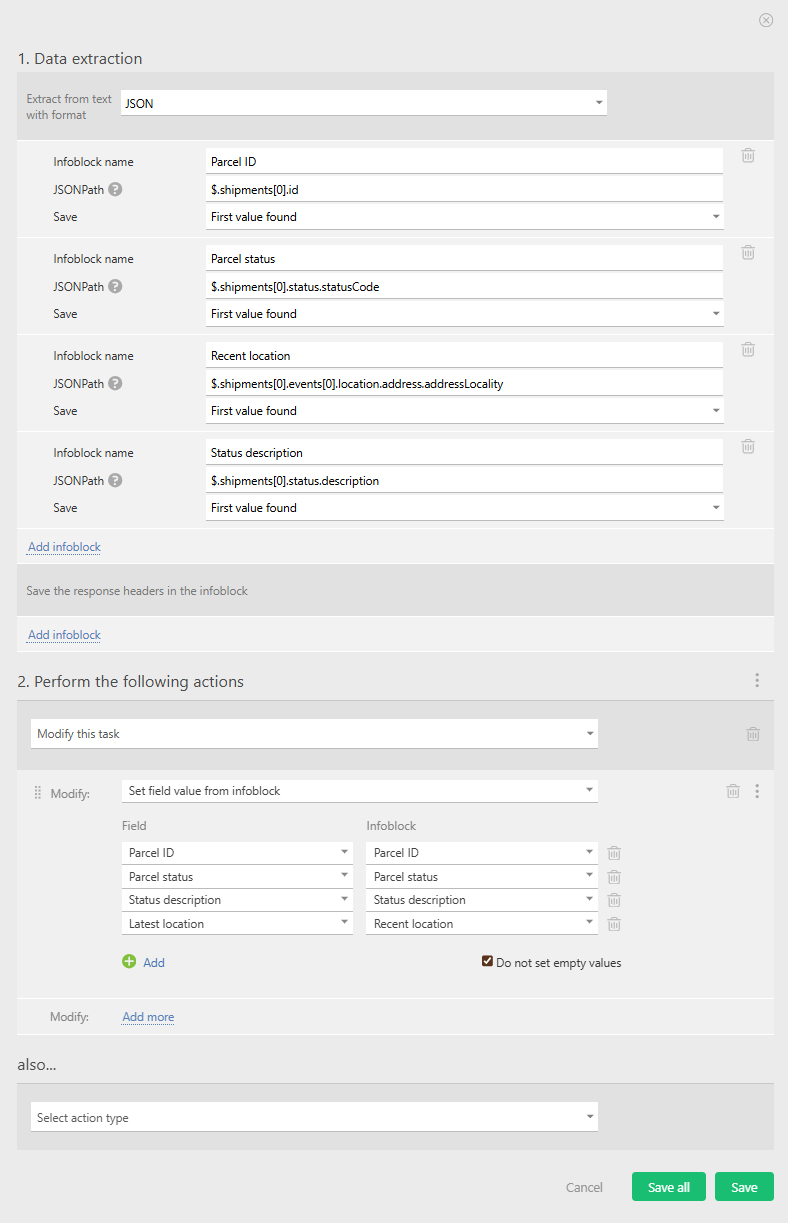
- Step № 3 — Parse the information received from FedEx about the shipment and use it to fill in the appropriate field: