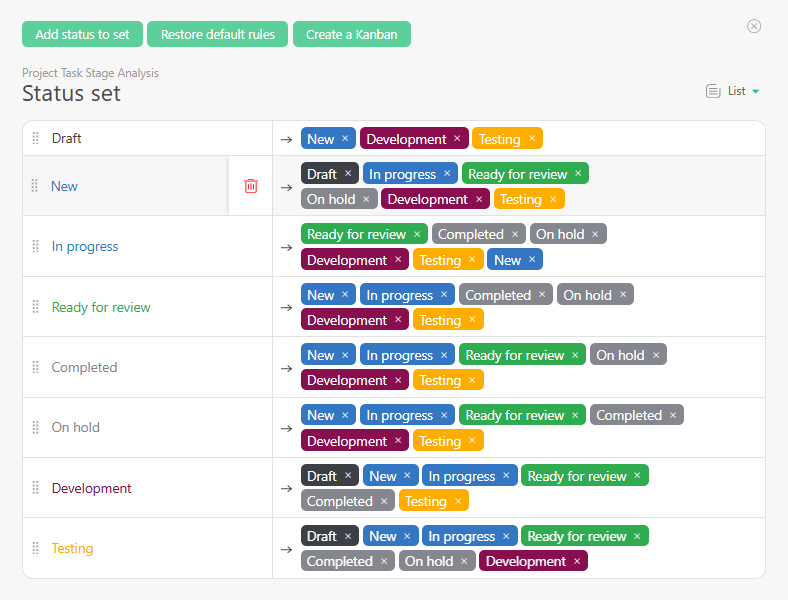
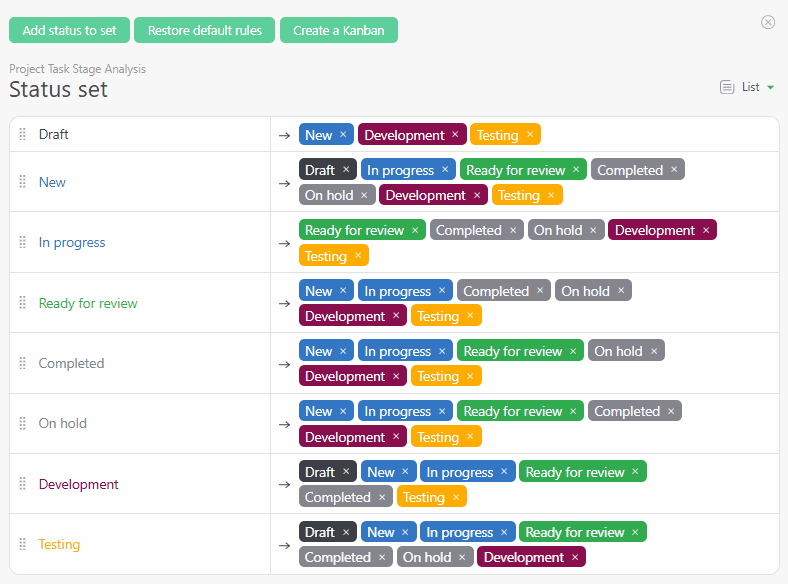
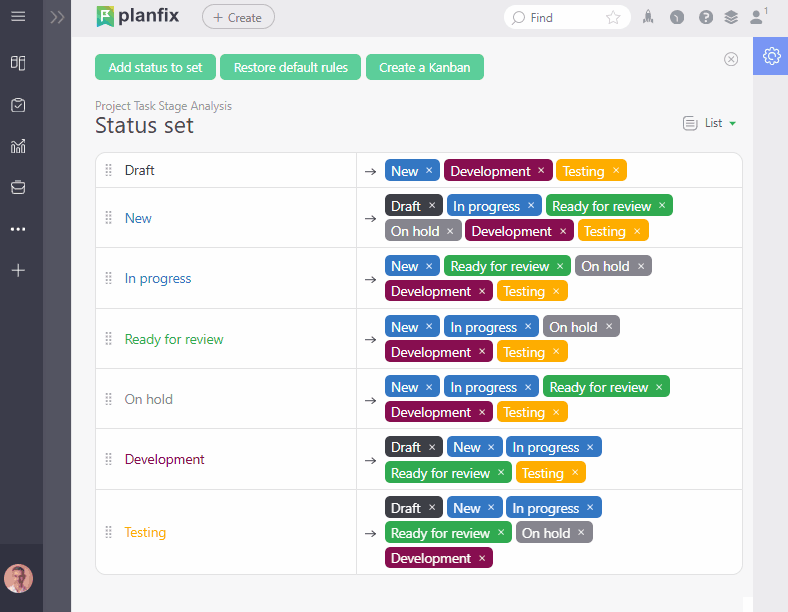
Set of object statuses
From Planfix
The set of statuses in Objects determines the lifecycle of tasks: what status they can be in and what the rules are for transitioning from status to status. When you create an object, the standard Planfix statuses are automatically added to the set.
Adding a new status
- Click on the "Add status to set" button
- If the necessary status already exists in your account, select it from the list
- If the necessary status does not exist, click on the "Plus" button
- Select the statuses from which you can transition to the added status
- Select the statuses to which you can transition from the added status
Deleting a status
To delete a status from the set, click the corresponding icon:
Please note that the status is only deleted from the object's status set and will remain in the account. You can delete a status from the account in the "Account management" - "Statuses" section.
Setting up transition rules between statuses
To add a transition, click Plus:
Additional status parameters
Clicking on the status will open a menu of additional settings:
In the additional settings, you can:
- Determine who has the right to transition to the current status.
- Add a separate button for the status.
- Add an automatic script.
- Remove the transition to the current status.
Important
- As a rule, a task can be canceled or completed anytime. Add status transitions to the "Canceled" and "Completed" statuses to support this behavior.
- Often, a task can be returned to the previous step. Consider all options for transitioning a task from status to status prior.