Integrating Planfix and WhatsApp using Chat API
From Planfix
Chat API is a service that allows companies to communicate with WhatsApp users from their own CRM or management systems. In order to connect Planfix and Chat API, you need to complete a few simple steps.
Before you begin setup, sign up for a Chat API account.
Setup
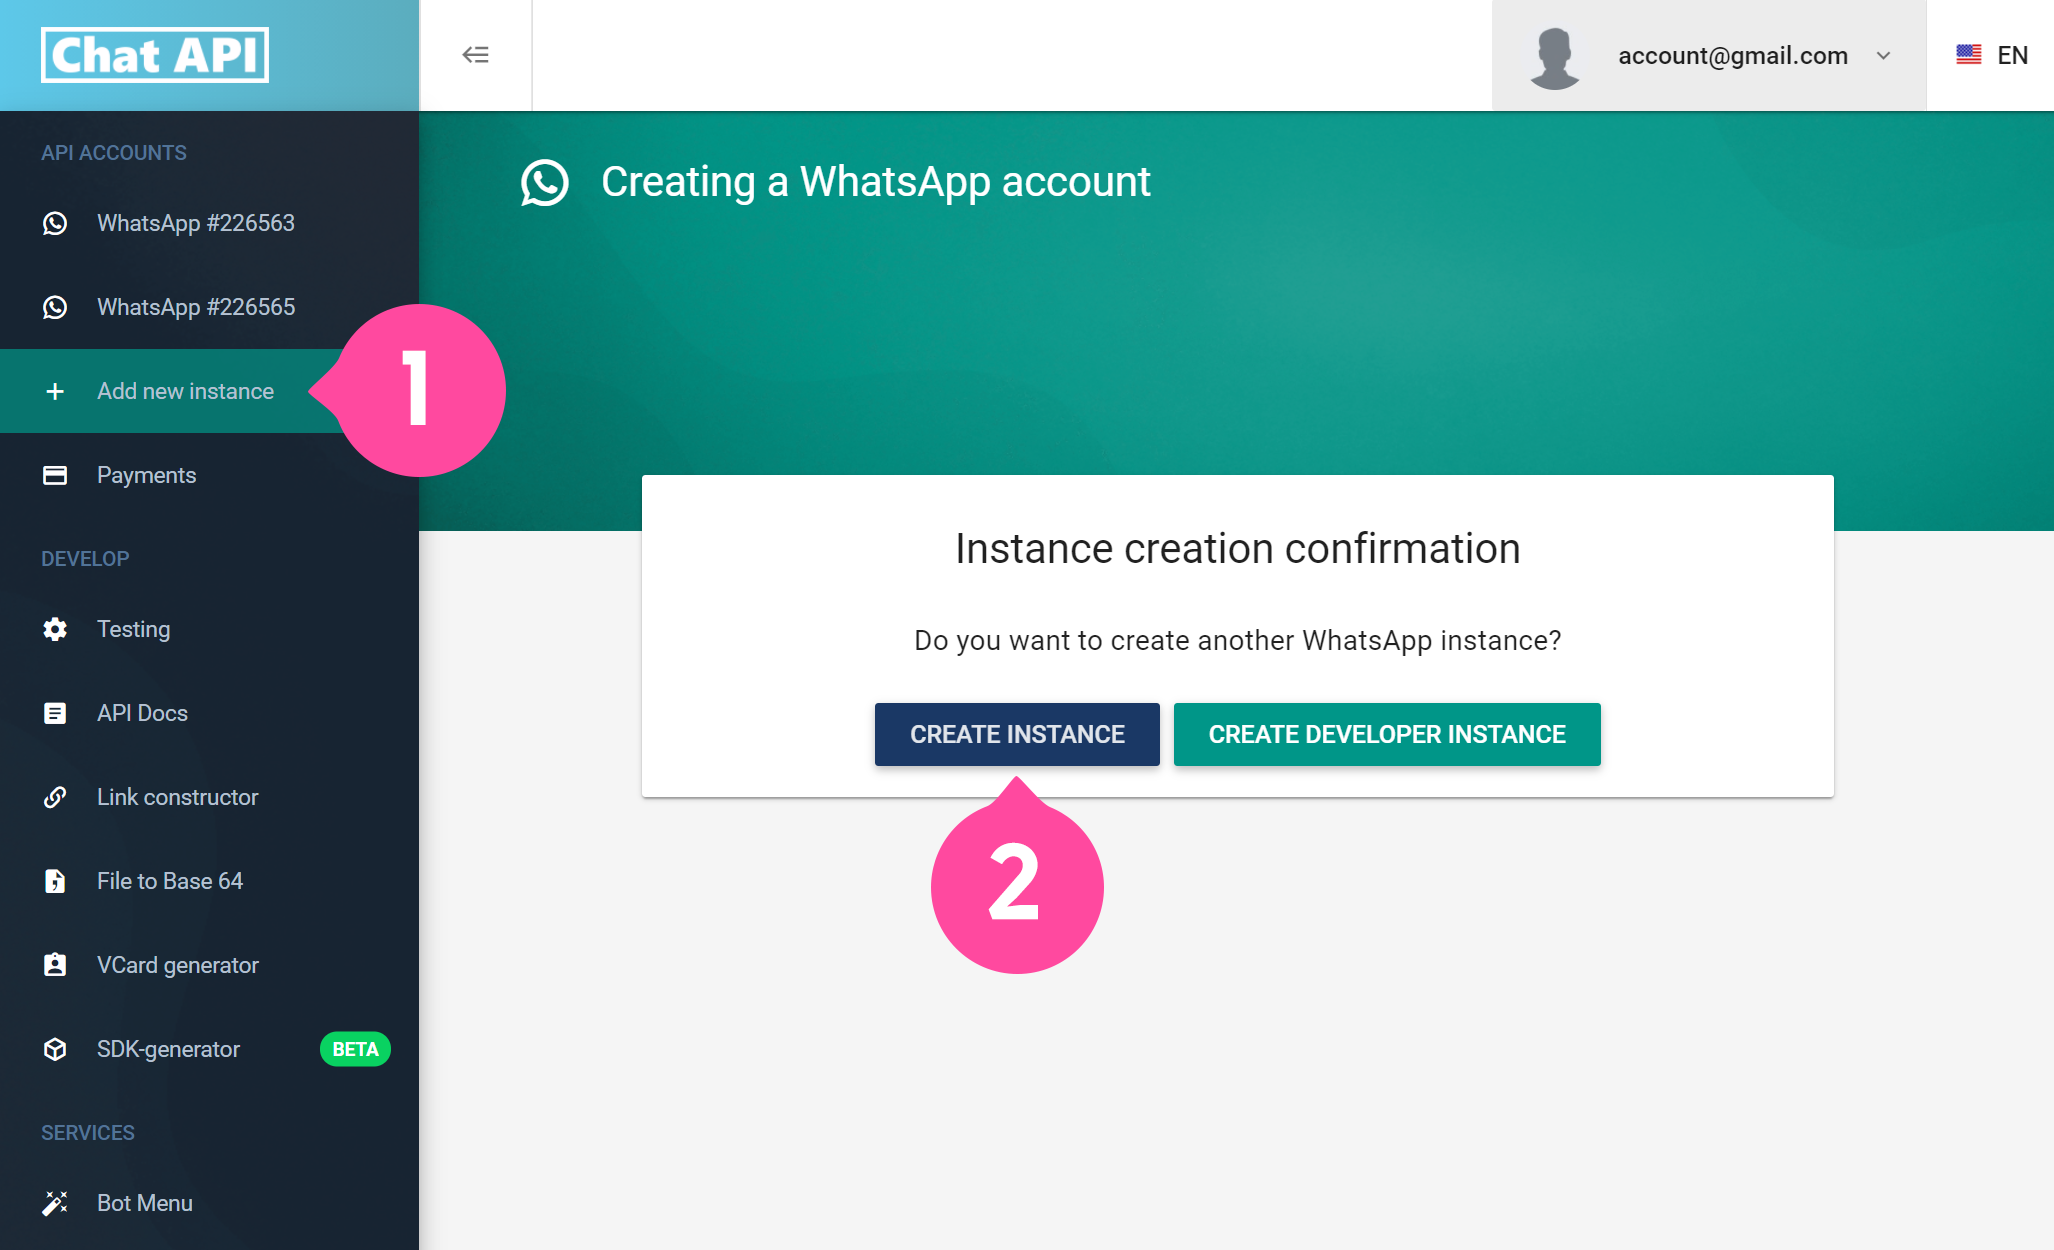
- In your Chat API dashboard, add one or more WhatsApp accounts:
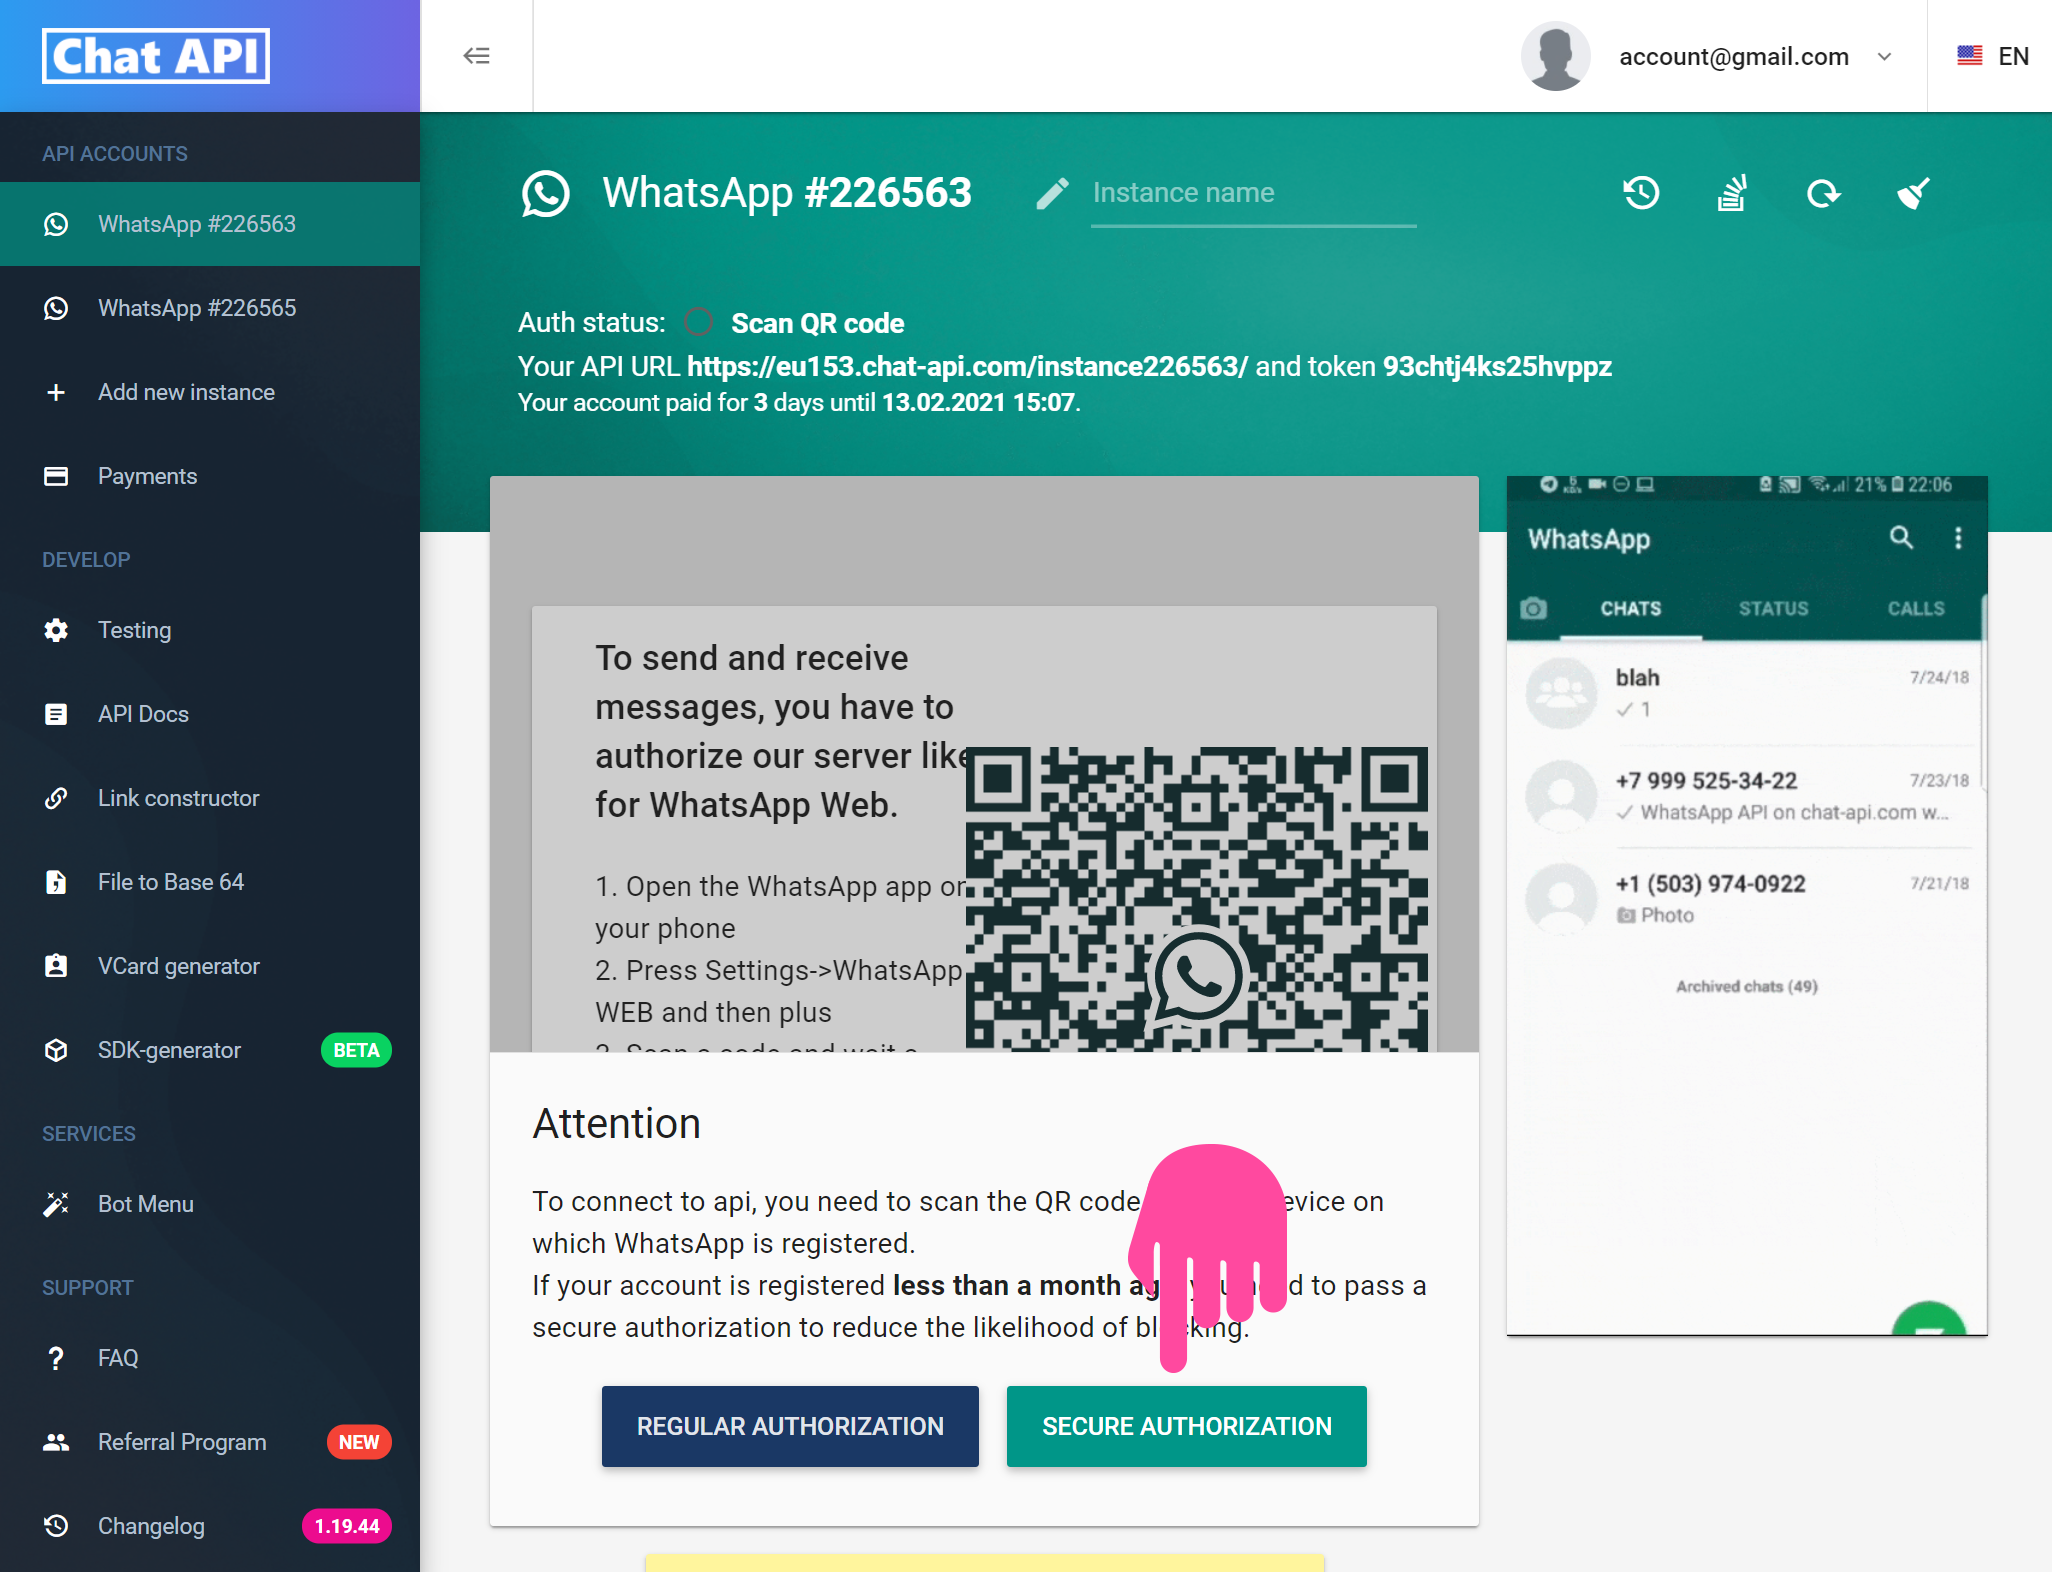
- Then follow the instructions on the site. Open WhatsApp on your phone and scan the QR code:
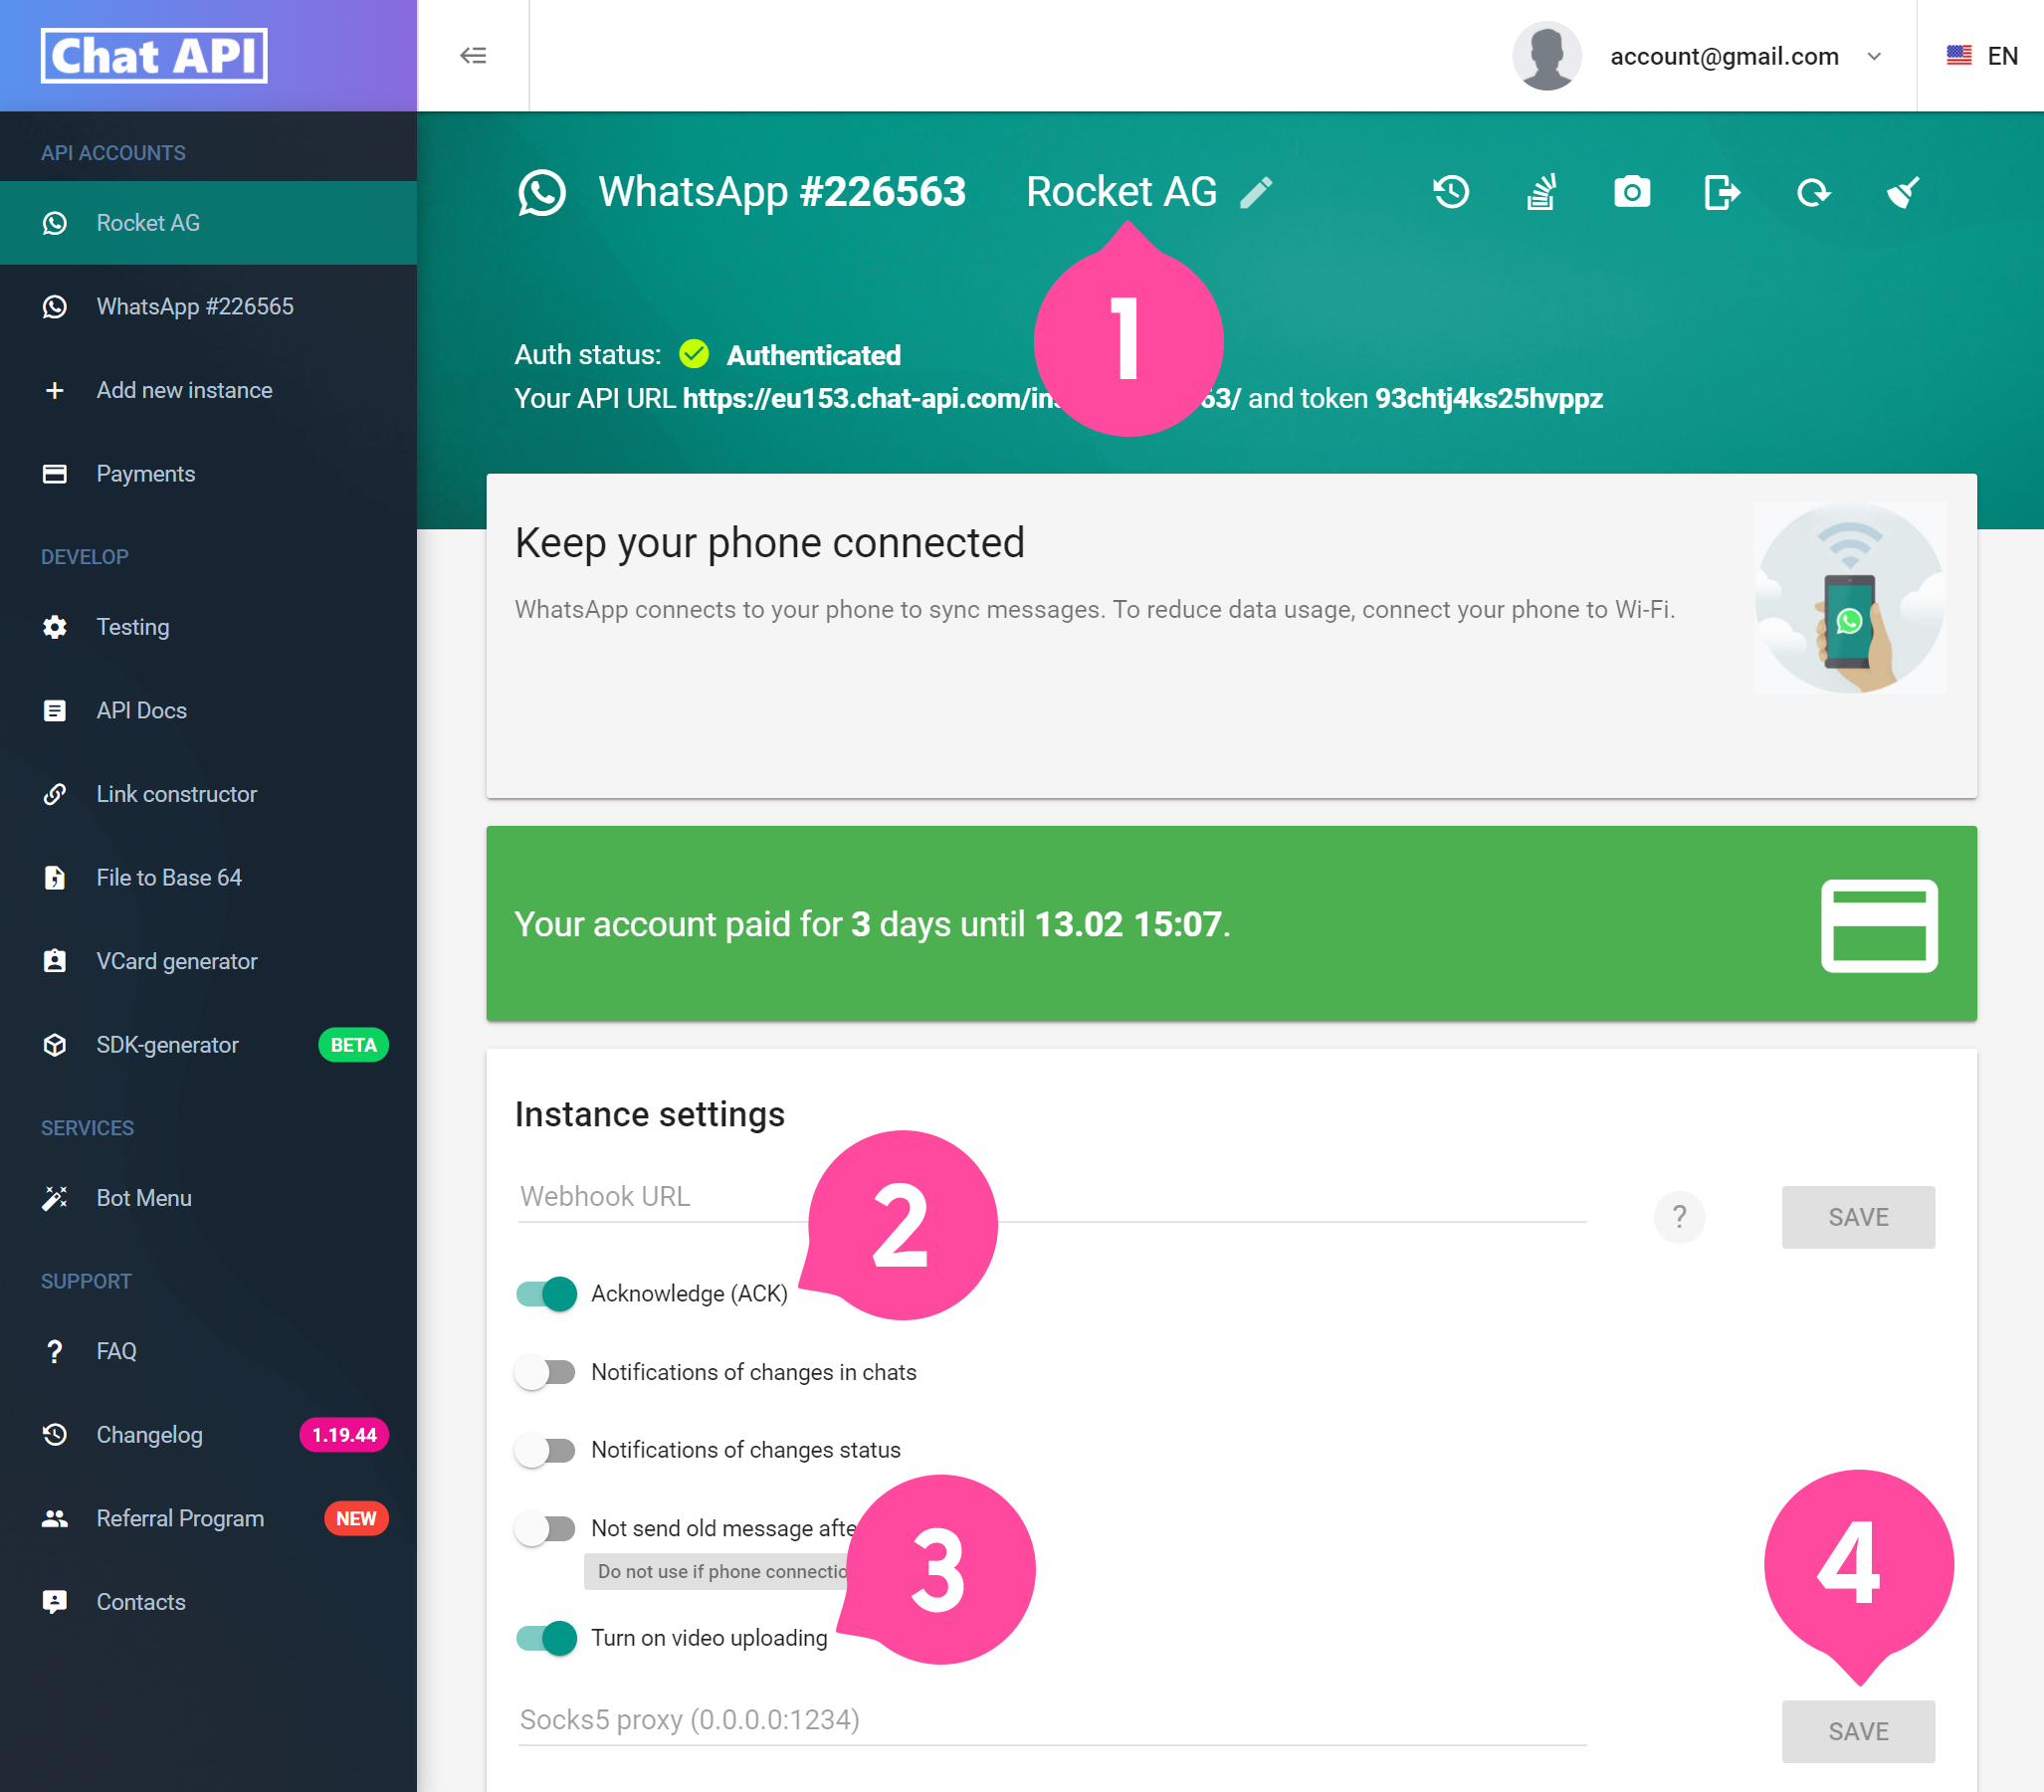
- Once you have successfully authorized the service, your account will be available to work with. You can set the following as desired:
- account name
- enabling read receipts
- enabling video notifications
- don't forget to save your changes:
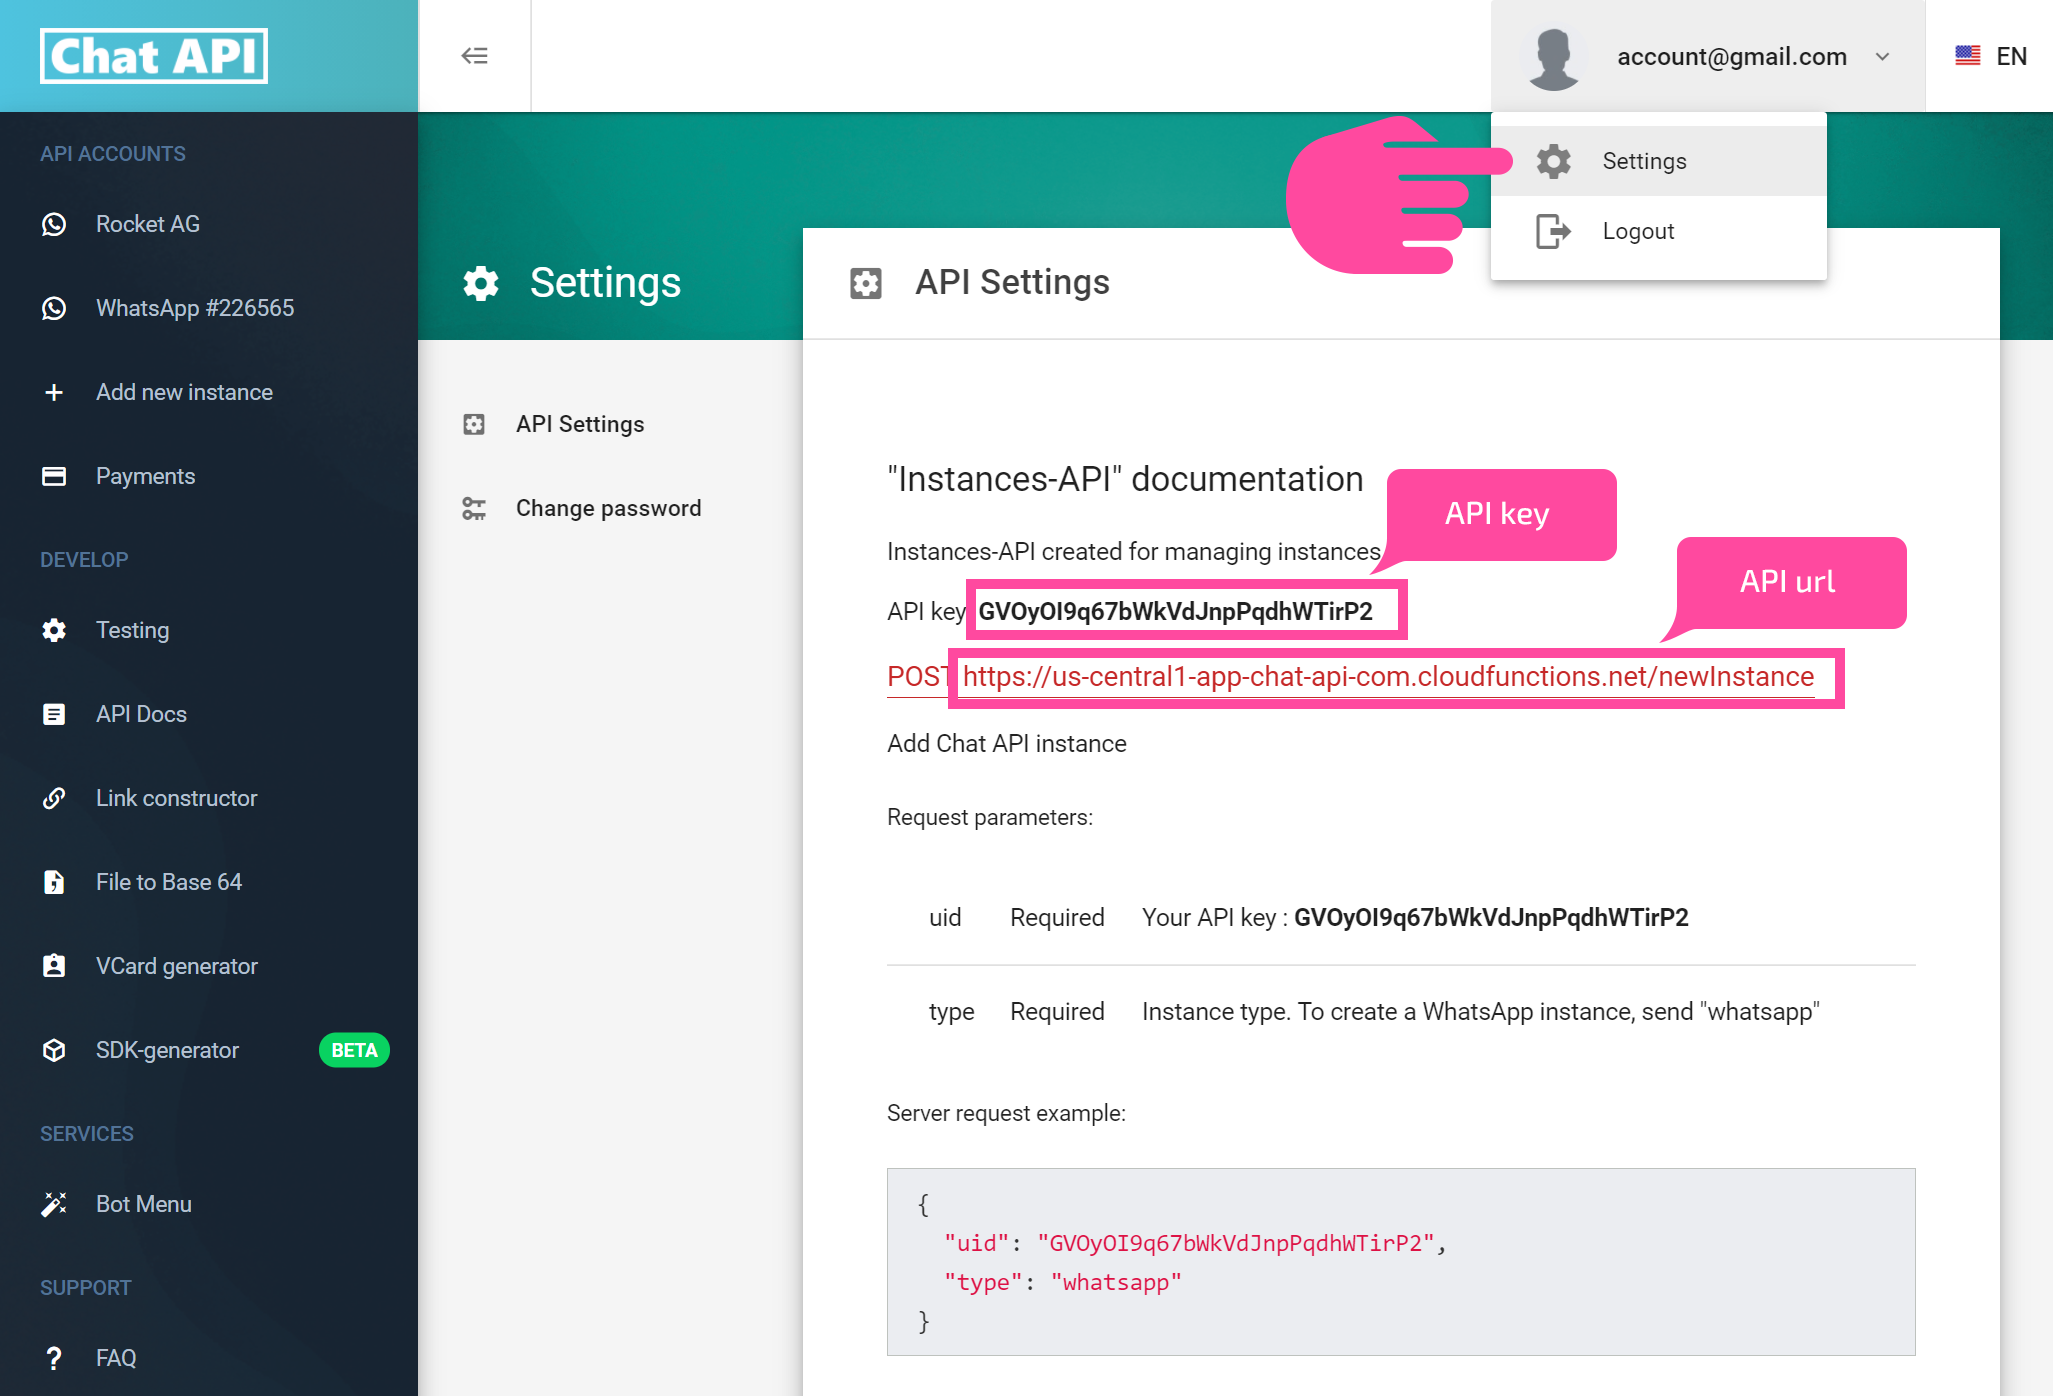
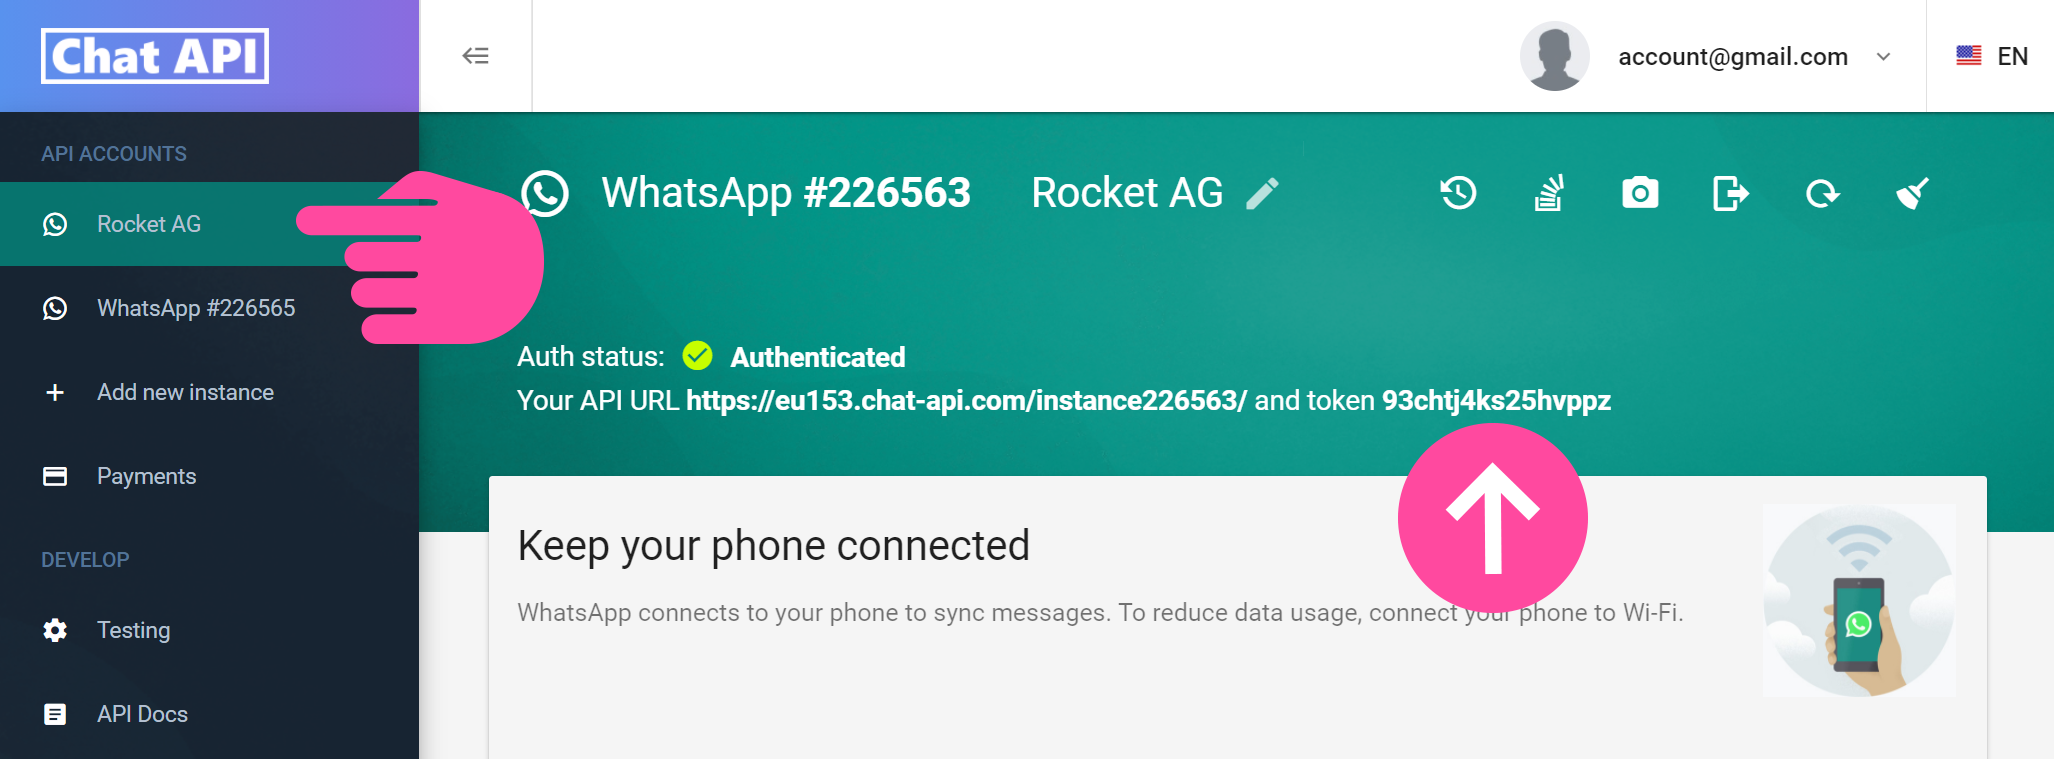
- Then open your account settings and copy the API key and API URL. You'll need them to set up the integration with Planfix:
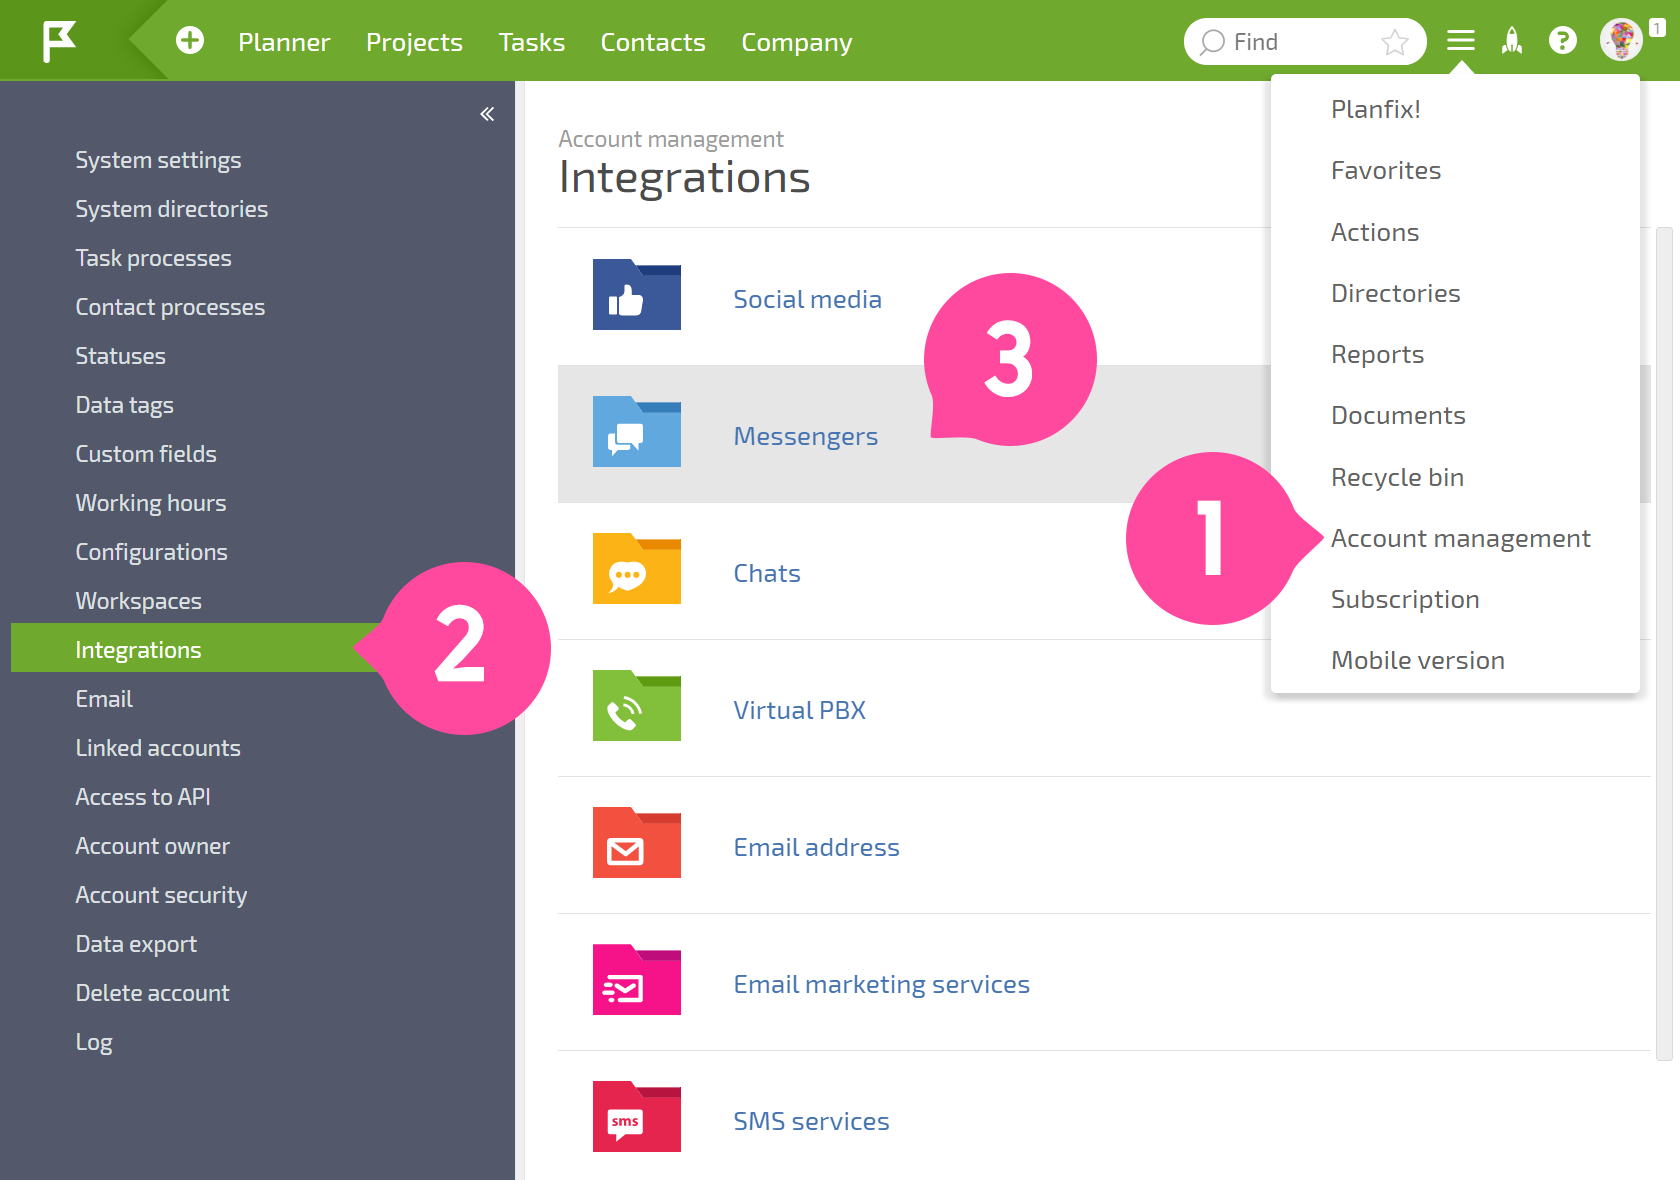
- Now let's set up Planfix. Go to Account management — Integrations — Messengers — WhatsApp — Chat API:
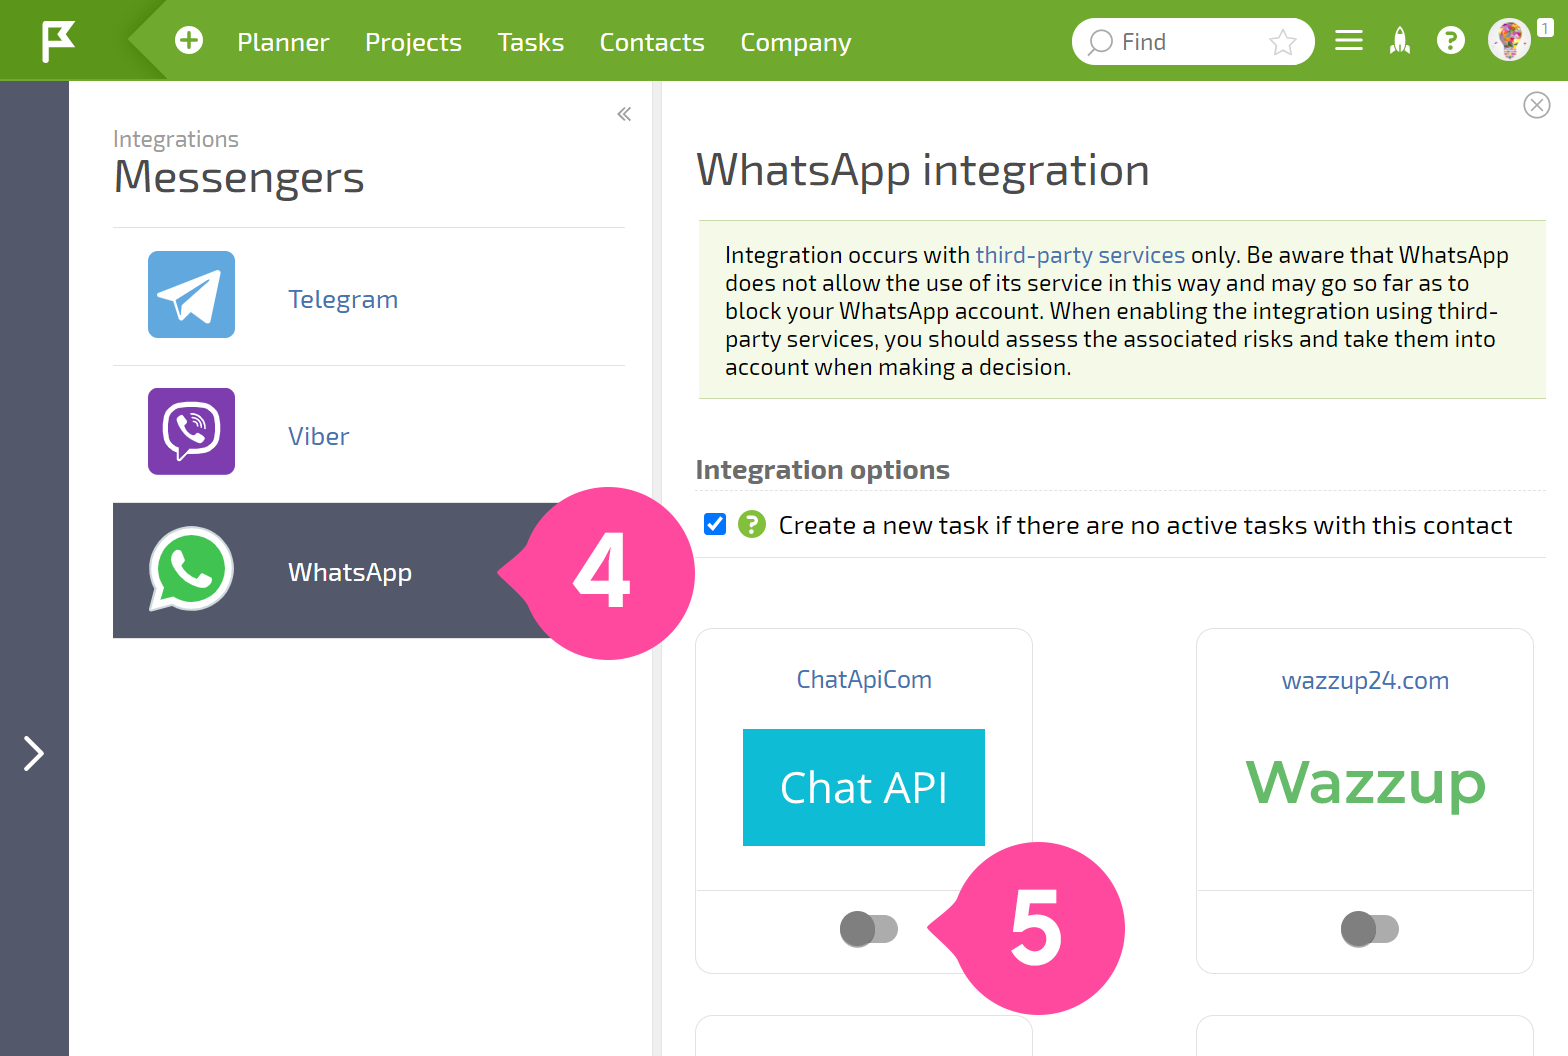
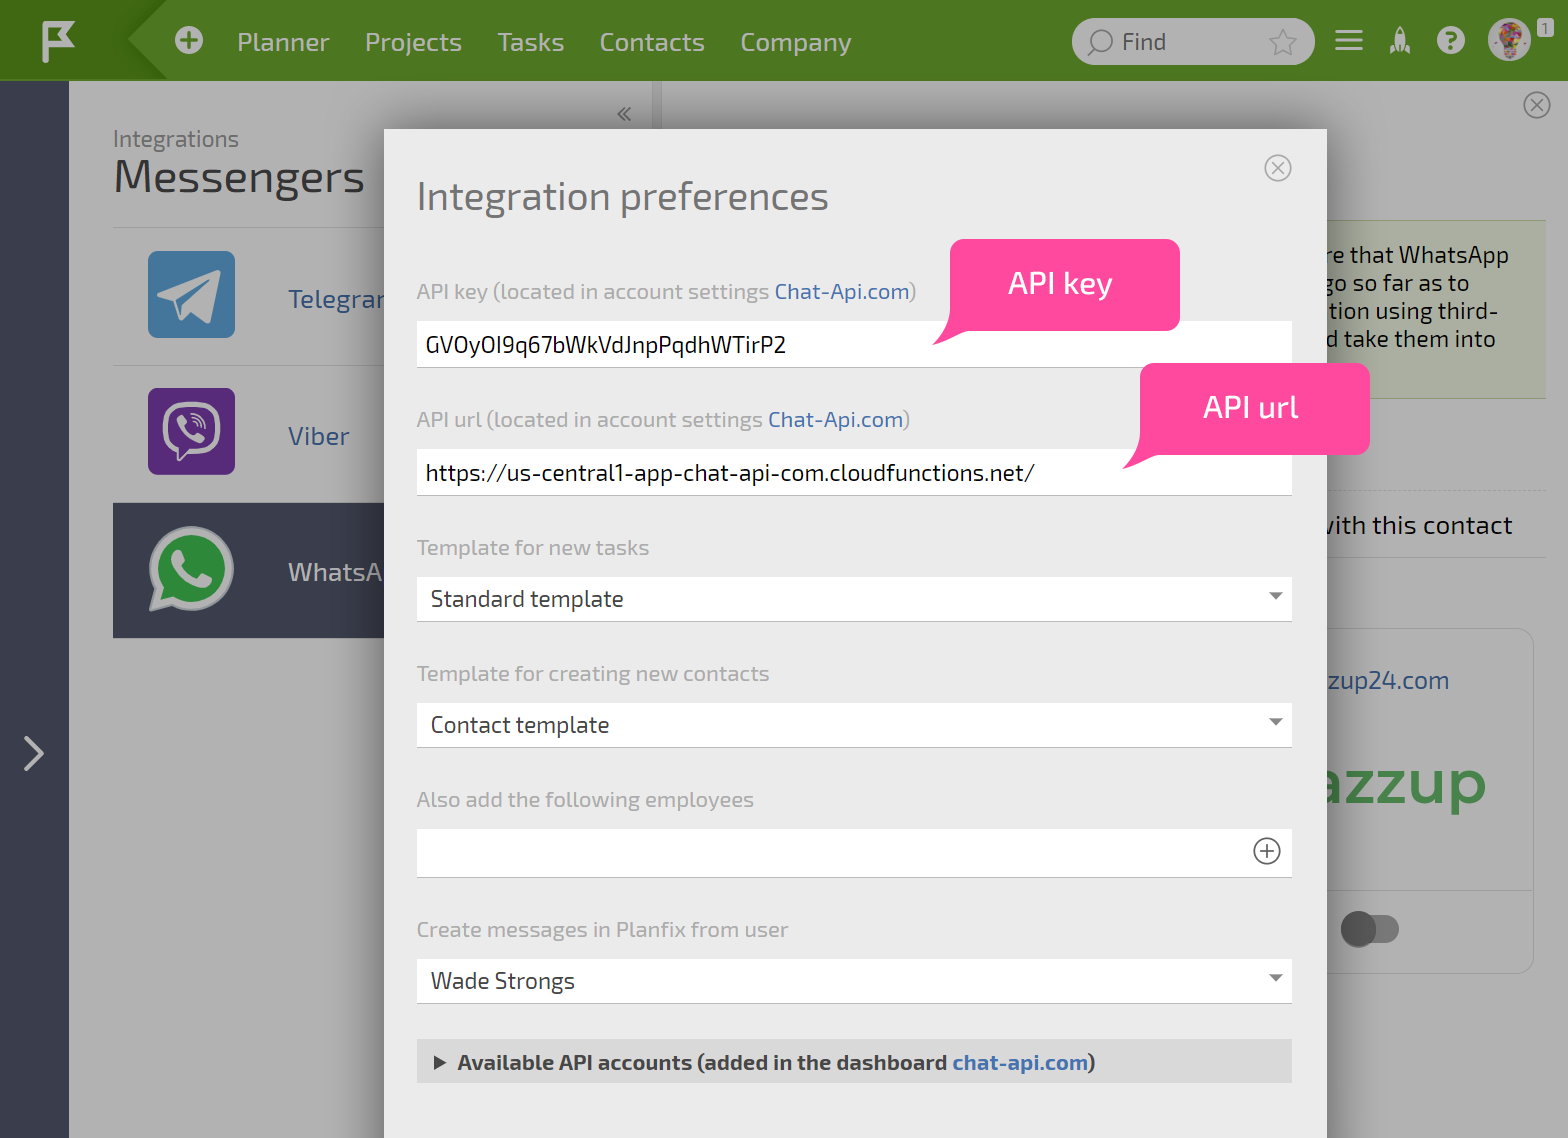
- Activate the integration. Then paste the API key and URL you copied earlier into the settings window that opens. You can also specify the template for creating new tasks and contacts, employees linked to task communication, and the user from whose name comments will be added to tasks:
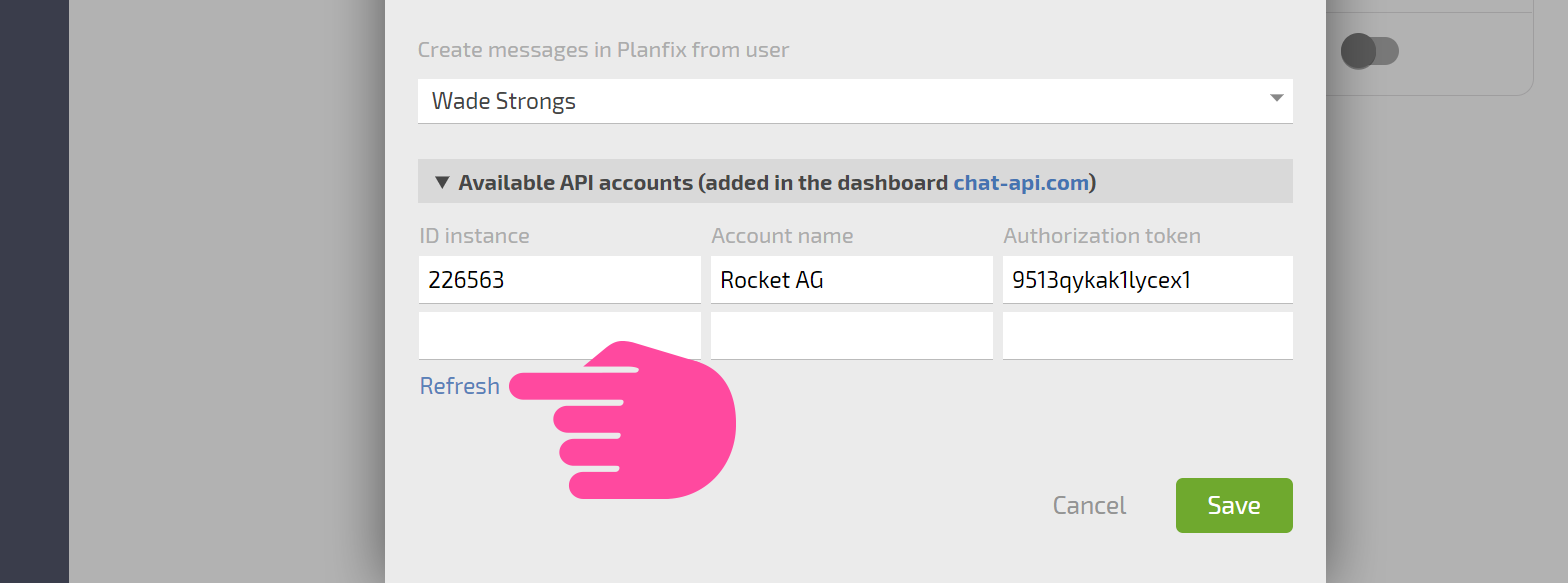
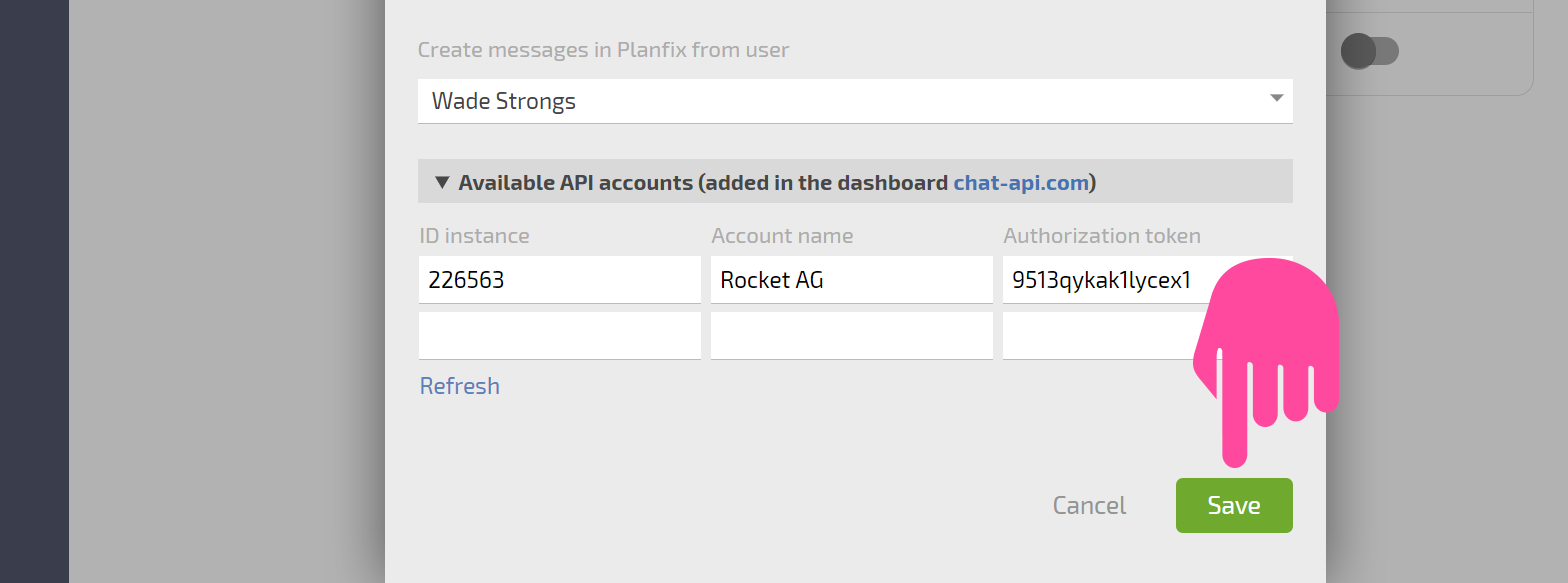
- Click the Refresh link to get a list of added WhatsApp accounts from your Chat API dashboard. You can give the accounts different names here:
Important
For the integration to work with each linked WhatsApp account, you must add the authorization token for each:
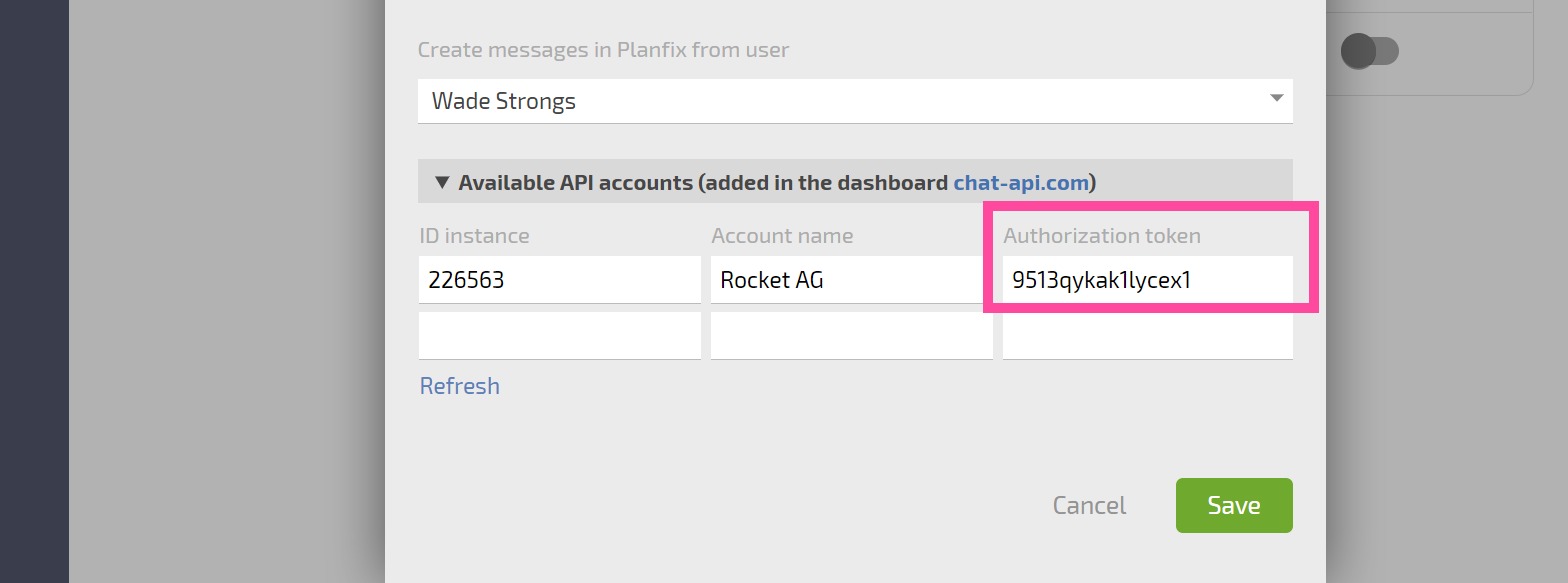
You can get your authorization token from your Chat API dashboard:
- Don't forget to save the integration settings by clicking the Save button.
After you save, all new messages from WhatsApp will be sent to Planfix, and a separate task will be created for each chat.
WhatsApp integration supports
- Sending and receiving files.
- Receiving location and contacts.