Schedule by day
This type of Planner list lets you manage a schedule for any objects. There's a list of objects on the left-hand side of the schedule, with a calendar grid on the right-hand side:

By selecting the desired date range to the right of a specific object, you can create a task that will be displayed as a "busy" block for the specified dates. When you do this, you can create a visual system for reserving tasks for each object, and at the same time build a workload calendar.
Configuring a schedule by day
This kind of planner list has several special options in its settings:
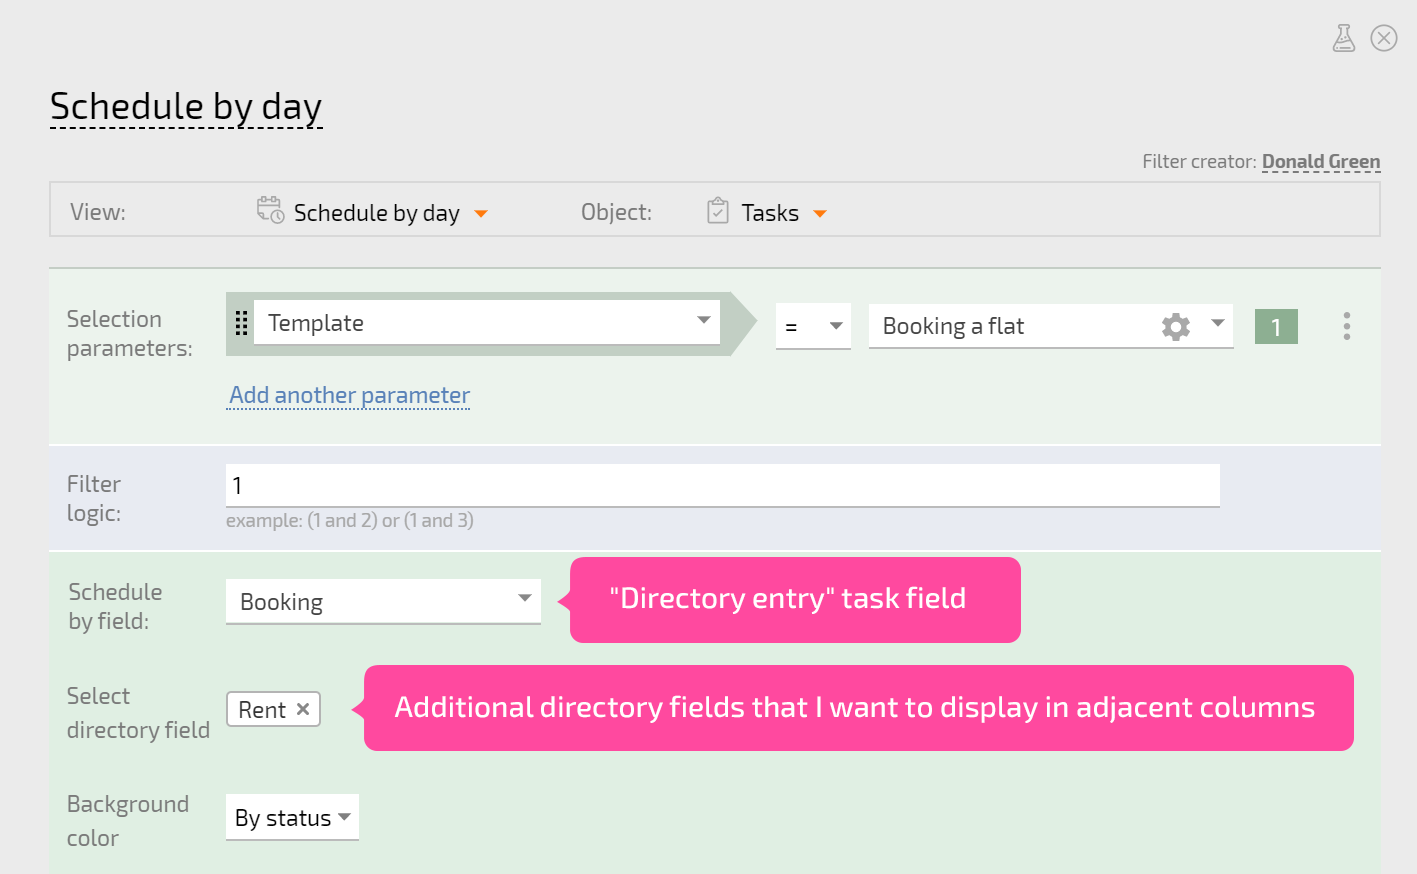
- Schedule by field - allows you to select the field in which objects for the schedule are stored. The following types of fields are supported:
When using fields that contain directory entries, you can specify additional directory fields to display in the schedule table:
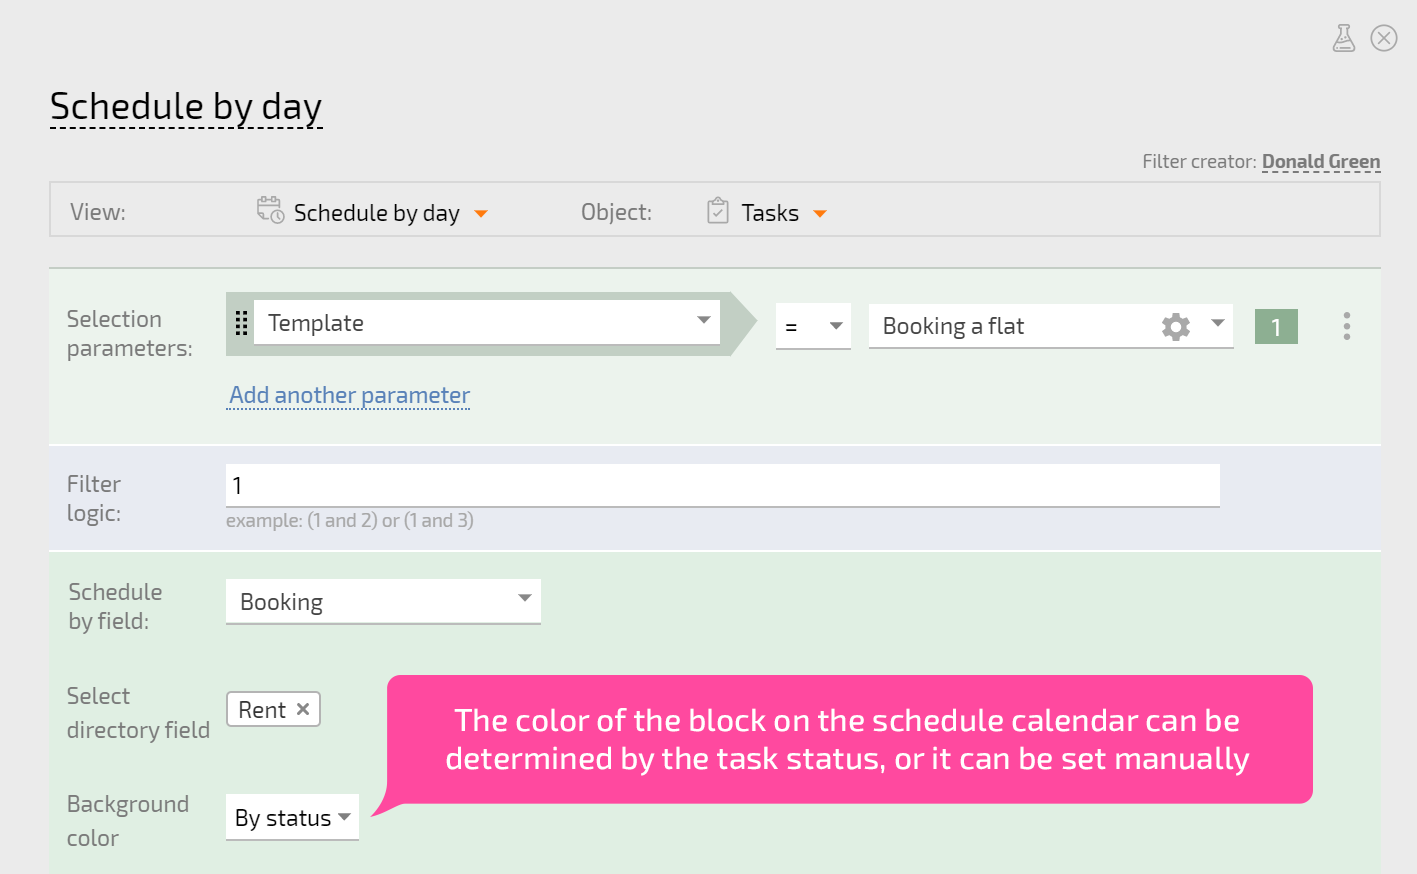
- Background color - lets you choose what will affect "busy" blocks (tasks) in the schedule. There are two options:
- Set by task status
- Set manually for each object (schedule row)
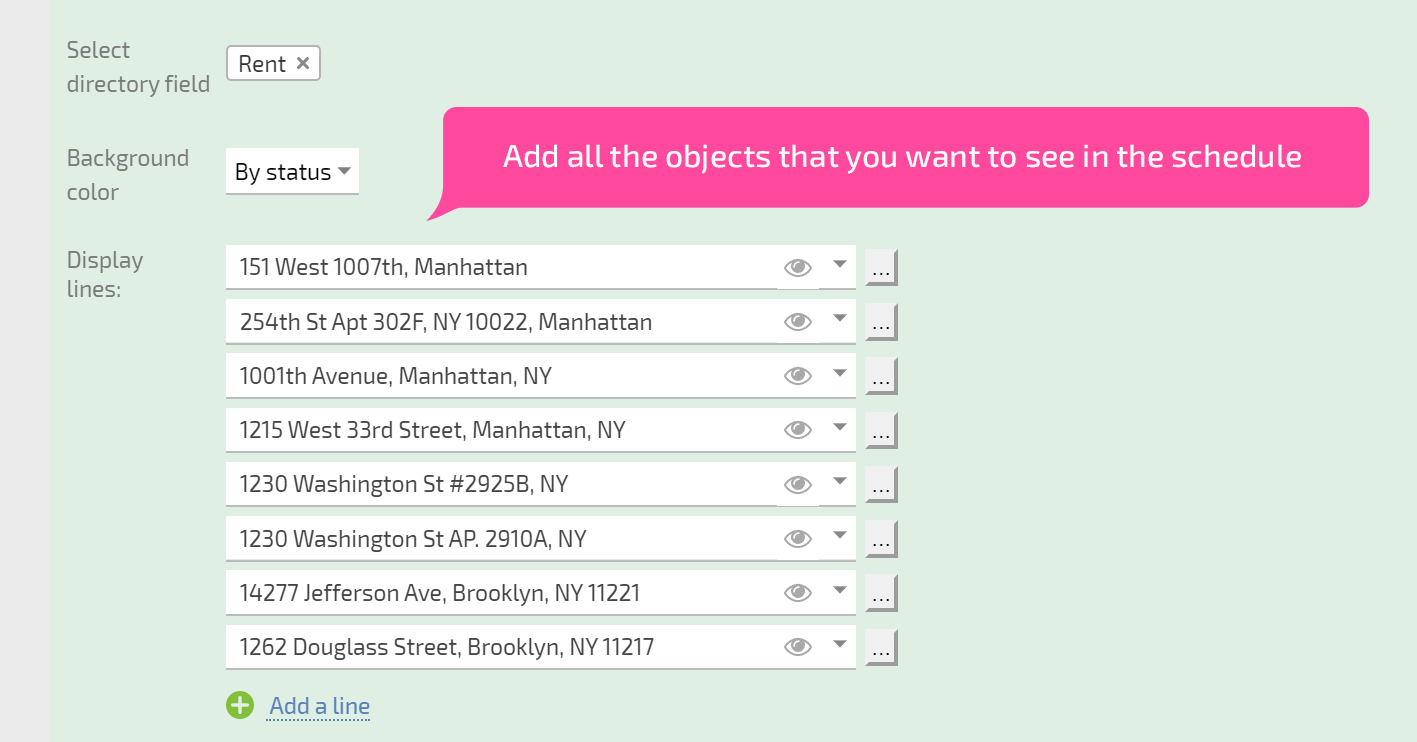
- Display rows - here, you need to add all the objects that will be displayed for the schedule:
- Start date and Due date - "Date" fields that determine the start and end of the "busy" block in the schedule:
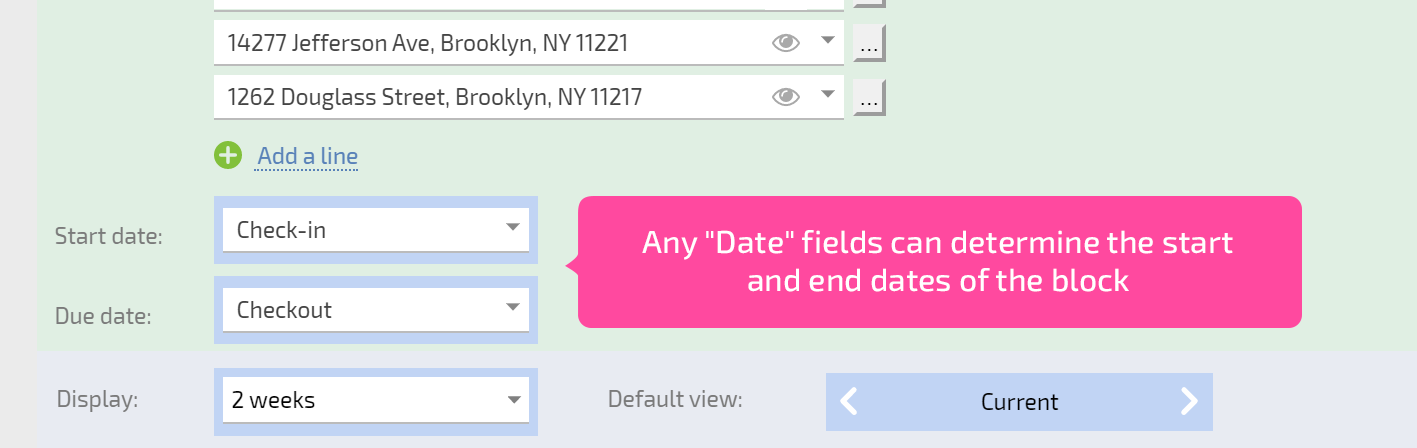
With "Schedule by day" lists, you can use any "Date" field; you're not limited to just the standard task start and end dates. This widens the scope of how these lists can be used.
Additional information
- Dragging objects to and from this kind of list is not currently supported.
- Within a schedule, blocks can be moved between different rows/objects.
- Only users with paid Planfix accounts can use Schedule by day Planner lists.