Adding a new status
From Planfix
There are two ways to add a new status:
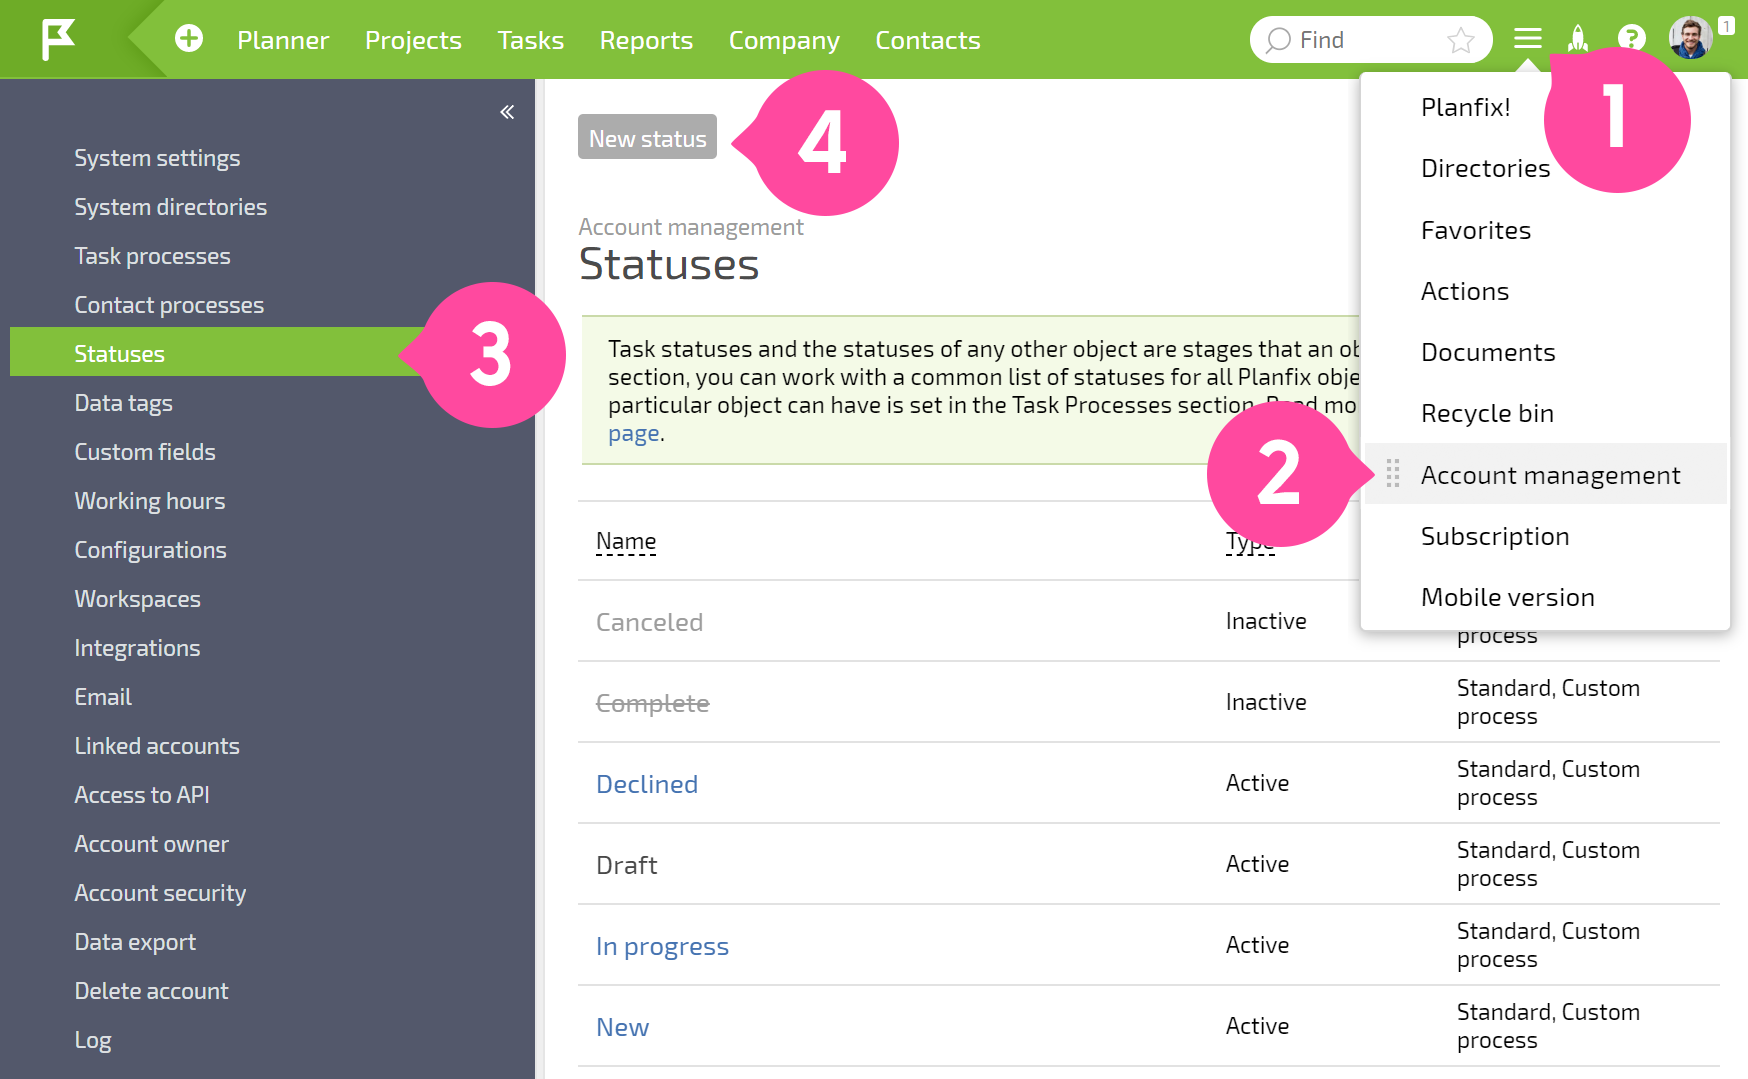
In the Statuses tab in the Account Management menu:
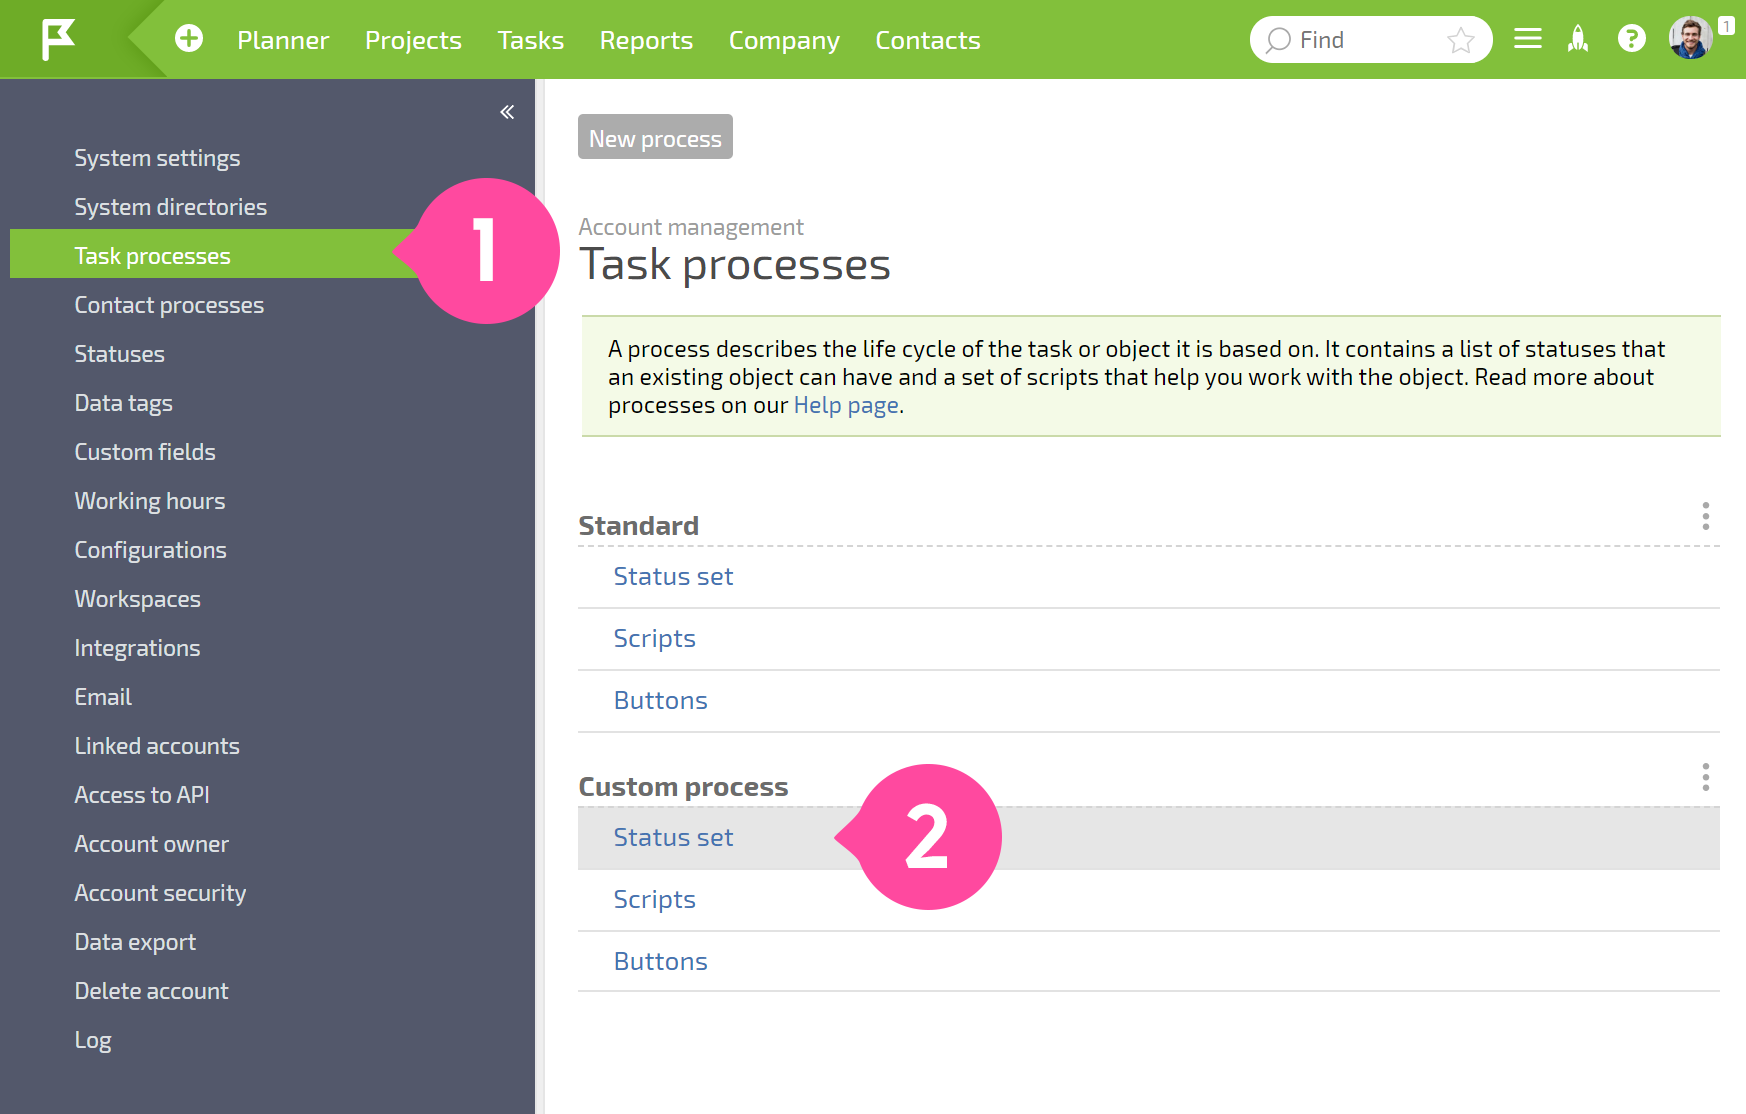
In the Task processes tab in the Account Management menu, selecting the desired status set:
When you use either of these two methods, the Interface for creating a status will open:
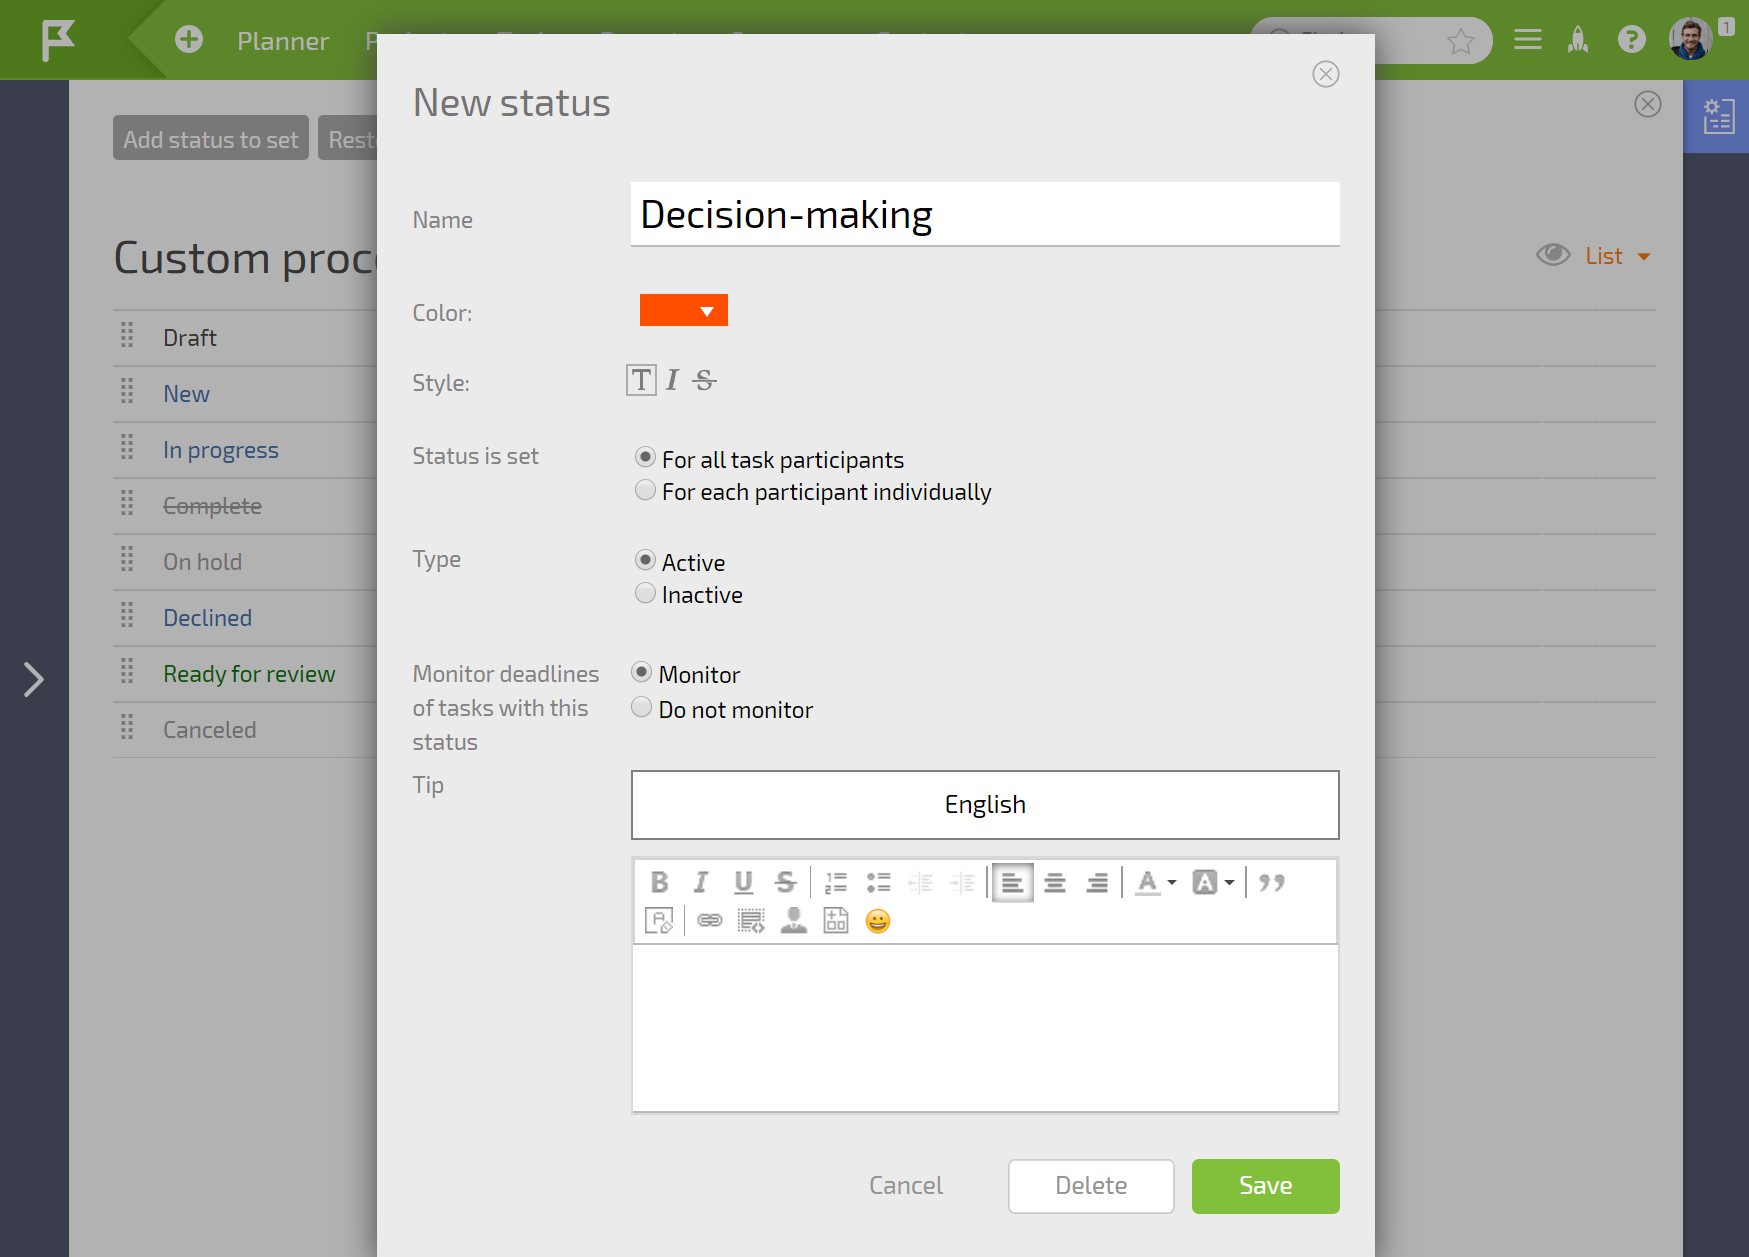
In this interface, you can
- Set the color that the status will be displayed in;
- Select the font style (regular or strikethrough);
- Select the status type (active or inactive) which will affect whether or not tasks with this status will be selected by filters;
- Set whether this status will be applied for all participants or individually for each assignee.
- Determine whether or not deadlines will be monitored for tasks with this status (whether or not a task will be considered overdue if it has this status after a certain date);
- Set a tip that describes the status and how to use it.
If you are having trouble choosing, it's best to leave the default value.
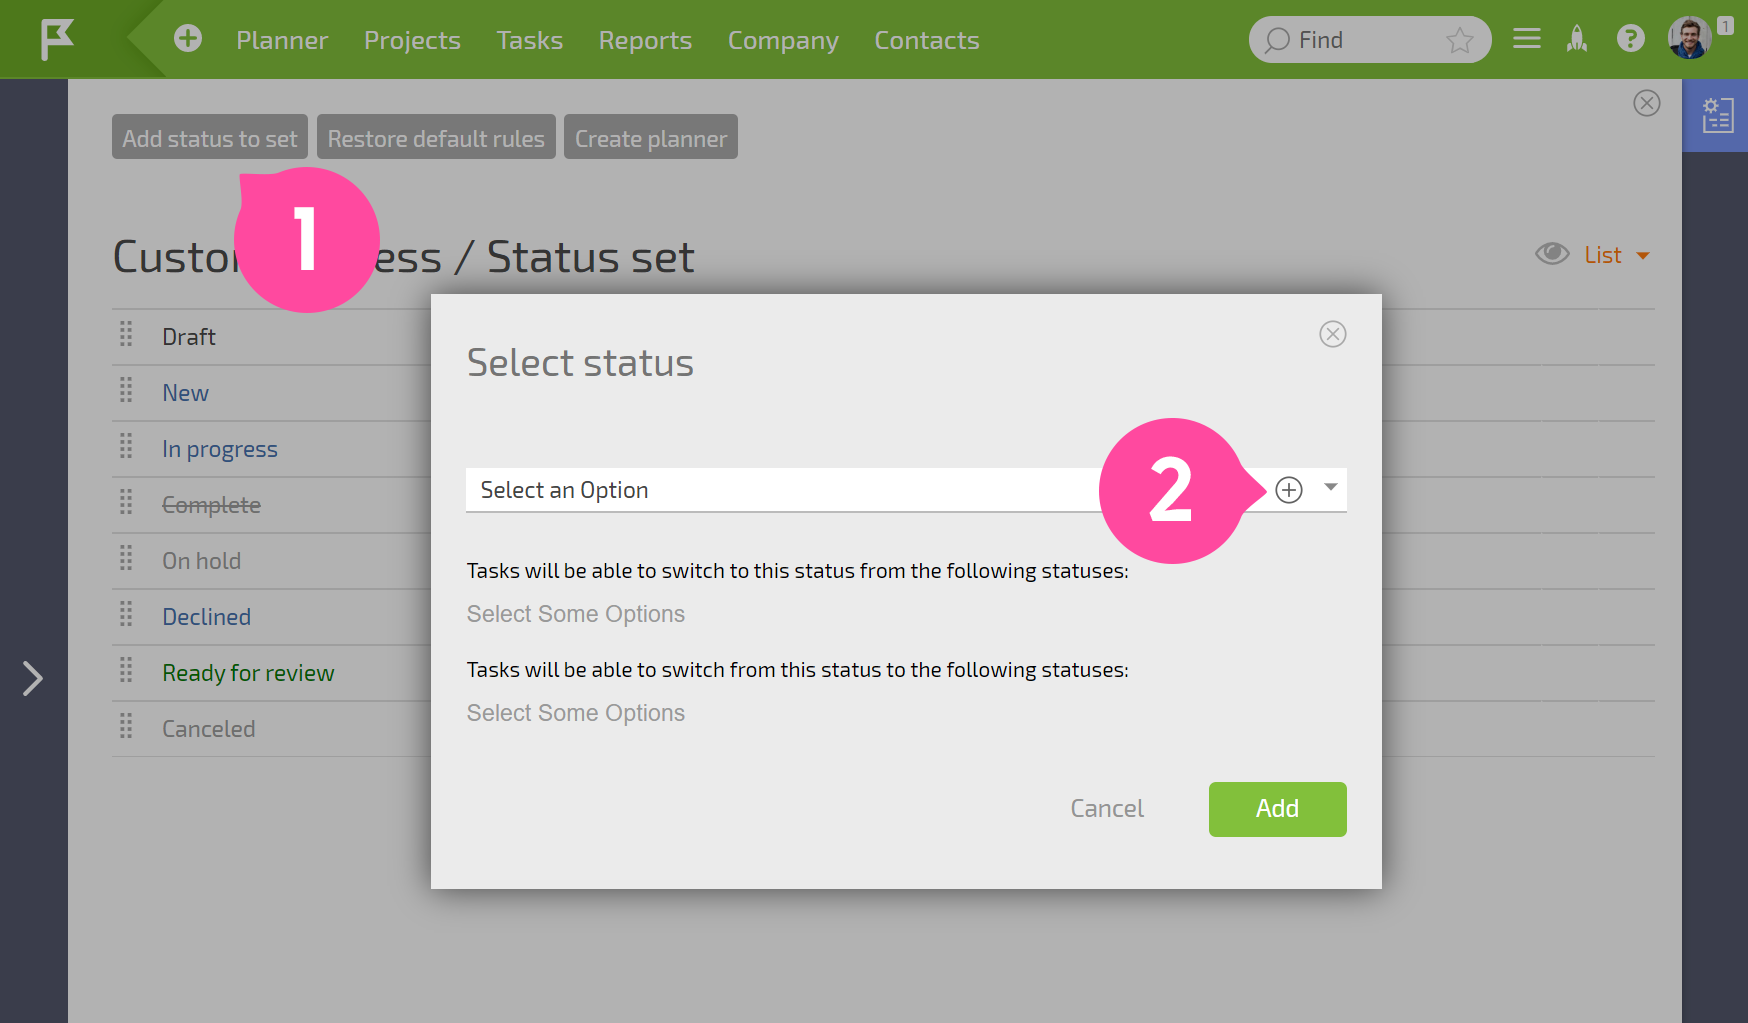
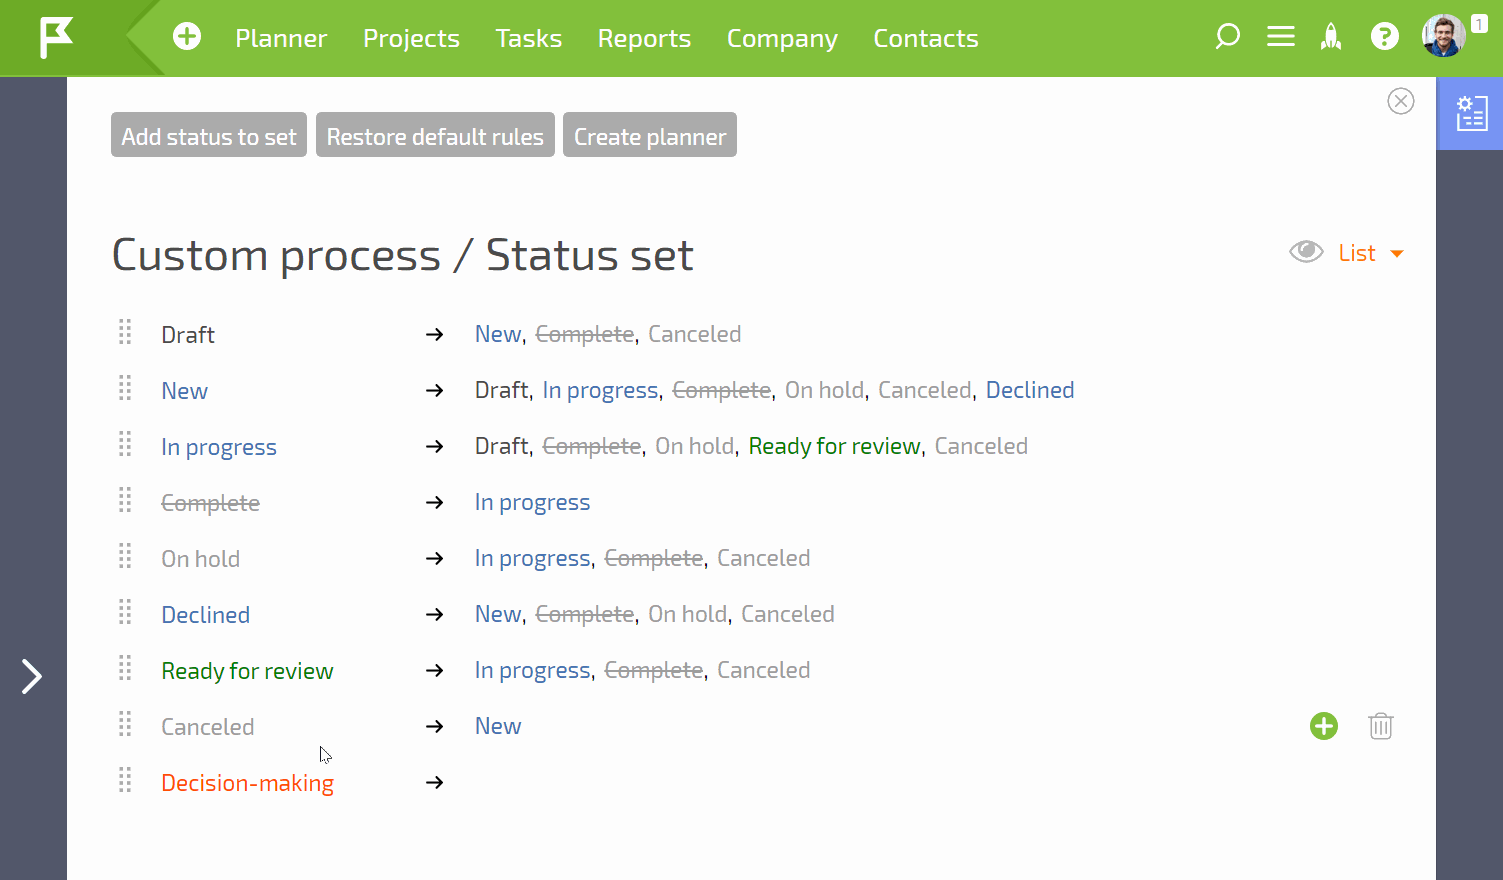
The order you establish for statuses will be used across all Planfix interfaces. To change a status's position in the list, click on it to drag and drop it in a new spot:
Once you have added all the statuses you need, you can move on to configuring the rules for transitioning between statuses.